211
POWERHEAD
POWERHEAD ASSEMBLY
10
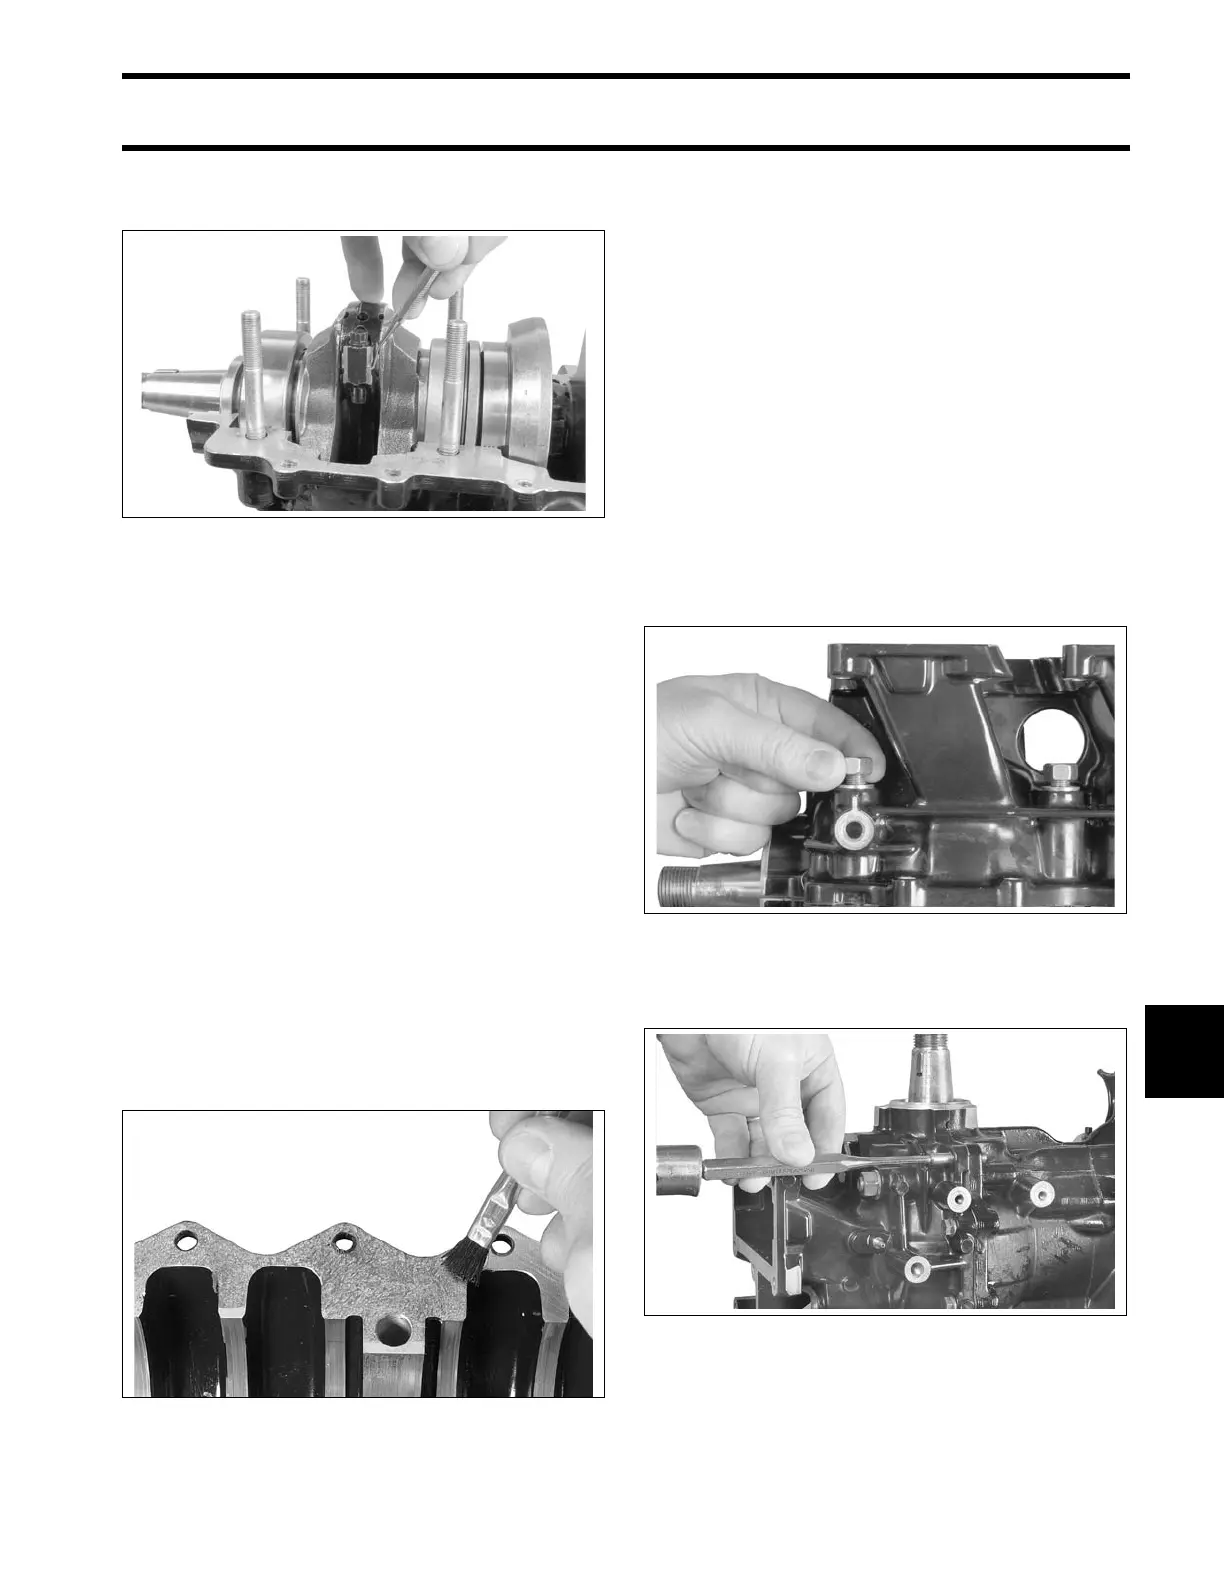
Test at least three corners of the rod and cap joint
with a pick. Joint must be smooth with no step.
Crankcase Assembly
Make sure crankshaft is still seated on dowel pins
before assembling crankcase.
Thoroughly clean an d deg rease the mating
flanges of the crankcase and cylinder block with a
non-petroleum based so lvent, such as iso propyl
alcohol or acetone, and let air dry.
IMPORTANT: DO NOT allow solvent to get on
internal componen ts. Clean on ly th e mating
flanges.
Apply Gasket Sealing Compound to lower oil seal
groove in crankcase. DO NOT put any sealer in
upper seal groove.
Use a small brush with a tapping motion to apply a
thin, even coat of Gel-Seal II sealant to the crank-
case mating fla nge. Th e sea ler must no t come
within 1/4 in. (6.4 mm) of bearings.
IMPORTANT: Gel-Seal II ha s a shelf life o f at
least one year when stored at room temperatu re.
Test the Gel-Seal II or replace it if the age of the
tube cannot be determined. Using old Gel-Seal II
could cause crankcase air leaks.
IMPORTANT: The use of Locquic Primer is NOT
recommended. If p rimer is used, crankcase
halves must be assemble d an d tig htened within
ten minutes after the Gel-Seal II has been applied.
Lower the crankcase into pla ce. Ma ke sure that
upper oil seal and lo wer seal housing are seated
in grooves.
Apply outb oard lu bricant to the main bearin g
studs. Inst all nut s and washe rs finger tight, no
more than 60 in. lbs. (7 N·m).
When the crankcase is se ated, inst all and firmly
seat the crankcase taper pin.
Tighten main bearing nut s in stages to a fina l
torque of:
• 26 to 30 ft. lbs. (35 to 41 N·m).
002117
TYPICAL 003874
002271
002260