337
GEARCASE SERVICE, 75 – 90 HP MODELS
DRIVESHAFT SHIMMING
12
DRIVESHAFT SHIMMING
If a new pinion gear is needed,
replace gear set before shimming.
Pinion gear backlash is achieved by using shims
between the drivesh aft bearing hou sing and the
thrust washer. When in stalling a new thrust bear-
ing o r washer , bearing housing, pinion, or drive-
shaft, it is n ecessary to p roperly sh im the
assembly to restore factory clearance.
Use Drive shaft Shimming T ool, P/N 50059 25
(replaces P/N 393185).
Shim gauge bars are precision made and shou ld
be handled carefully. The len gth of each bar is
stamped near the part number. This dimension is
0.020 in. (0.508 mm) shorter than the actu al
shimmed length of the driveshaft.
IMPORTANT: Clean pinion and driveshaf t
before assembly. Replace any damaged parts.
Assemble th e driveshaf t bearing ho using, thru st
washer, thrust bearing, and pinion onto the drive-
shaft. Use Driveshaft Seal Protector, P/N 318674,
when installing or removing the bearing housing.
Lightly coat the threads of the pinion nut with out-
board lubrican t and tigh ten to a torque of 100 to
110 ft. lbs. (136 to 149 N·m).
IMPORTANT: The origina l pinion nut may be
used for shimming, but must NOT be used in final
assembly.
Select correct collar and shim gauge bar:
• Collar: P/N 341440
• Shim gauge bar: P/N 328367
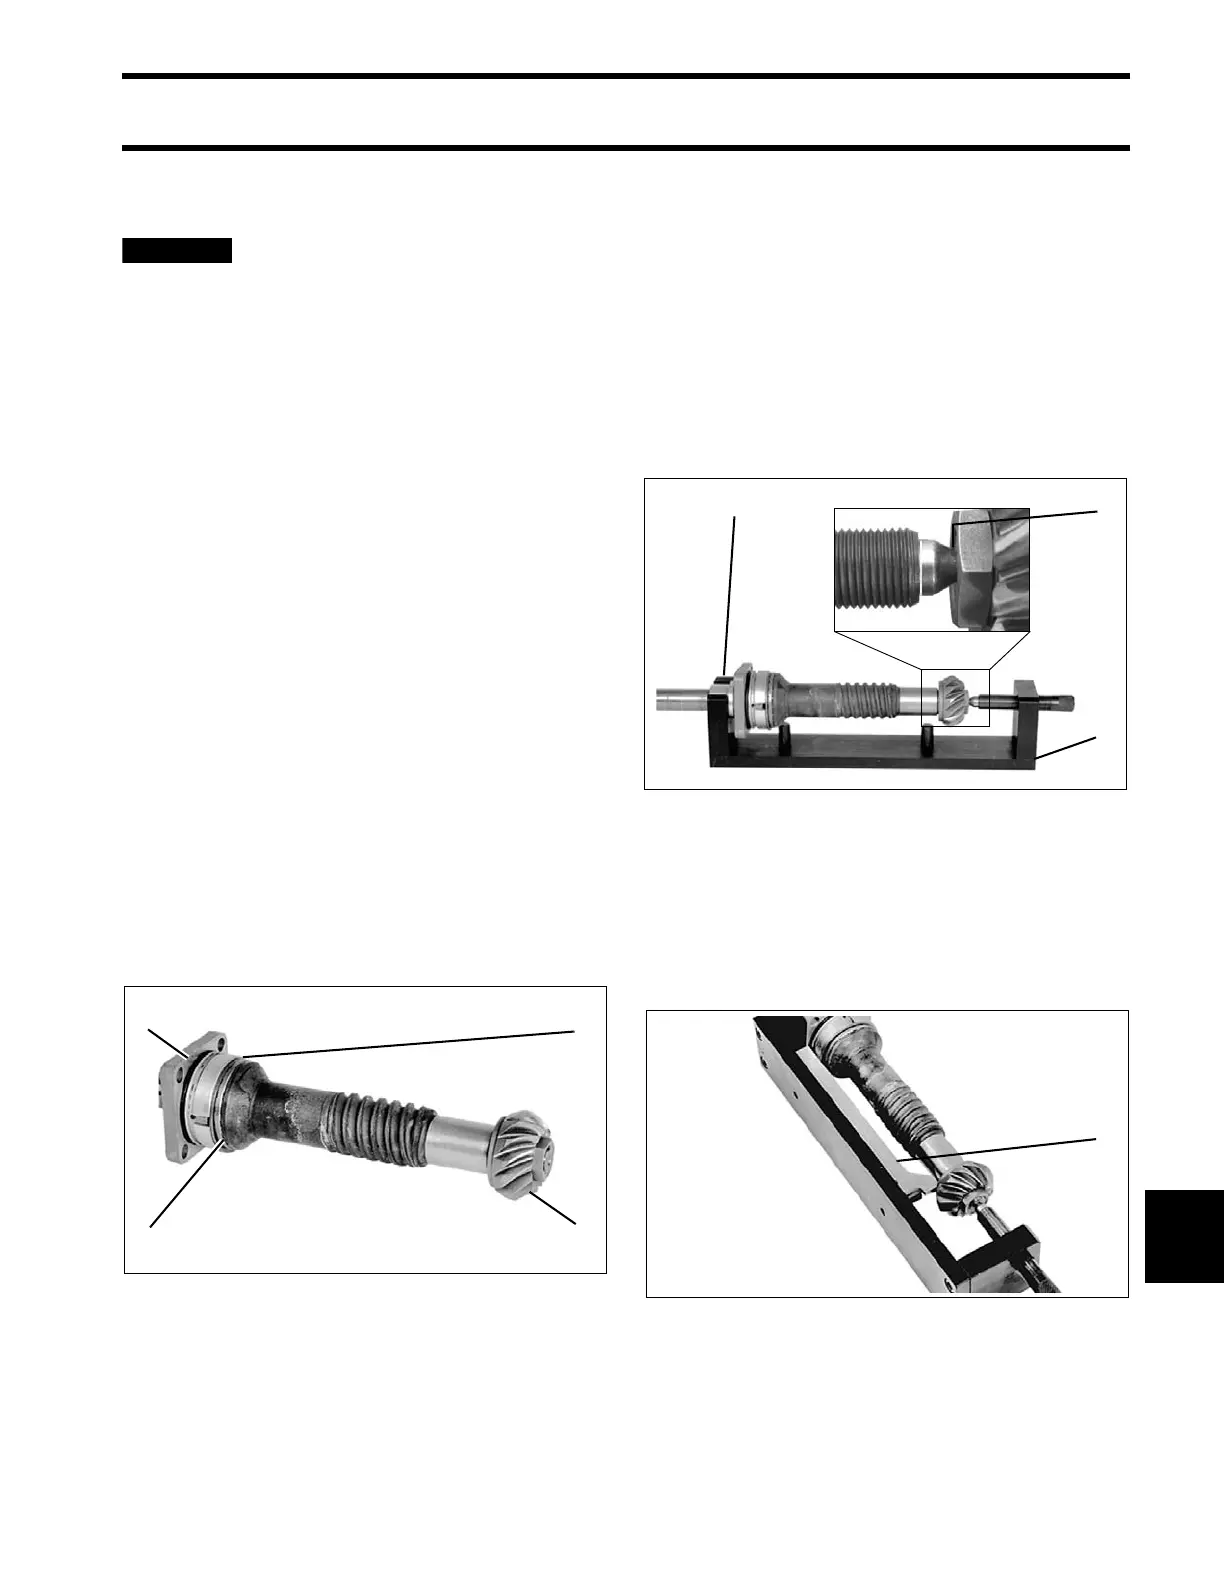
Slide the collar o nto the driveshaft with large en d
in contact with the bearing housing.
Insert the assembled driveshaft into the tool base
and tighten pre load screw against the driveshaft
until groove on the spr ing-loaded plunger is flush
with end of threads. Tighten locking ring on pre-
load screw.
Rotate the driveshaf t several revolutions to se at
bearings.
Lay the tool base on its side . Position the shim
gauge bar against guide pins of the tool base.
Check squareness of the be aring housing mount-
ing surface by holding the shim gauge bar against
the pinion while rot ating just the bearing hous-
ing. Use a fe eler g auge to me asure cle arance
1. Driveshaft bearing housing
2. Thrust washer
3. Thrust bearing
4. Pinion
COA3565
1. Collar
2. Tool base
3. Groove
COA3566
DSC00326
1. Shim gauge bar COA3567