203
POWERHEAD
POWERHEAD ASSEMBLY
10
POWERHEAD
ASSEMBLY
IMPORTANT: Proceed slowly . Make no forced
assemblies unless a pressin g opera tion is called
for. All interna l components must be perfectly
clean and lightly coated with outboard lubricant.
IMPORTANT: Use new wrist pin retaining rings,
gaskets, seals, and O-rings during assembly.
Crankshaft Assembly
Oil the end of the cra nkshaft. Use Crankshaf t
Bearing/Sleeve Installer, P/N 338647, and place a
new lower main bearing onto crankshaft with let-
tered side facing th e tool. Inst all bearing un til it
seats on the crankshaft.
Oil the end of the cra nkshaft. Use Crankshaf t
Bearing/Sleeve Inst aller, P/N 338647, to drive a
new sleeve o nto the crankshaft until the installer
contacts the lower main bearing.
If the inst aller sticks on the sleeve af ter installa-
tion, thread Slide Hamme r, P/N 391008, in to
installer and pull it off.
IMPORTANT: Inspect sleeve af ter inst allation.
Sleeve must not be used if surface is damaged.
Use retaining ring pliers to install bearing retaining
ring with sharp edge facing away from bearing.
Lubricate a new driveshaft O-ring and lightly lubri-
cate crankshaf t splines with Moly Lube. Inst all
O-ring in sleeve.
Lubricate the center main bea rings and split
sleeves with outboard lubricant and install them in
their original positio ns. The split sleeve ring
grooves must face toward driveshaf t (lower) en d
of crankshaft when installed.
Lightly coat the outside edge of a new lower hous-
ing se al with Gasket Sealing Compound. Press
against outer case of the seal to install seal in the
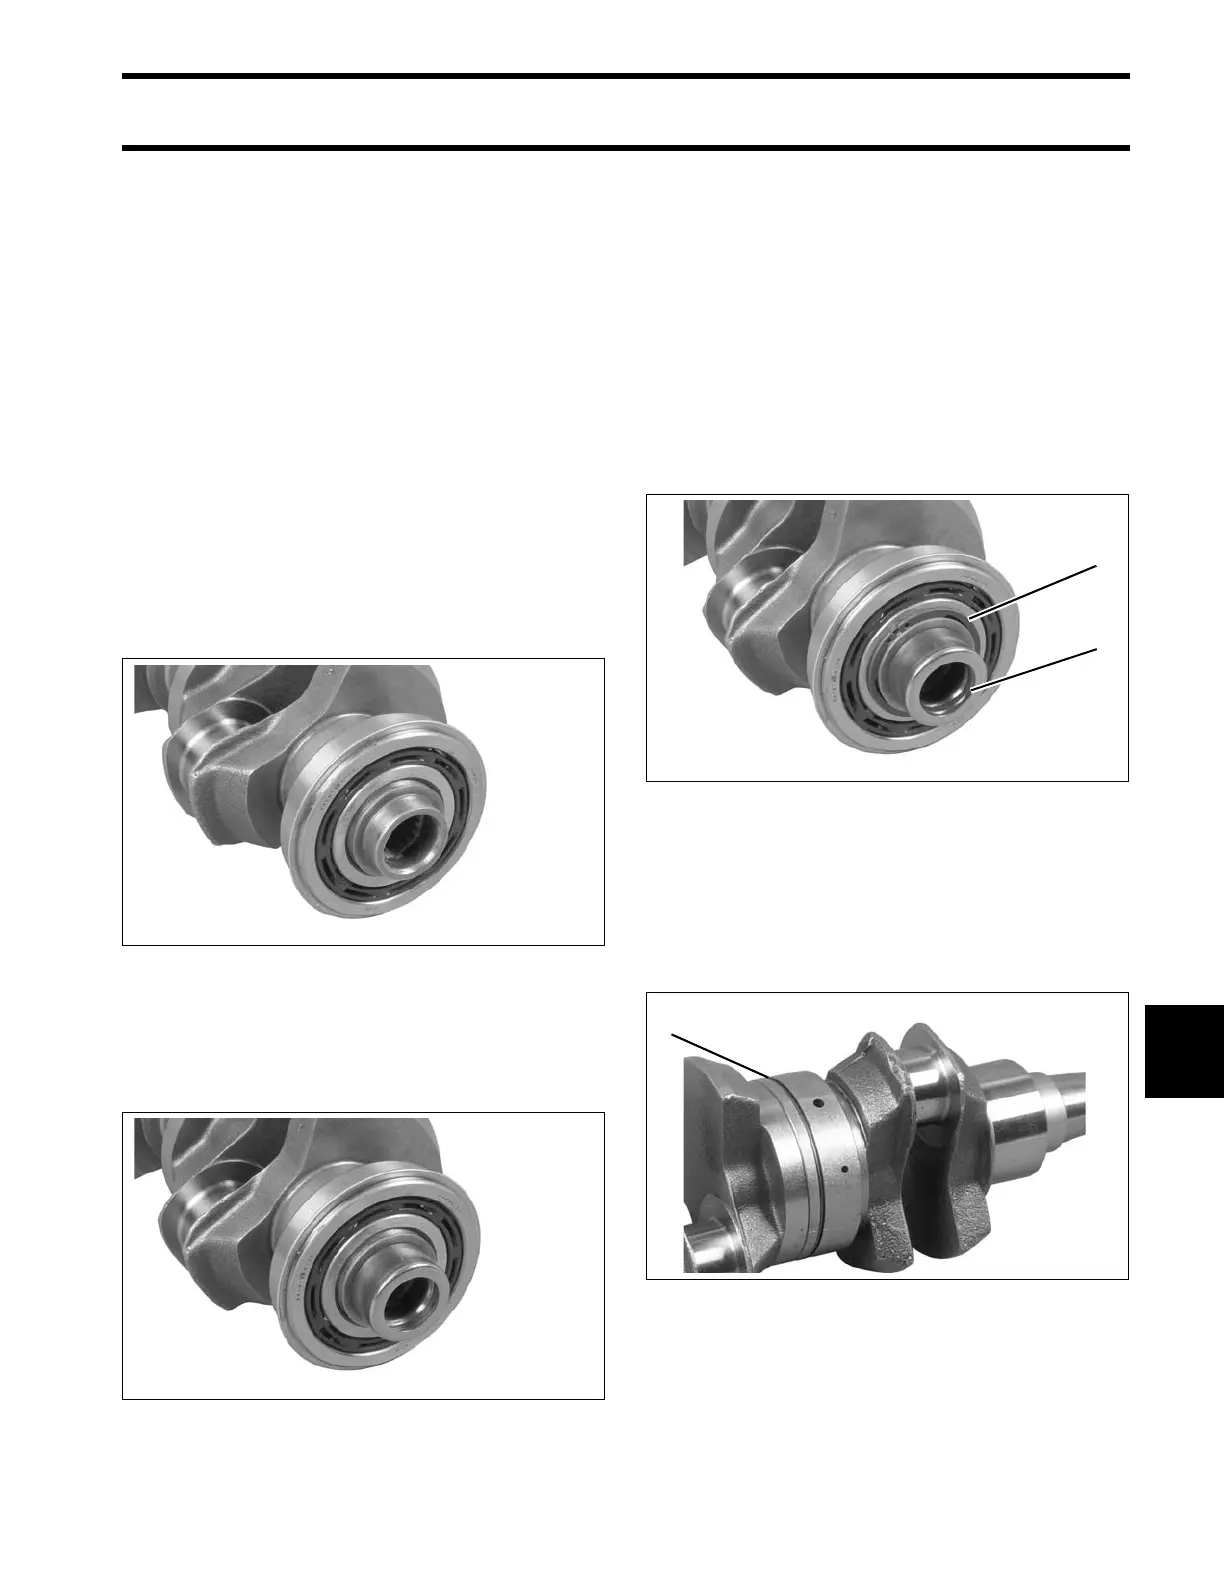
002029
002030
1. Bearing retaining ring
2. O-ring
002031
1. Groove toward driveshaft end 002032