GE MEDICAL SYSTEMS PROPRIETARY TO GE
D
IRECTION 2294854-100, REVISION 3 LOGIQ™ 9 PROPRIETARY MANUAL
Chapter 8 Replacement Procedures 8-179
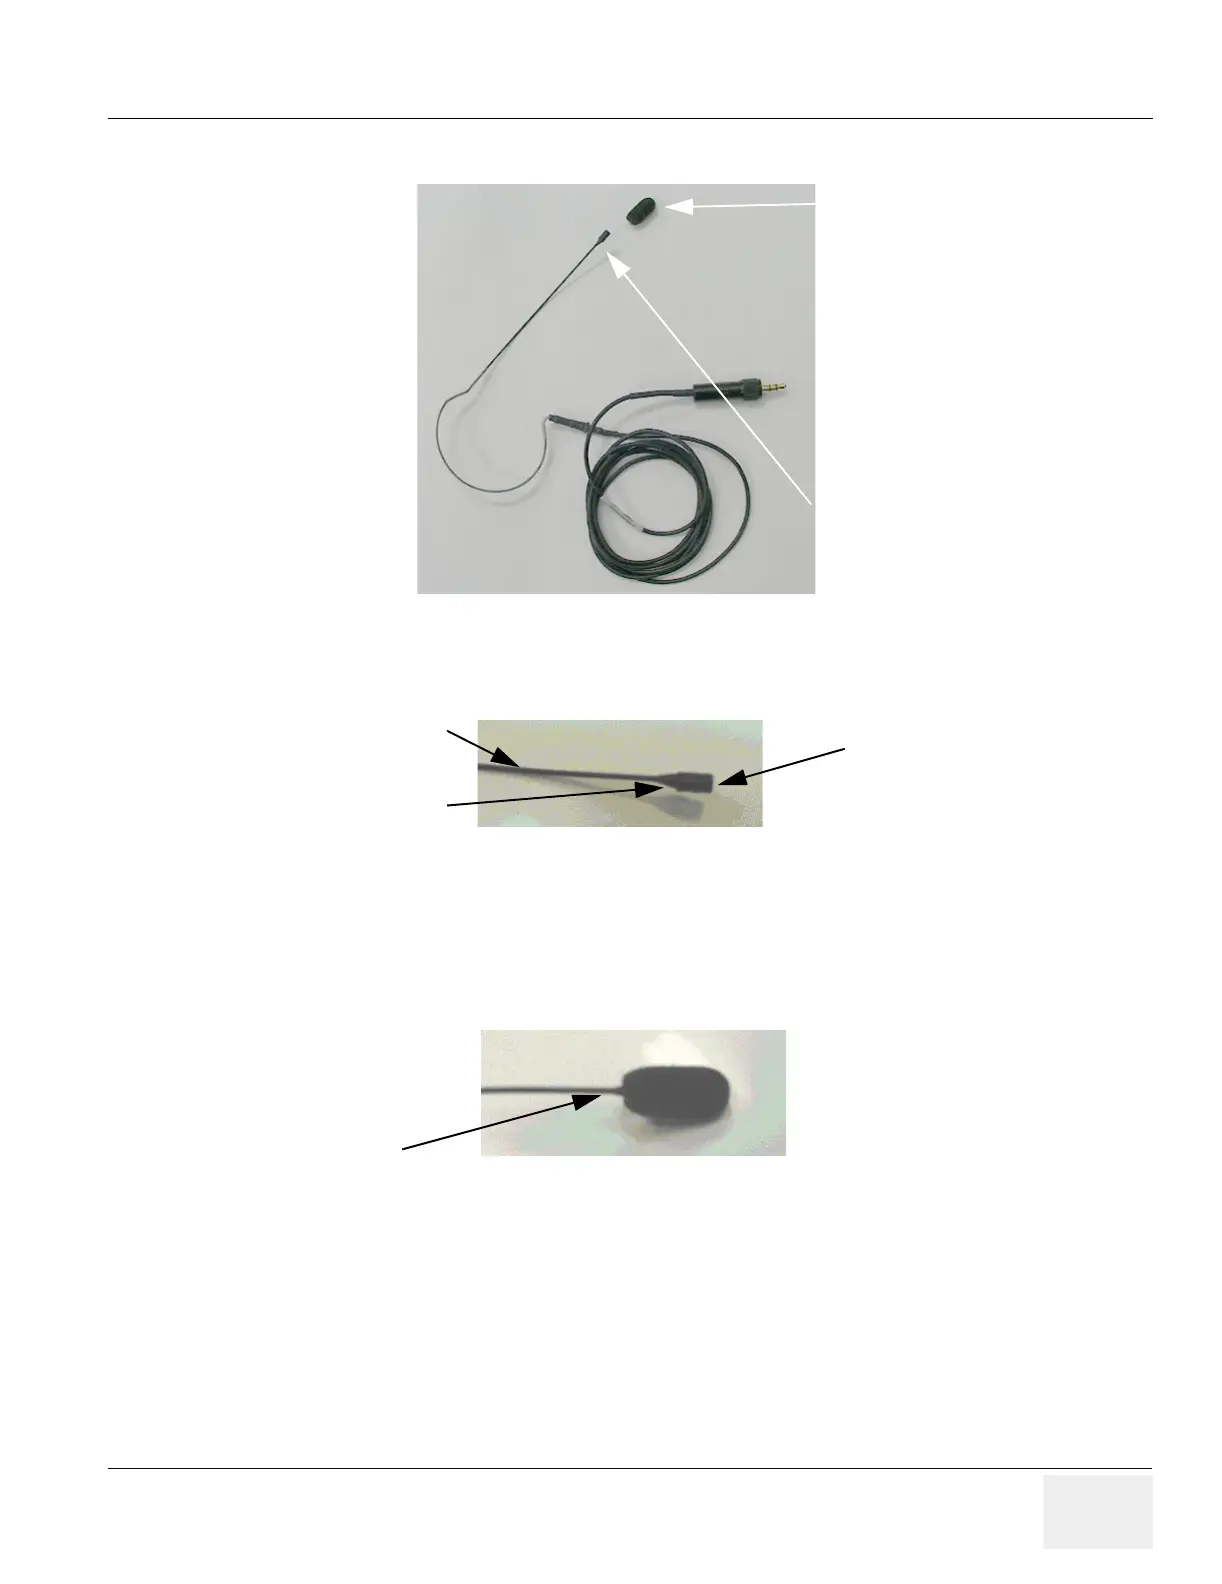
3.) With the windscreen off, note the taper from the microphone wire to the microphone element.
4.) When putting on the wind screen, slightly twirl the foam in your fingers while threading it onto the
microphone element. Once the element has entered the foam, you must push further to fit the
plastic cap that is inside the foam onto the microphone element. This takes a little force and rocking
motion.
5.) When fitted correctly, the taper should be totally covered by the windscreen. If you see the taper
as in the above picture, the cap inside the foam is not pushed on all the way and the wind screen
will easily fall off during use.
Figure 8-188 Microphone with Wind Screen
Figure 8-189 Tarnsmitter Microphone
Figure 8-190 Improper Wind Screen Placement
Microphone
Wind Screen
(May already be installed)
Microphone Element
Wire
Taper
Taper still visible – windscreen
not fully installed!!