○○○○○○○○○○○○○○○○○○○○○○
5•6 Reference Guide
○○○○○○○○○○○○○○○○○○○○○○
5•6 Reference Guide
RECORDING
Recording a User Style is easy.
1. Press on of the USER Style buttons and se-
lect a free location (User) to create a new
Style.
2. You are prompted to create a new style.
3. Press OK, (F1).
The Style «Record View» page activates with
a superimposed «Select Riff» dialog window:
4. Select the Variation, (VAR. 1, VAR. 2, VAR.
3, VAR. 4), section, (BASIC, FILL, INTRO,
ENDING) and chord, (MAJOR, MINOR, 7TH)
with the cursor buttons and press ENTER to
confirm.
The LED on the RECORD button lights up
and the «Record View» page is shown in
negative highlight.
5. Select the track, usually the Drum track first,
that you want to record.
Press the corresponding Soft button to place
the track in Record mode (Record icon show-
ing). Only tracks showing the Record icon
will capture events during the recording.
6. Press START/STOP to start the recording.
A one-measure countdown will start (shown
on the measure counter in the top right hand
corner of the display) and a metronome tic
will help you with your timing.
If you don’t want the metronome, turn if off
with the soft button F8.
7. Start playing after the lead-in.
The recording proceeds in a cyclic manner:
once the end of the riff is reached, the re-
cording starts again from the beginning. The
number of bars recorded will depend on the
setting in the initial RecView display, in the
Measures parameter (in this case 2).
8. When you have finished recording the first
track, stop the recording with START/STOP.
The Track will still be in record mode, allow-
ing you to add new events by starting again
with Start/Stop. The default setting of the
Record mode will be Overdubb. Other record
mode settings can be selected (explained
afterwards). Stop the recording of additional
note with Start/Stop.
○○○○○○○○○○○○○○○○○○○○○○
Sample Translator 2•55
○○○○○○○○○○○○○○○○○○○○○○
Sample Translator 2•55
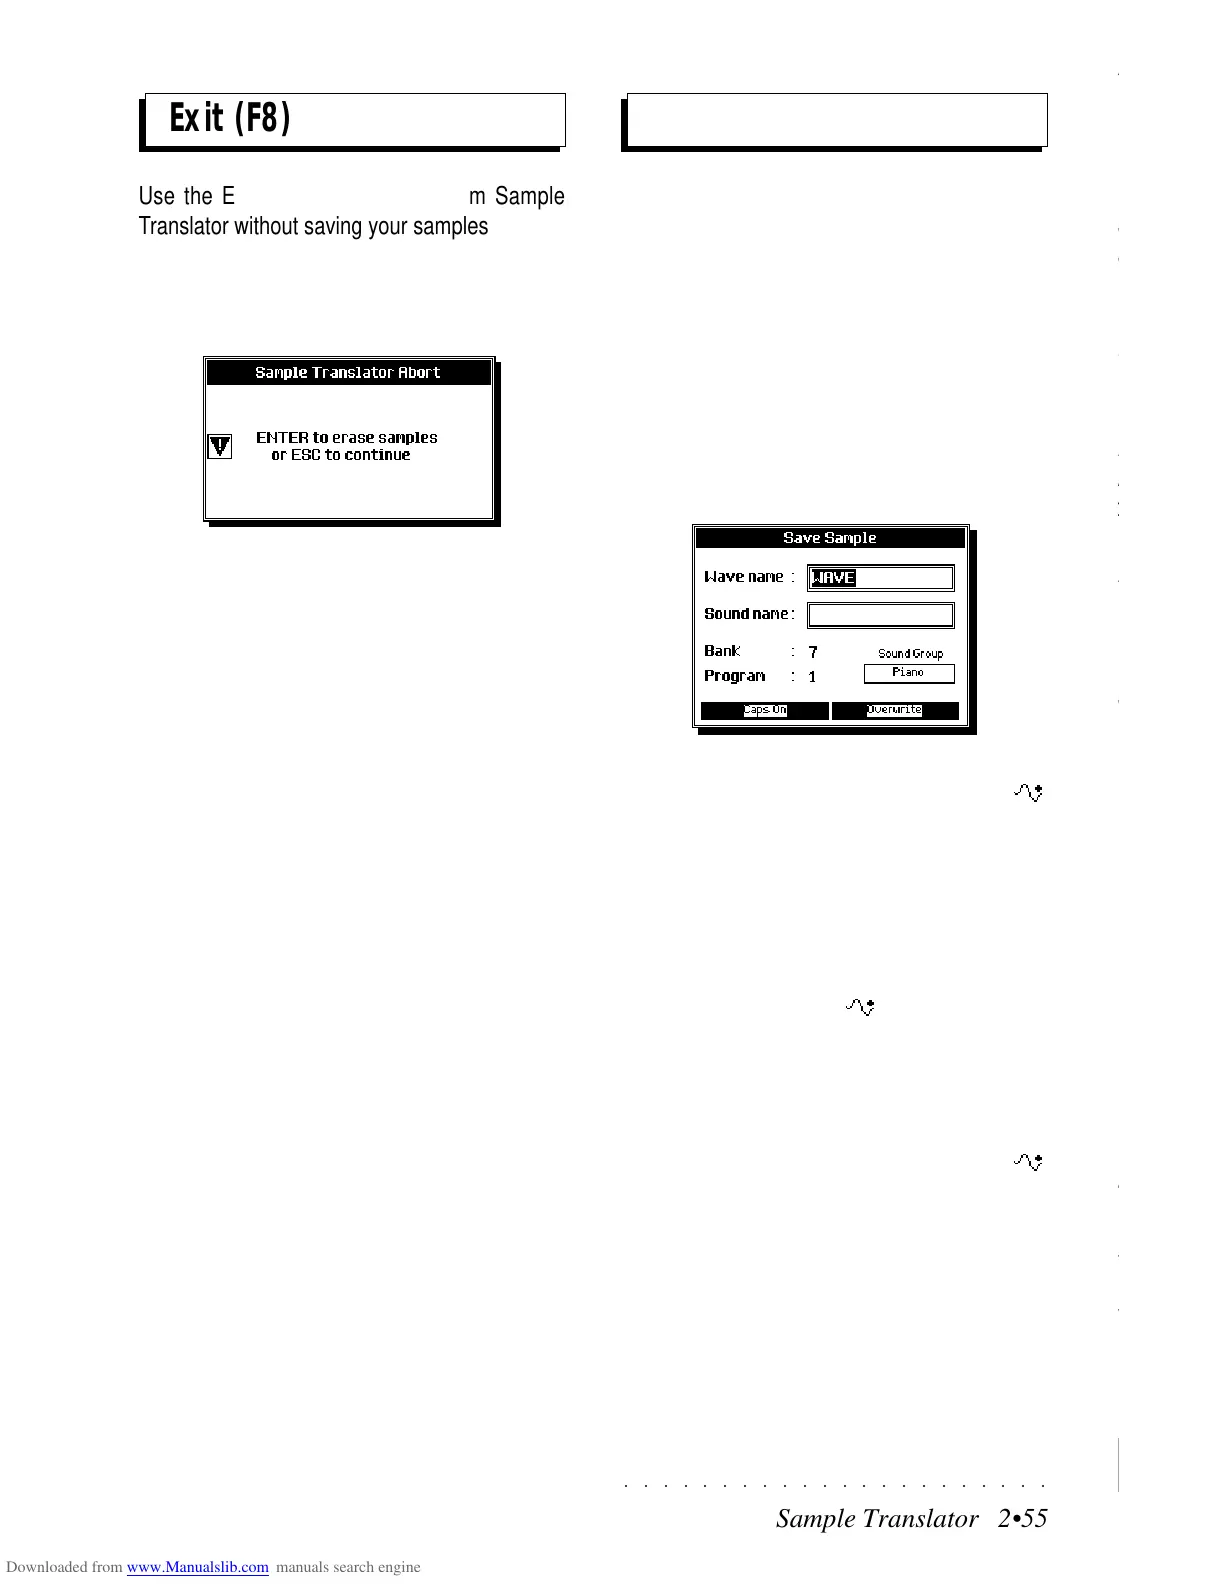
Exit (F8)
Use the EXIT option to escape from Sample
Translator without saving your samples.
Pressing EXIT activates a prompt to confirm the
abort process with ENTER and cancel all sam-
ples.
Pressing ENTER cancels all samples and returns
to the Sound Edit environment.
Press ESCAPE to cancel the display and retain
the samples. Save the samples with SAVE to
escape the Sample Translator.
Storing Samples
SAVE (F2)
The SAVE operation is used to save assigned
Samples to the SK760/880SE Wave Library. A
Waveform can contain one or more assigned
samples, provided that each is assigned to a spe-
cific keyboard range.
Once your samples have been assigned, press
the SAVE button, (F2), to Save the Waveform to
the SK760/880SE Wave Library.
The Save Sample dialog window is shown:
Here you can write a name for the waveform
(Wave name) and a name for the new RAM -
Sound (Sound name) based on the Waveform.
The name given to the Waveform is automati-
cally assigned to the sound once you select the
Sound Name entry zone. You are free, however,
to write a different name for the Sound.
Also shown is the first available empty location
in RAM for the new RAM -Sound, defined by
the Bank and Program numbers.
Whatever Bank and Program number you select
with the Dial, it will always correspond to an empty
location in RAM. SK760/880SE does not allow
you to overwrite existing Ram-Sounds or RAM -
Sounds.
If you attempt to save the Waveform with a name
that already exists, an message appears saying
that the Wave Name already exists.
Press Enter or Escape to cancel the message
and return to the Save Sample window and write
a different name for the Wave.
Confirm with ENTER to save the Waveform to
Exit (F8)
Use the EXIT option to escape from Sample
Translator without saving your samples.
Pressing EXIT activates a prompt to confirm the
abort process with ENTER and cancel all sam-
ples.
Pressing ENTER cancels all samples and returns
to the Sound Edit environment.
Press ESCAPE to cancel the display and retain
the samples. Save the samples with SAVE to
escape the Sample Translator.
Storing Samples
SAVE (F2)
The SAVE operation is used to save assigned
Samples to the SK760/880SE Wave Library. A
Waveform can contain one or more assigned
samples, provided that each is assigned to a spe-
cific keyboard range.
Once your samples have been assigned, press
the SAVE button, (F2), to Save the Waveform to
the SK760/880SE Wave Library.
The Save Sample dialog window is shown:
Here you can write a name for the waveform
(Wave name) and a name for the new R
AM -
Sound (Sound name) based on the Waveform.
The name given to the Waveform is automati-
cally assigned to the sound once you select the
Sound Name entry zone. You are free, however,
to write a different name for the Sound.
Also shown is the first available empty location
in RAM for the new R
AM -Sound, defined by
the Bank and Program numbers.
Whatever Bank and Program number you select
with the Dial, it will always correspond to an empty
location in RAM. SK760/880SE does not allow
you to overwrite existing Ram-Sounds or R
AM -
Sounds.
If you attempt to save the Waveform with a name
that already exists, an message appears saying
that the Wave Name already exists.
Press Enter or Escape to cancel the message
and return to the Save Sample window and write
a different name for the Wave.
Confirm with ENTER to save the Waveform to