○○○○○○○○○○○○○○○○○○○○○○
2•40 Reference Guide
○○○○○○○○○○○○○○○○○○○○○○
2•40 Reference Guide
Storing Sounds
Whenever you edit a sound you will, at some
point, decide that you either want to save your
new sound or simply forget it and return to using
the instrument as before. A modified Sound that
has not been stored to memory shows a small
mark at the top left hand corner before the name.
To cancel an edit, simply press the EXIT button
and confirm with ENTER to return the main Edit
menu This will cancel your edit and return the
sound to its starting status.
If you decide you want to store your sound into
the instrument’s memory, the next step will be to
press the SAVE button (F8).
Any sound that you create yourself can be stored
in Sound Group families, (or “Banks”). During
the storing process, you will first be asked to se-
lect a destination for your new sound and then
given the opportunity to name it.
1. Press the soft button F8 to select “Save” from
the main Edit Sound menu.
The «Bank Prog. Change» window opens
where you can select the destination of the
new Sound in the SK760/880SE Sound li-
brary.
The SK760/880SE Sounds are stored in the
order of Bank Select and Program Change
numbers. You can choose to store the mod-
ified sound with its original name, or with a
new name.
RAM-Sounds based on ROM-Wavesamples
are saved with an asterisk (*) attached after
the name to identify the Sound from the orig-
inal. New sounds based on new Wavesam-
ples loaded from disk or created with the
Sample Translator are called RAM-
Sounds, identified by the small graphical
representation of a wave ( ).
2. Use the directional arrows to select the “Bank”
and “Prog. Change” entry zones and rotate
the Dial to select the numbers correspond-
ing to an empty location (shown as “No
Sound”).
3. To change the Sound’s name, press the Soft
button F7/F8 .
Use the standard name entry procedure (see
“Alphanumeric Entry” on page 1.4 of the
Quick Guide).
Press ENTER to confirm the new name.
4. Press ENTER again to memorize the Sound
to the selected location.
Storing Sounds
Whenever you edit a sound you will, at some
point, decide that you either want to save your
new sound or simply forget it and return to using
the instrument as before. A modified Sound that
has not been stored to memory shows a small
mark at the top left hand corner before the name.
To cancel an edit, simply press the EXIT button
and confirm with ENTER to return the main Edit
menu This will cancel your edit and return the
sound to its starting status.
If you decide you want to store your sound into
the instrument’s memory, the next step will be to
press the SAVE button (F8).
Any sound that you create yourself can be stored
in Sound Group families, (or “Banks”). During
the storing process, you will first be asked to se-
lect a destination for your new sound and then
given the opportunity to name it.
1. Press the soft button F8 to select “Save” from
the main Edit Sound menu.
The «Bank Prog. Change» window opens
where you can select the destination of the
new Sound in the SK760/880SE Sound li-
brary.
The SK760/880SE Sounds are stored in the
order of Bank Select and Program Change
numbers. You can choose to store the mod-
ified sound with its original name, or with a
new name.
RAM-Sounds based on ROM-Wavesamples
are saved with an asterisk (*) attached after
the name to identify the Sound from the orig-
inal. New sounds based on new Wavesam-
ples loaded from disk or created with the
Sample Translator are called RAM-
Sounds, identified by the small graphical
representation of a wave (
).
2. Use the directional arrows to select the “Bank”
and “Prog. Change” entry zones and rotate
the Dial to select the numbers correspond-
ing to an empty location (shown as “No
Sound”).
3. To change the Sound’s name, press the Soft
button F7/F8 .
Use the standard name entry procedure (see
“Alphanumeric Entry” on page 1.4 of the
Quick Guide).
Press ENTER to confirm the new name.
4. Press ENTER again to memorize the Sound
to the selected location.
○○○○○○○○○○○○○○○○○○○○○○
Edit Style 5•21
○○○○○○○○○○○○○○○○○○○○○○
Edit Style 5•21
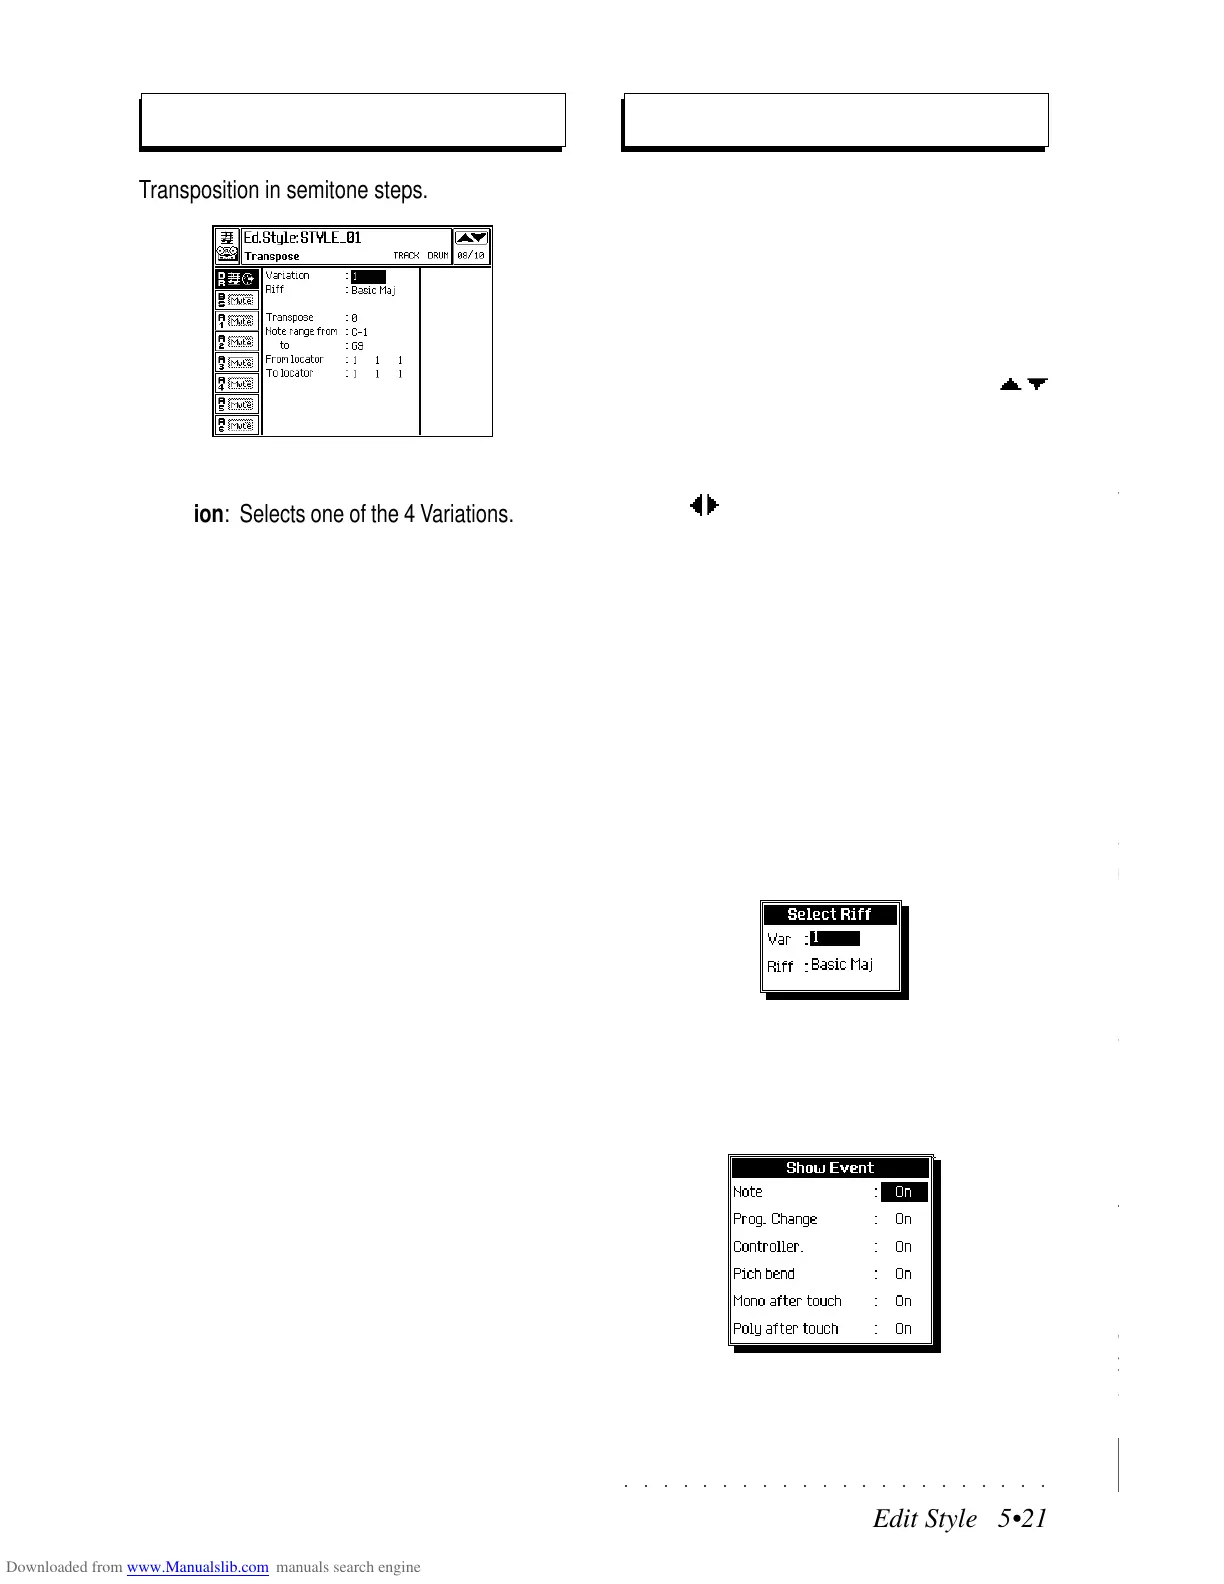
Transposition in semitone steps.
PARAMETERS:
Variation: Selects one of the 4 Variations. Only
existing Variations can be selected (those with at
least one recorded Riff).
Riff: Selects one of the riffs from the chosen Vari-
ation. Only existing riffs can be selected. If the
Style is empty, the phrase «No Riff» appears.
Transpose: Determines the value of the trans-
position (in semitone steps).
Assignable values: -64 ... +64.
Note range from... to...: Sets the upper and
lower limits of the notes to be affected. To trans-
pose a single percussive instrument of the Drum
track, assign the same note to the highest and
lowest limit. For example, to change the snare
(D2) set the parameter to «Note range from D2
to D2».
Assignable values: C-1 ... G9
From locator... To locator...: Defines the start
and end point of the part to be affected. It is pos-
sible to specify the measure, beat and resolu-
tion.
Assignable values: within the actual limits of the
Riff.
Transpose
Microscope
The Microscope allows you to modify every sin-
gle event recorded in the tracks. The Event List
shown at the center of the display shows all the
events recorded.
ACCESS TO THE EVENT EDIT
1. With the track in edit selected, use the
/
cursor buttons to scroll through the events.
The selected notes are played automatically.
2. Select the parameter to be changed using
the
/
cursor buttons.
3. Use the DIAL to change the selected param-
eters.
PROGRAMMABLE EVENTS AND PARAMETERS
The «Status» column shows the type of event.
One or more parameters can be changed for each
event. See the next page for a table of events
and their parameters.
SELECT RIFF... (F1)
Selects the Riff and Variation to edit.
SHOW... (F2)
Here you can select the events that will be dis-
played in the Event List.
Set the parameters and press ENTER.
To mask the events, select «Off»