○○○○○○○○○○○○○○○○○○○○○○
6•26 Reference Guide
○○○○○○○○○○○○○○○○○○○○○○
6•26 Reference Guide
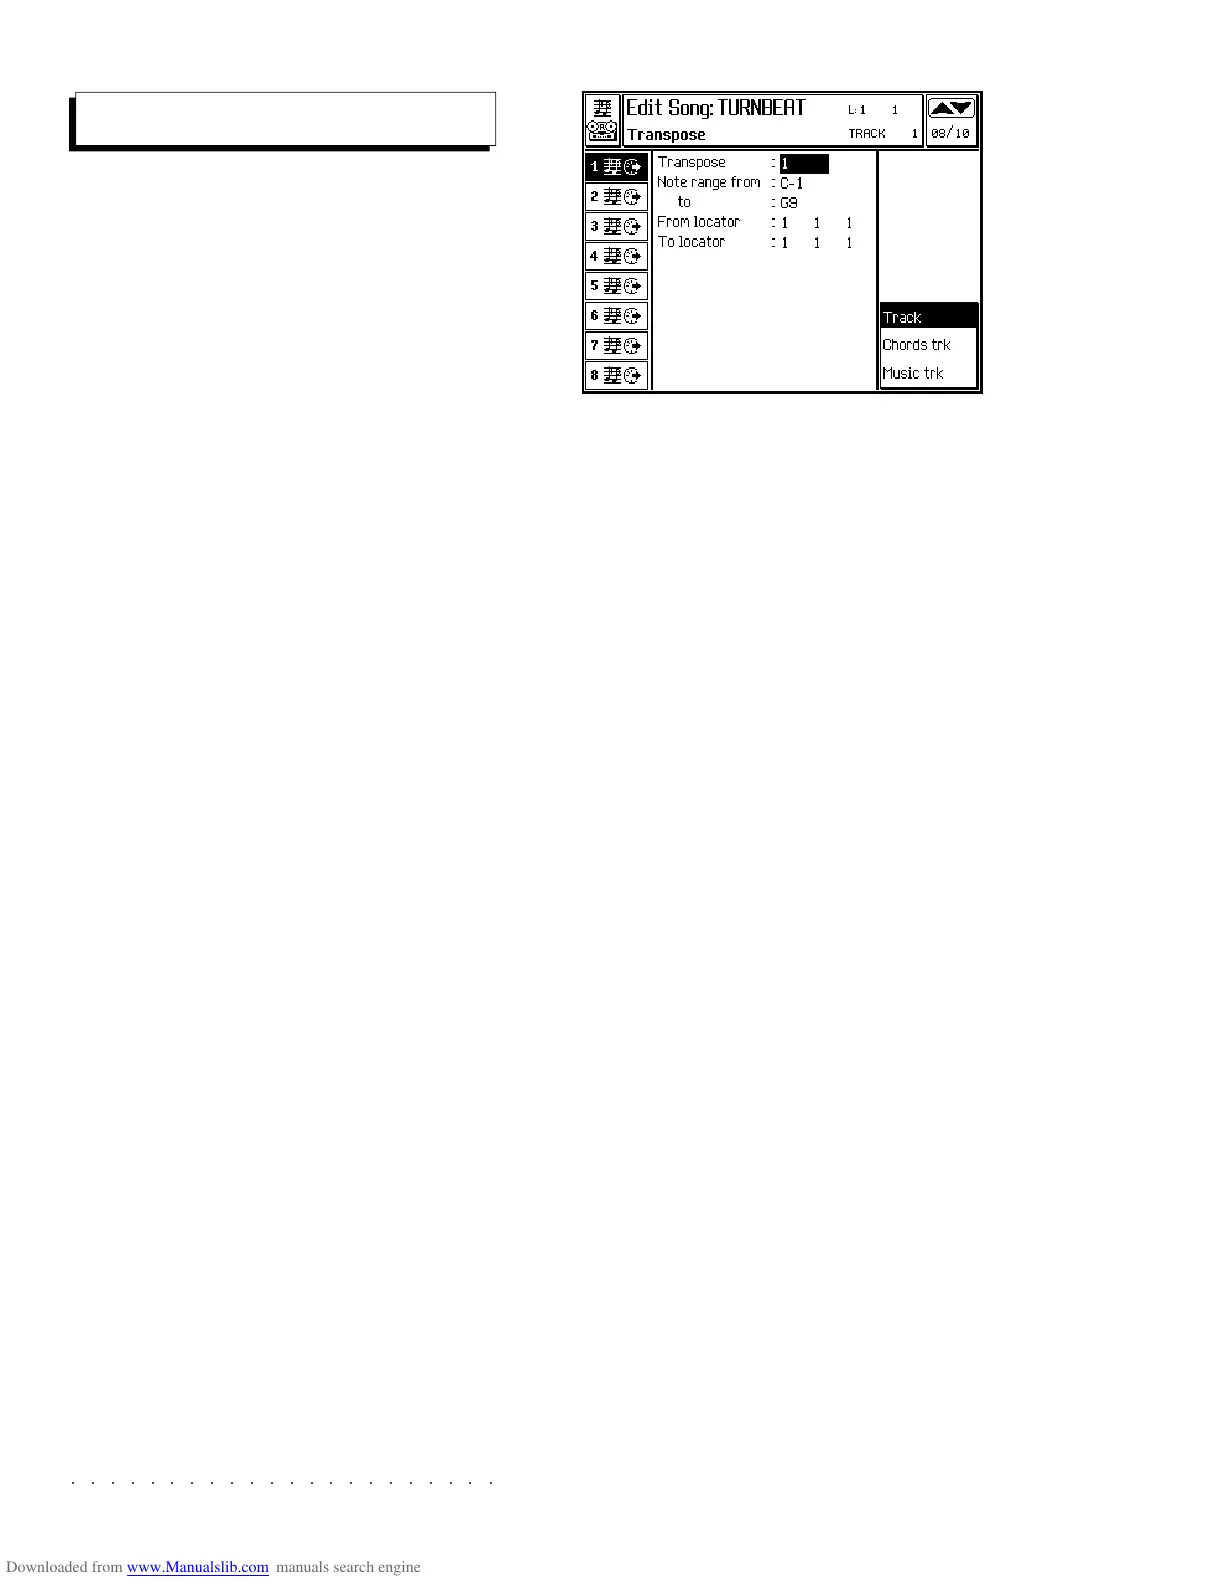
Transposition of a recorded track by semitones.
Also available are options to transpose the
Chords and Music tracks of the Score of a song.
This allows you to see the score in the correctly
transposed status after a transpose operation.
TRACK (F6)
Transposition of a Song track by semitones.
CHORDS TRK (F7)
Transposition of the Chords track of the Score
by semitones.
MUSIC TRK (F8)
Transposition of the Music track of the Score by
semitones.
TRANSPOSE VALUE
Determines the value of the transposition (in semi-
tones).
NOTE RANGE FROM... TO...
Assigns the upper and lower limits of the notes
to be affected. To transpose a single percussive
instrument of the Drum track, assign the same
note to the highest and lowest limit. For exam-
ple, to change the snare (D2) set the parameter
to «Note range from D2 to D2».
Assignable values: C-1 ... G9.
FROM LOCATOR... TO LOCATOR...
Determines the start and end point of the part to
be affected. It is possible to specify Measure,
Beat and ‘tick’.
Assignable values: within the actual limits of the
Song. It is not possible to specify a point beyond
the end of the Song.
Transpose
○○○○○○○○○○○○○○○○○○○○○○
Sounds 2•11
○○ ○○○○○○○○○○○○○○○○○○○○
Sounds 2•11
COMPARE... (F4)
ON/OFF switch. When active, the original pa-
rameter values of the Drumkit/Sound Patch in edit
are temporarily recalled in order to compare them
with the current edited ones.
RESTORE (F6)
This option restores the original Sound Patch or
cancels the last modifications applied after sav-
ing to the Performance.
1. Press F6 to open the following dialog win-
dow:
2. Select the function required with the direc-
tional arrows and press ENTER to confirm or
ESCAPE to cancel to abort.
S.P. Performance - Restores the Drumkit/
Sound Patch in edit to its original status (can-
cels all editing operations applied to all notes).
Current edit - Cancels the current modifica-
tions and recalls the last saved parameter
settings of the Drumkit memorized in the
Performance.
STORE... (F8)
This option allows you to save the modifications
to a Performance or creates a new Drumkit/
Sound Patch file that can be used by any Per-
formance.
To conserve the modifications, save them before
selecting a Performance. Selecting a Perform-
ance before saving cancels all modifications ap-
plied.
SAVE THE MODIFICATIONS AS A NEW DRUMKIT/
SOUND PATCH FILE
1. Press F8 («Store...»).
The «Store» dialog window opens:
2. The “File” option is shown selected. Press
ENTER to confirm.
An insertion zone appears:
The insertion zone shows the Program-
Change and BankSelect MSB (CC00) to
which the new Drumkit/SoundPatch will be
saved.
3. Press ENTER to confirm the current location,
or use the DIAL if you wish to select a differ-
ent location.
4. If you want to change the name of the file,
press the soft button F7 or F8.
5. Insert a name using the method described
in the Alphanumeric Entry paragraph on
page 1.4 of the Quick Guide. Press ENTER
to confirm the name and return to the Store
window.
Edit Perf Sound /Sound Patch