○○○○○○○○○○○○○○○○○○○○○○
3•22 Reference Guide
○○○○○○○○○○○○○○○○○○○○○○
3•22 Reference Guide
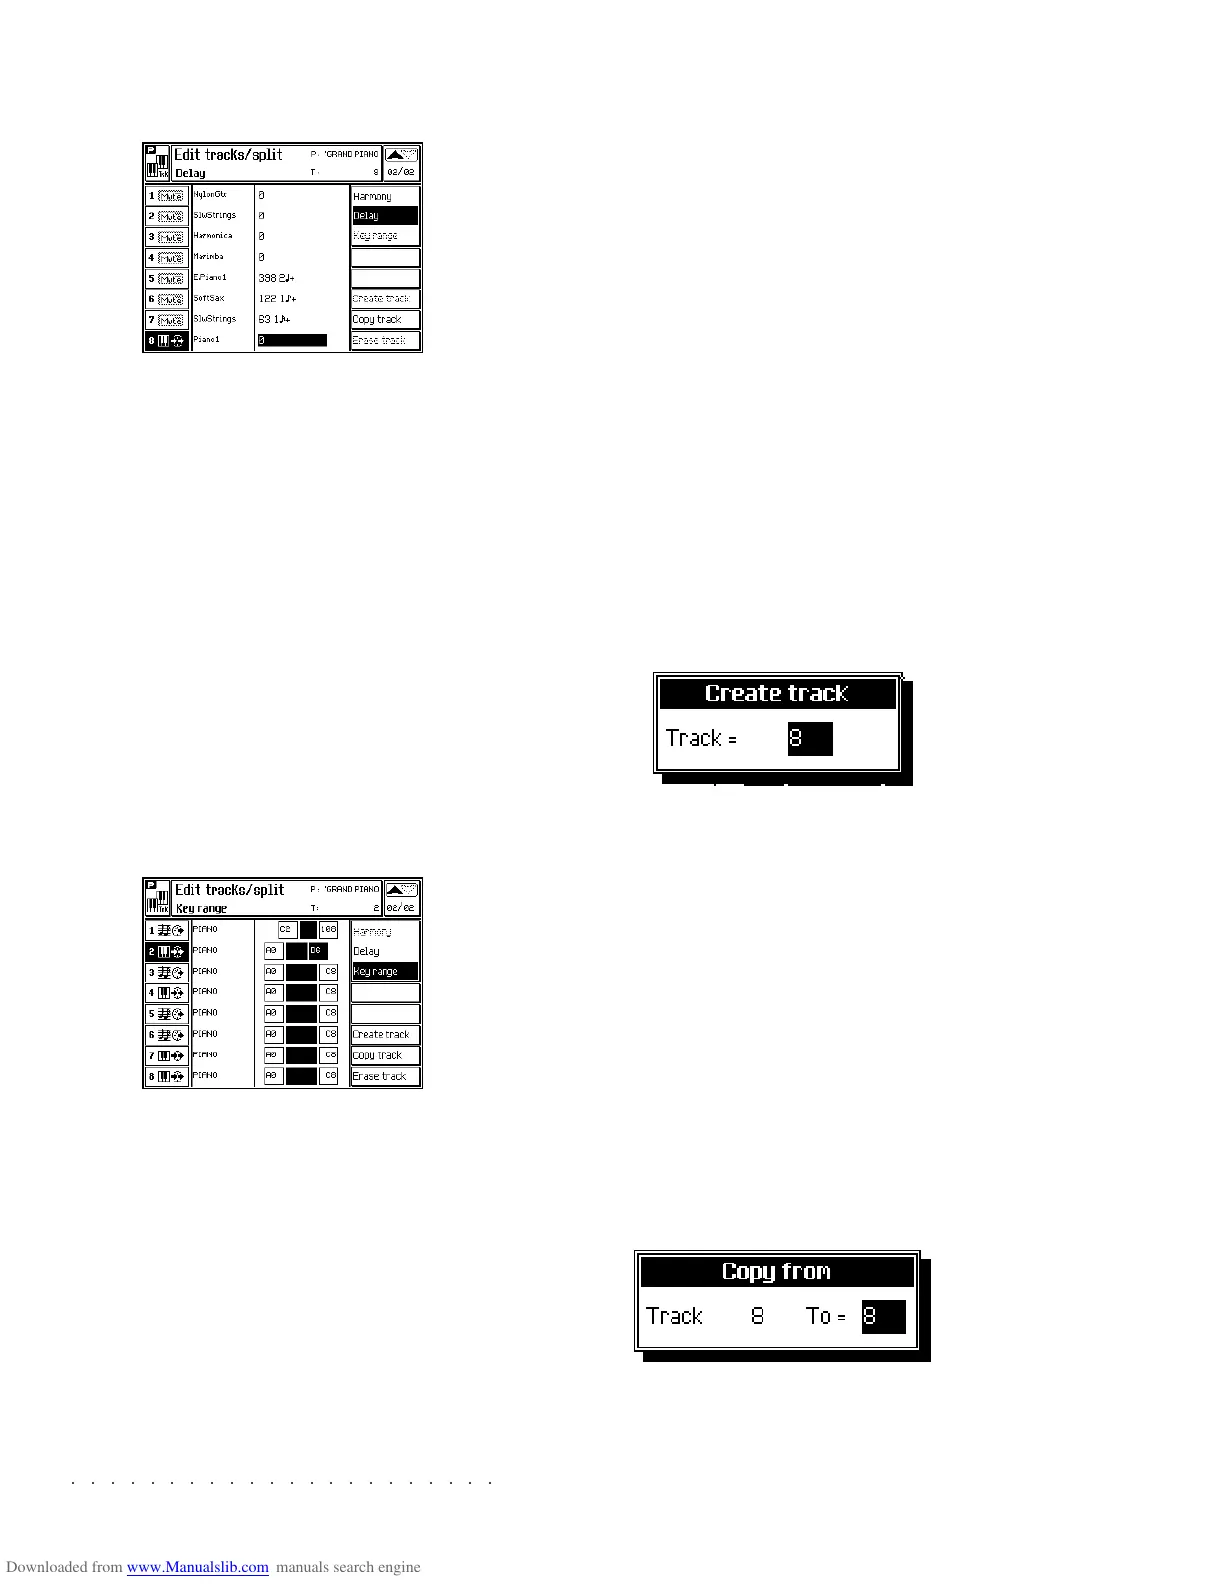
DELAY (F2)
Selecting a value here will cause the sound to be
delayed for a brief period of time after a key is
pressed. This allows you to create a number of
special effects using real time delays. The delay
time value is shown in “Ticks”. These ticks are
subdivisions of the beat based on the current
“Clock Speed”, (the tempo of the internal
sequencer). Each tick represents 1/192nd of a
beat. Therefore if you set a delay time of 192,
you will hear a delay of exactly one beat between
when you press the key and when the sound is
heard.
Assignable values: 0 (off)…192 (1
q
) … 384 (2
q
)
… 576 (3
q
) … 768 (4
q
)
.
KEY RANGE (F3)
This function, available only if you are working
with a Song Performance in Song mode, assigns
a keyboard extension (highest and lowest notes)
to each track, allowing you to program a multi-
split Performance.
For example, to make a five part split, activate
Tracks 1, 2, 3, 4 and 5 (using the corresponding
soft buttons).
Then assign the Key ranges as follows,
Track 1: A0 to B2
Track 2: C3 to B3
Track 3: C4 to B4
Track 4: C5 to B5
Track 5: C6 to A8
This will give you a five part split where you have
a different sound in each octave.
Assignable values: A0) … C8
.
CREATE TRACK (F6)
This function, available only if you are working
with a Song Performance in Song mode, allows
you to create multi-track Performances of more
than 16 tracks. Each track you create has the
same default settings.
Press the Soft button F6 to open the «Create
Track» dialogue window:
Specify the Track number with the DIAL. If the
specified track number already exists, default
values are automatically assigned.
Press ENTER to confirm or ESCAPE to cancel
the operation.
COPY TRACK (F7)
This function allows you to copy the settings of
one track to another, saving time. The destina-
tion track assumes all the programmed settings
of the source track.
Select the source track and press the soft button
F6 to open the «Copy track» dialogue window.
Specify the number of the track to copy to with
the DIAL.
○○○○○○○○○○○○○○○○○○○○○○
Disk 4•15
○○○○○○○○○○○○○○○○○○○○○○
Disk 4•15
4. Select the Group file from the RAM directo-
ry and its destination.
5. Press ENTER twice to execute the command.
SAVE ALL
Use «Save All» to save an entire set of file types
contained in RAM in a single step.
SAVE ALL SONG PROCEDURE (EXAMPLE)
1. Select ALL SONG from the main Save page.
2. Press ENTER to enter the FILE SELECTOR, then
select the destination device (Floppy, Hard
disk o SCSI).
3. Select the destination Block in the disk di-
rectory, then press ENTER twice to start the
saving procedure
If necessary, select an empty location to cre-
ate a new Block using the method described
in the Quick Guide, page 1.47.
Warning: Use “Save ALL” with care as this proce-
dure overwrites all data at the destination. B e abso-
lutely sure, therefore, of the file content in disk be-
fore using the “Save ALL” procedures.