○○○○○○○○○○○○○○○○○○○○○○
4•24 Reference Guide
○○○○○○○○○○○○○○○○○○○○○○
4•24 Reference Guide
HARD DISK SLEEP TIME
To avoid hearing the noise caused by the rota-
tion of the hard disk, you can set this parameter
to turn the hard disk off after an operation.
Options: Off (always on), 5 sec ... 60 sec.
HARD DISK PROTECTION
As a safety measure to prevent unwanted file loss,
use the Hard Disk Protection function to protect
your hard disk.
Note: All
SK760/880SE
instruments leave the fac-
tory with the Hard Disk Protection active.
In order to use the Save, Erase or Move opera-
tions on the Hard Disk, the protection must be
removed.
Select the Hard Disk Protection function and
press ENTER to activate the protection function.
Use the right/left cursor arrows to toggle between
the two options (Unprotect/Protect).
Press ENTER to save the selected status to
memory.
HARD DISK BACKUP
This option allows you to backup part or all the
Hard disk data to floppy disk in compressed or
decompressed form. By default, the “Compress”
option is selected.
At the end of a work session, always remember
to copy all newly elaborated data present on Hard
disk to floppy disks. Should the Hard disk suffer
damage and data loss, you will always be able to
recuperate the data from disks.
HOW TO BACK UP YOUR HARD DISK DATA
1. Have some empty formatted data disks ready.
As a general rule, 1000 Kb of Hard Disk data
are compressed to approx. 50% of the origi-
nal value in the case of Songs, and 30% in
the case of Sounds. Use this conversion
scale to calculate approximately how many
disks you will require to backup your data.
The size of each selected Block file is shown
at the bottom of the directory.
2. Select the Hard Disk Backup option and press
ENTER to activate the function.
Selecting this function opens a second level
display showing the Hard disk directory on
the left and a column on the right where you
can prepare a list of data to backup and com-
press.
The backup list can consist of Block files only,
not individual files normally found in a block.
3. Prepare a list of the block(s) to backup.
Select a Block and press ENTER to insert it
into the list. The cursor moves down to the
next empty location automatically. Repeat
the operation for other blocks.
If you attempt to insert a Block that has al-
ready been inserted, an appropriate warning
is displayed. Press ESCAPE to cancel the
warning and select a different Block.
4. Press EXECUTE (F1) to start the backup
process.
After a short period, the unit is ready to back-
up the data and a dialog appears requesting
you to insert Disk n. 1:
○○○○○○○○○○○○○○○○○○○○○○
Performances - Edit Performance 3•13
○○ ○○○○○○○○○○○○○○○○○○○○
Performances - Edit Performance 3•13
GROUP B
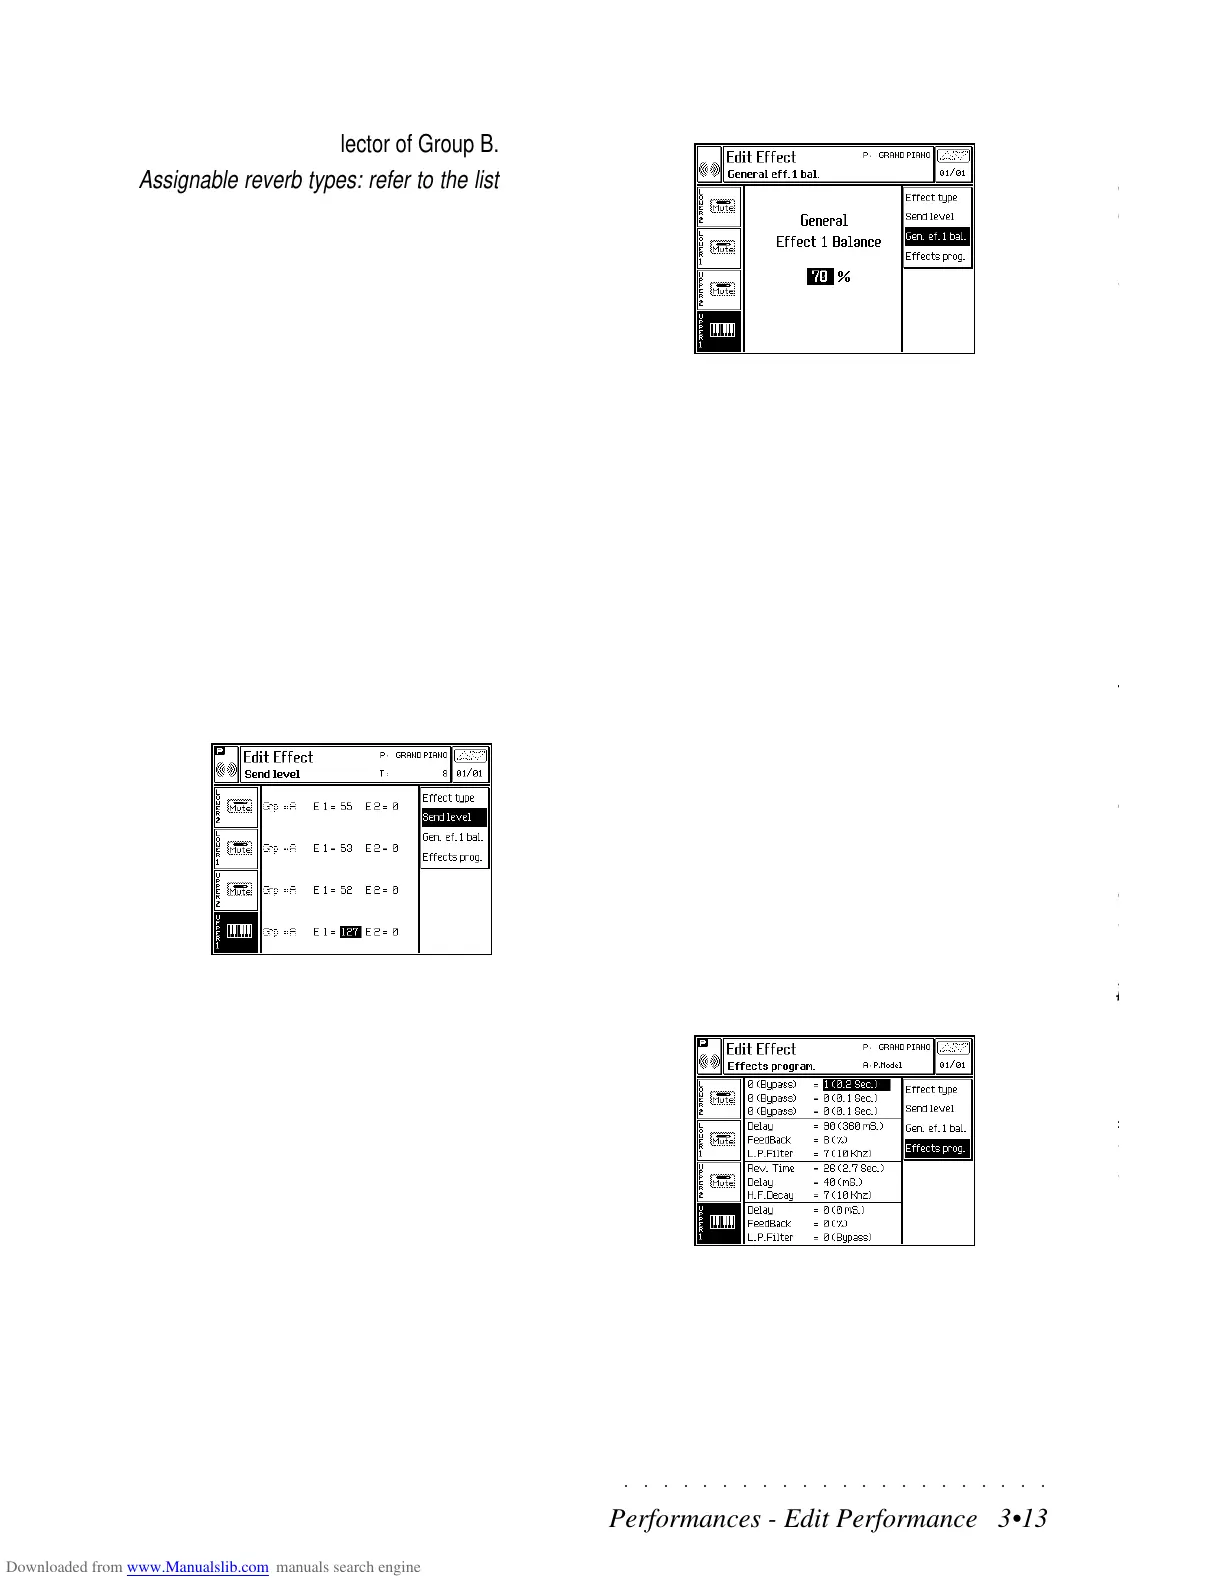
EFF. 1: The Reverb selector of Group B.
Assignable reverb types: refer to the lists in the
Appendix.
VOL. General Reverb level of Group B.
Assignable values: 0 ... 127.
EFF. 2: The Modulation, (delay/chorus/flanger,
etc) selector of Group B.
Assignable delay/mod types: refer to the lists in
the Appendix.
VOL. General Modulation level of Group B.
Assignable values: 0 ... 127.
EFFECT 2 TO EFFECT 1: Sets the quantity of
feedback of Eff2 into Eff1.
Assignable values: 0 (no feedback) ... 127 (maxi-
mum feedback of the signal).
SEND LEVEL (F2)
Here you can control the amount of effect (SEND)
assigned to each track. In Style/Performance
mode, you cannot switch Groups for the keyboard
tracks and accompaniment tracks, therefore the
Group A and B parameters cannot be selected.
The parameter is divided into three parts, the first,
(Group A or B), remains fixed, the second, (E1),
and the third, (E2), relate to the Reverb and Modu-
lation effect send levels for each track.
In Song mode, the Group parameter can be
switched from A to B and vice versa.
Assignable values: 0 (dry) ... 127 (wet). A zero
send level corresponds to no effect for the track.
GENERAL EFF1 BALANCE (F3)
Here you can adjust the overall Reverb level, re-
gardless of the current Performance. This pa-
rameter allows you to adapt the reverberation of
the SK760/880SE to the natural reverb of the sur-
roundings.
Assignable values: 0% (all dry) ... 100% (all wet).
The value of 70% corresponds to the factory set
value.
The reverb duration varies according to the di-
mensions and absorption characteristics of the
surroundings in which you play. You can pro-
gram the SK760/880SE reverb in order to obtain
the best results over headphones, or for home
listening, and then regulate this parameter to
adapt the reverb to the surroundings in which you
play in public.
The setting is not retained in memory at power
down.
EFFECTS PROGRAMMING (F4)
Here you can program the effects currently as-
signed to your Performance.
The top section of the display (6 lines) relate to
the Group A effects, while the bottom half to the
Group B effects.
GROUP B
EFF. 1: The Reverb selector of Group B.
Assignable reverb types: refer to the lists in the
Appendix.
VOL. General Reverb level of Group B.
Assignable values: 0 ... 127.
EFF. 2: The Modulation, (delay/chorus/flanger,
etc) selector of Group B.
Assignable delay/mod types: refer to the lists in
the Appendix.
VOL. General Modulation level of Group B.
Assignable values: 0 ... 127.
EFFECT 2 TO EFFECT 1: Sets the quantity of
feedback of Eff2 into Eff1.
Assignable values: 0 (no feedback) ... 127 (maxi-
mum feedback of the signal).
SEND LEVEL (F2)
Here you can control the amount of effect (SEND)
assigned to each track. In Style/Performance
mode, you cannot switch Groups for the keyboard
tracks and accompaniment tracks, therefore the
Group A and B parameters cannot be selected.
The parameter is divided into three parts, the first,
(Group A or B), remains fixed, the second, (E1),
and the third, (E2), relate to the Reverb and Modu-
lation effect send levels for each track.
In Song mode, the Group parameter can be
switched from A to B and vice versa.
Assignable values: 0 (dry) ... 127 (wet). A zero
send level corresponds to no effect for the track.
GENERAL EFF1 BALANCE (F3)
Here you can adjust the overall Reverb level, re-
gardless of the current Performance. This pa-
rameter allows you to adapt the reverberation of
the SK760/880SE to the natural reverb of the sur-
roundings.
Assignable values: 0% (all dry) ... 100% (all wet).
The value of 70% corresponds to the factory set
value.
The reverb duration varies according to the di-
mensions and absorption characteristics of the
surroundings in which you play. You can pro-
gram the SK760/880SE reverb in order to obtain
the best results over headphones, or for home
listening, and then regulate this parameter to
adapt the reverb to the surroundings in which you
play in public.
The setting is not retained in memory at power
down.
EFFECTS PROGRAMMING (F4)
Here you can program the effects currently as-
signed to your Performance.
The top section of the display (6 lines) relate to
the Group A effects, while the bottom half to the
Group B effects.