○○○○○○○○○○○○○○○○○○○○○○
6•24 Reference Guide
○○○○○○○○○○○○○○○○○○○○○○
6•24 Reference Guide
Cancels a specified number of measures. The
measures directly after the point of cancellation
shift towards the beginning of the Song and join
with the measures preceding the cancellation
point.
Hint: To cancel measures without shifting those af-
ter the deletion point, use the Erase events function.
PARAMETERS
MEASURES TO DELETE
Specifies the number of measures to delete.
Assignable values: any number that does not ex-
ceed the total number of measures in the Song.
For example, if the Song is 50 measures long,
the maximum value that can be assigned is 50.
DELETE FROM LOCATOR
This parameter indicates the first measure of
those to be deleted.
Assignable values: within the actual limits of the
Song. The parameter is linked to the previous
one, which can be modified if the measures be-
tween the deletion start point and the end of the
Song are less than those shown in
«Measures».
Delete measures
Example of Delete measures. Measures 3 and 4 are cancelled.
All the measures after the delete point shift towards the
beginning of the song.
1 2 5 63 4
1 2 3 4
(1) (2) (5) (6)
Cancels a specified number of measures. The
measures directly after the point of cancellation
shift towards the beginning of the Song and join
with the measures preceding the cancellation
point.
Hint: To cancel measures without shifting those af-
ter the deletion point, use the Erase events function.
PARAMETERS
MEASURES TO DELETE
Specifies the number of measures to delete.
Assignable values: any number that does not ex-
ceed the total number of measures in the Song.
For example, if the Song is 50 measures long,
the maximum value that can be assigned is 50.
DELETE FROM LOCATOR
This parameter indicates the first measure of
those to be deleted.
Assignable values: within the actual limits of the
Song. The parameter is linked to the previous
one, which can be modified if the measures be-
tween the deletion start point and the end of the
Song are less than those shown in
«Measures».
Delete measures
Example of Delete measures. Measures 3 and 4 are cancelled.
All the measures after the delete point shift towards the
beginning of the song.
○○○○○○○○○○○○○○○○○○○○○○
Edit Sound 2•13
○○○○○○○○○○○○○○○○○○○○○○
Edit Sound 2•13
If you’re serious about creating and editing
sounds then it won’t be too long before you yearn
for a little more flexibility than is offered by the
Performance Edit Sound/Sound Patch param-
eters.
In the advanced editing controls you will find the
real key to the sound synthesizing power of the
SK760/880SE. The results of your Sound edit-
ing tasks is a RAM-Sound that you can store to
the SK760/880SE sound library, assign to any
track of any Performance and save to Disk.
ENTERING EDIT SOUND
When you enter EDIT SOUND, it is best to “pre-
pare” yourself by checking that the current sound,
that is, the one shown selected in the Perform-
ance display, is the one you want to edit. For
example, if you want to tweak some of the pa-
rameters of a Piano sound to create a variation,
it’s best to start with a sound similar the one you
want to modify. If, instead, you want to create a
completely new and original Sound, you can start
with practically any one you wish, because in the
editing menus, you’ll find all the tools you need.
You can choose to enter EDIT SOUND either with
a “solo’d” Sound (SOLO button LED on), or with
two or more tracks of the current Performance
active. This second option allows you to listen
to the Sound currently in edit together with other
active tracks of the Performance to give you an
idea of what your edited Sound is like when com-
bined with other Sounds. Once you enter EDIT
SOUND, you cannot activate or deactivate the
SOLO button; you must set the SOLO button
according to your requirements before entering
Edit Sound.
Advanced Edit Sound
PROCEDURE
1. From the main Style/Performance display,
select the track containing the Sound you
wish to edit.
If necessary, press the SOLO button to iso-
late the Sound from the rest.
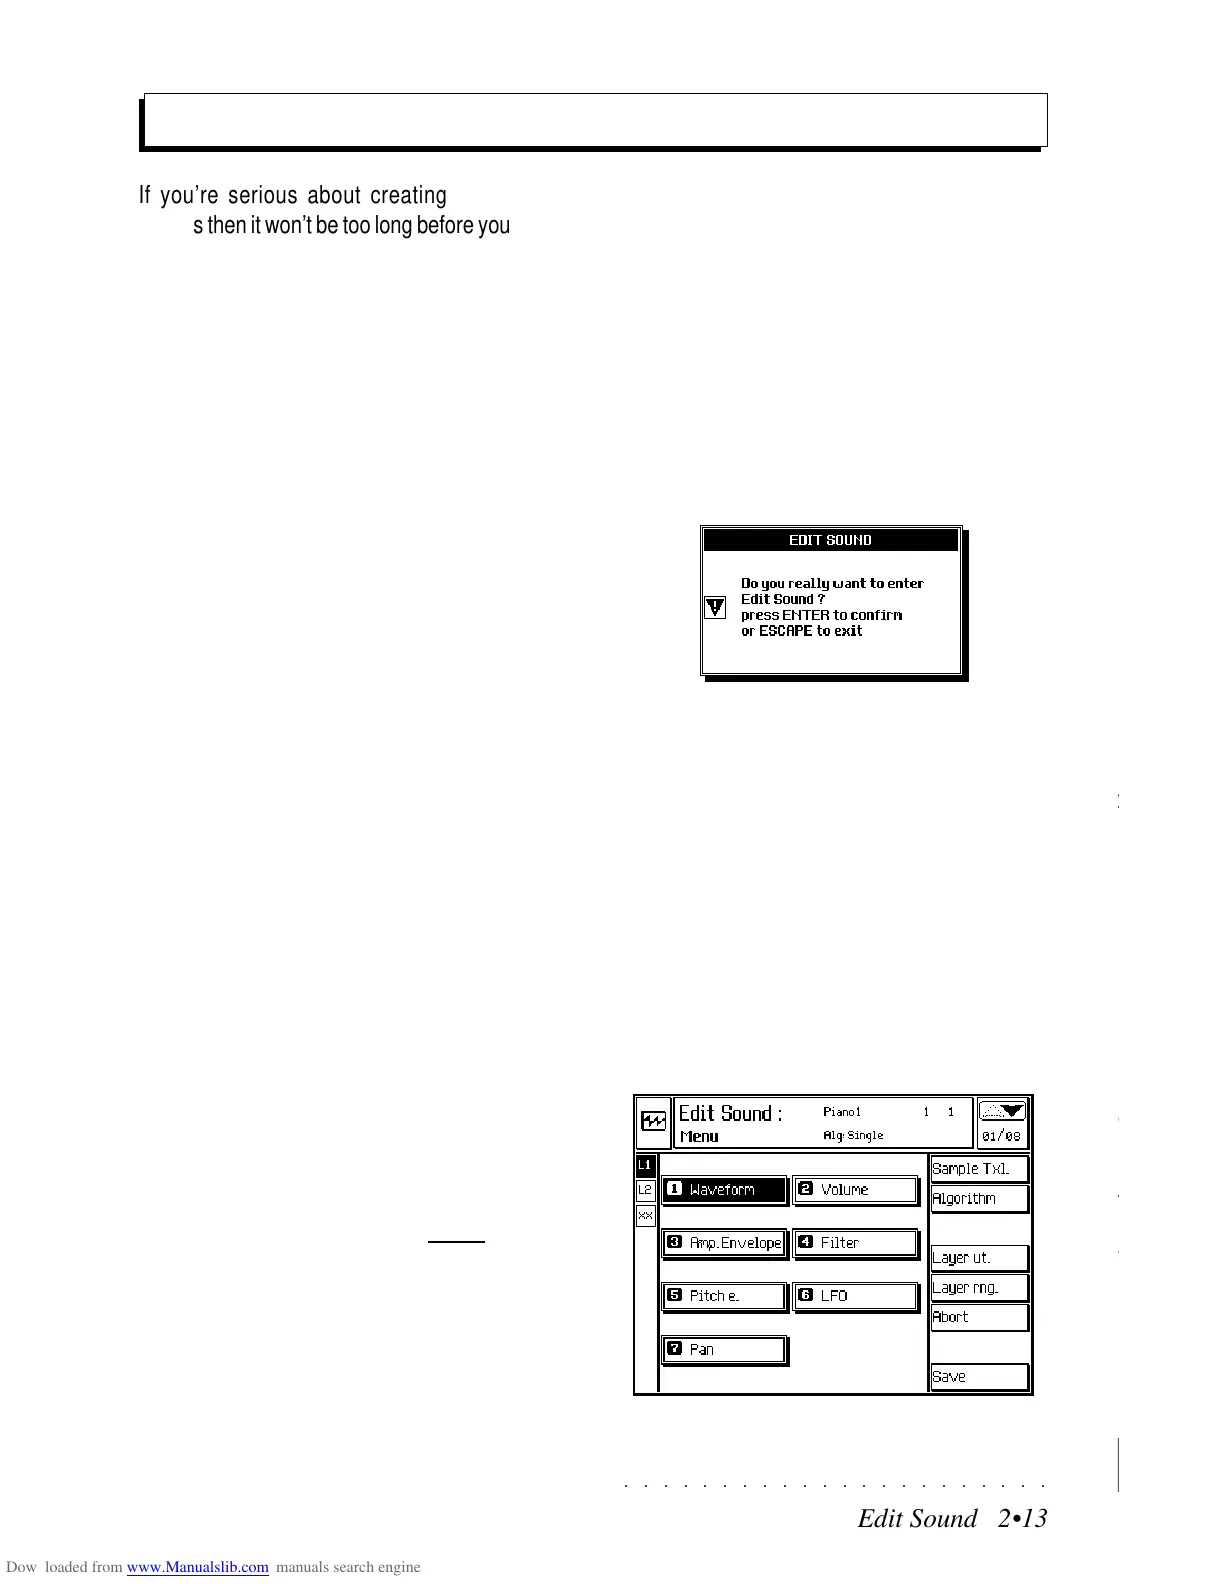
2. Press the SYNTH button in the EDIT
NUMBER section
You are prompted to confirm the request to
enter EDIT SOUND.
3. Press ENTER to enter EDIT SOUND.
Press ESCAPE to cancel the request.
With ENTER, you gain access to the Edit
Sound menu consisting of several “Editors”.
The configuration of the Editors depends on
the starting Sound.
Edit Sound - main menu
If you’re serious about creating and editing
sounds then it won’t be too long before you yearn
for a little more flexibility than is offered by the
Performance Edit Sound/Sound Patch param-
eters.
In the advanced editing controls you will find the
real key to the sound synthesizing power of the
SK760/880SE. The results of your Sound edit-
ing tasks is a RAM-Sound that you can store to
the SK760/880SE sound library, assign to any
track of any Performance and save to Disk.
ENTERING EDIT SOUND
When you enter EDIT SOUND, it is best to “pre-
pare” yourself by checking that the current sound,
that is, the one shown selected in the Perform-
ance display, is the one you want to edit. For
example, if you want to tweak some of the pa-
rameters of a Piano sound to create a variation,
it’s best to start with a sound similar the one you
want to modify. If, instead, you want to create a
completely new and original Sound, you can start
with practically any one you wish, because in the
editing menus, you’ll find all the tools you need.
You can choose to enter EDIT SOUND either with
a “solo’d” Sound (SOLO button LED on), or with
two or more tracks of the current Performance
active. This second option allows you to listen
to the Sound currently in edit together with other
active tracks of the Performance to give you an
idea of what your edited Sound is like when com-
bined with other Sounds. Once you enter EDIT
SOUND, you cannot activate or deactivate the
SOLO button; you must set the SOLO button
according to your requirements
before entering
Edit Sound.
Advanced Edit Sound
PROCEDURE
1. From the main Style/Performance display,
select the track containing the Sound you
wish to edit.
If necessary, press the SOLO button to iso-
late the Sound from the rest.
2. Press the SYNTH button in the EDIT
NUMBER section
You are prompted to confirm the request to
enter EDIT SOUND.
3. Press ENTER to enter EDIT SOUND.
Press ESCAPE to cancel the request.
With ENTER, you gain access to the Edit
Sound menu consisting of several “Editors”.
The configuration of the Editors depends on
the starting Sound.
Edit Sound - main menu