○○○○○○○○○○○○○○○○○○○○○○
5•4 Reference Guide
○○○○○○○○○○○○○○○○○○○○○○
5•4 Reference Guide
chord is not recognized, the chord symbol is
shown as the lowest note played followed by sev-
eral asterisks. For example: «C***** ».
Note: In order for the chord to be recognized (and
the relative symbol to be shown on the display)
Arrange On/Off must be on.
DYNAMIC ARRANGE
When DYNAMIC ARRANGE is active, the vol-
ume of the Style Auto accompaniments can be
controlled according to the velocity applied to the
chord notes. Increased chord note velocity in-
creases the volume of the accompaniments.
When Off, the accompaniment volumes remain
unchanged with changes in chord note velocity.
AUTOBACKING
When AUTOBACKING is on, a quick change of
chord updates the Style auto accompaniment
pattern instantly without “breaks” in the pattern.
When off, a change of chord does not update
instantly but waits for the next note of the ac-
companiment before revising the pattern.
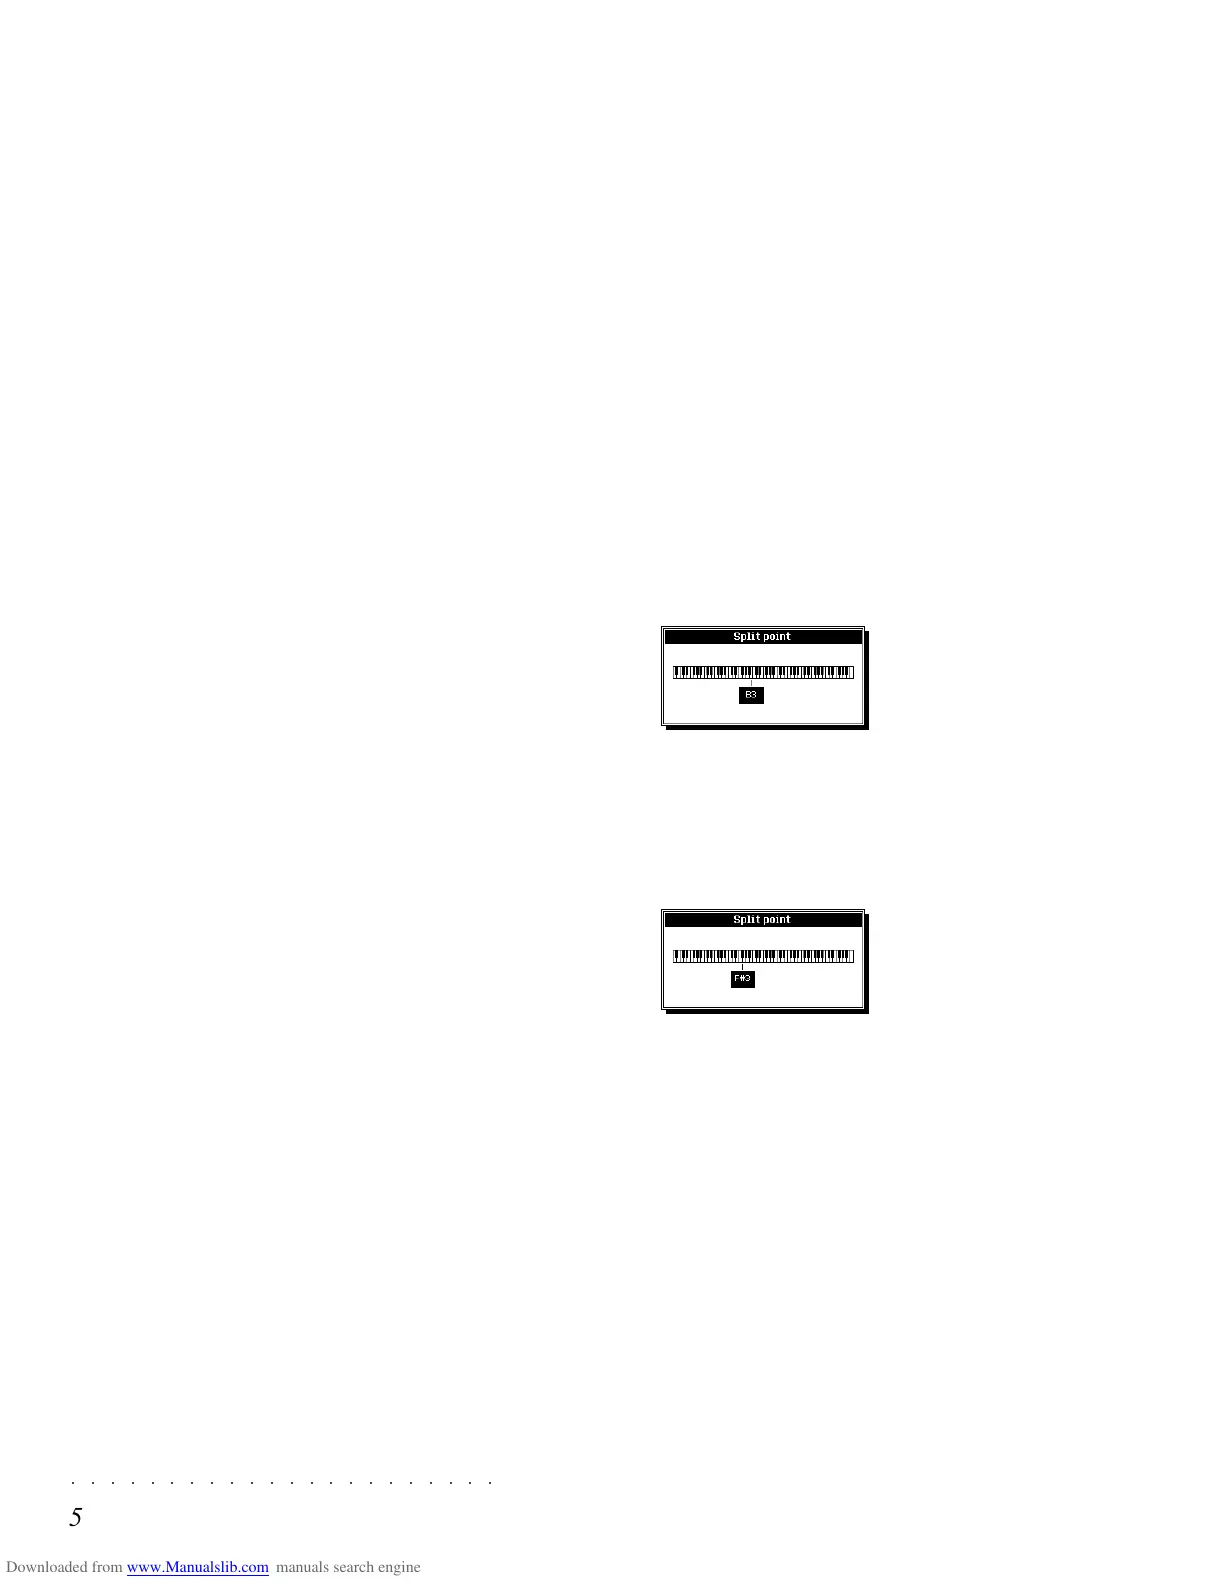
CHANGING THE SPLIT POINT
The Split Point is:
(a)
the point that separates the Upper and Low-
er keyboard sections in the Upper&Lower and
Multi keyboard modes and,
(b)
the point below which the keyboard recogniz-
es chords which trigger the Style automatic
accompaniments (
in Fingered and One Fin-
ger chord recognition modes
).
The current Split Point setting appears in the main
page as an option that can be selected with the
paired soft buttons F7/F8.
The setting can be modified as required.
1. With the main Style/RealTime display show-
ing, press Soft buttons F7/F8 to open the
«Split Point» dialog window.
2. Rotate the DIAL, or play a note on the key-
board (corresponding to the highest note of
the Lower split zone) to modify the setting.
If you entered the wrong note, simply play
another.
3. Press ENTER to confirm the new Split Point,
or ESCAPE to cancel the operation.
With ENTER, the main page will show the
new Split Point setting. With ESCAPE the
original Split Point will be restored.
Note: The Split Point is a general parameter (not
linked to a particular Performance) which is con-
served in memory when the instrument is turned
off. The new setting is lost when the “Reset All”
operation is carried out or if the backed-RAM
loses its data due to the total discharge of the
battery.
chord is not recognized, the chord symbol is
shown as the lowest note played followed by sev-
eral asterisks. For example: «C***** ».
Note: In order for the chord to be recognized (and
the relative symbol to be shown on the display)
Arrange On/Off must be on.
DYNAMIC ARRANGE
When DYNAMIC ARRANGE is active, the vol-
ume of the Style Auto accompaniments can be
controlled according to the velocity applied to the
chord notes. Increased chord note velocity in-
creases the volume of the accompaniments.
When Off, the accompaniment volumes remain
unchanged with changes in chord note velocity.
AUTOBACKING
When AUTOBACKING is on, a quick change of
chord updates the Style auto accompaniment
pattern instantly without “breaks” in the pattern.
When off, a change of chord does not update
instantly but waits for the next note of the ac-
companiment before revising the pattern.
CHANGING THE SPLIT POINT
The Split Point is:
(a)
the point that separates the Upper and Low-
er keyboard sections in the Upper&Lower and
Multi keyboard modes and,
(b)
the point below which the keyboard recogniz-
es chords which trigger the Style automatic
accompaniments (
in Fingered and One Fin-
ger chord recognition modes
).
The current Split Point setting appears in the main
page as an option that can be selected with the
paired soft buttons F7/F8.
The setting can be modified as required.
1. With the main Style/RealTime display show-
ing, press Soft buttons F7/F8 to open the
«Split Point» dialog window.
2. Rotate the DIAL, or play a note on the key-
board (corresponding to the highest note of
the Lower split zone) to modify the setting.
If you entered the wrong note, simply play
another.
3. Press ENTER to confirm the new Split Point,
or ESCAPE to cancel the operation.
With ENTER, the main page will show the
new Split Point setting. With ESCAPE the
original Split Point will be restored.
Note: The Split Point is a general parameter (not
linked to a particular Performance) which is con-
served in memory when the instrument is turned
off. The new setting is lost when the “Reset All”
operation is carried out or if the backed-RAM
loses its data due to the total discharge of the
battery.
○○○○○○○○○○○○○○○○○○○○○○
Performances - Edit Performance 3•1
○○ ○○○○○○○○○○○○○○○○○○○○
Performances - Edit Performance 3•1
Performances
memory. There are 64 Performances from the
factory and all are user-programmable. That is,
you can save your modifications to any of the
Performances without losing them. At any time,
you can restore the original Performances with
the RESTORE function.
REAL TIME PANEL OPERATIONS
Several panel operations can be carried out to
change the status of the Performances while you
play.
For example, if you recall a single Performance,
(one with only one sound active to play on the
keyboard), you can activate one or more tracks
to play with a combination of sounds. The Per-
formance will still be the same one recalled, but
modified so that more tracks are active to play.
Some examples are given in the Quick Guide on
pages 1.18-1.20.
You can also change other Performance param-
eters, such as the track Volumes using the 8 panel
sliders, or the keyboard mode, from Full to Up-
per/Lower, (split keyboard), to Multi using the
corresponding Soft buttons. You can assign a
different split point to the keyboard in Upper/lower
mode, you can even assign different Sounds to
the tracks.
If you don’t want to save the changes you make
to your Performance, simply select another one
and all the changes to the previous Performance
will be lost. If, instead, you want to save the Per-
formance, press the STORE PERFORMANCE
button followed by ENTER to save the changes.
The STORE PERFORMANCE operation is ex-
plained in greater detail on page. 3. 24.
A PERFORMANCE is a combination of up to 16
sounds either layered together or split across the
keyboard in any configuration. Whatever play-
ing mode you are using, Real time, Style or Song,
it will always be governed by a Performance
which determines how you play in real time, how
you play the Style or the Song.
Pressing one of the PERFORMANCE GROUPS
buttons and selecting a PERFORMANCE will put
the SK760/880SE in Performance play mode.
You would use the Performances to play in real
time with up to 8 sounds simultaneously.
Other Performances which you can select from
the panel are the Style Performances, available
in Style mode when the SINGLE TOUCH PLAY
button is on. Also available are the Song Per-
formances when you are in Song mode.
Lets take a closer look at the Performances and
all the things you can do with them
SELECTING THE PERFORMANCES
To select them, simply press one of the Perform-
ance Group buttons and select a Performance
with the corresponding soft button. In this way
you can select all Performances which already
exist in memory.
In the Quick Guide, on page 1.31, you’ll find il-
lustrated explanations relating to the selection of
the Performances.
Each Performance Group button recalls 8 Per-
formances to choose from. In this way you can
select all Performances which already exist in