○○○○○○○○○○○○○○○○○○○○○○
1•36 Quick Guide
○○○○○○○○○○○○○○○○○○○○○○
1•36 Quick Guide
1
2
4
3
TRANSPOSING TRACKS BY OCTAVES
Any track, if selected, can be instantly transposed
in octave steps, within the range
±
5 octaves.
1. Select the track you wish to transpose.
2. Press the OCTAVE + to raise the octave set-
ting.
An insertion screen shows the current Oc-
tave setting.
Press the OCTAVE + button as many times
as necessary until you reach the desired set-
ting. The value is expressed in semitones:
12 = 1 octave, 24 = 2 octaves, etc.. The in-
sertion screen cancels automatically after 2/
3 seconds.
3. Press OCTAVE – button to lower the octave
setting.
The current Octave setting is shown.
Continue pressing the OCTAVE – button as
many times as necessary until you reach the
desired setting. An eventual positive Octave
status will be cancelled.
TO CLEAR THE TRACK OCTAVE SETTING
4. Press both OCTAVE buttons simultaneously.
The insertion screen shows the value of “0”
and the track’s normal pitch is restored.
○○○○○○○○○○○○○○○○○○○○○○
Edit General 8•5
○○○○○○○○○○○○○○○○○○○○○○
Edit General 8•5
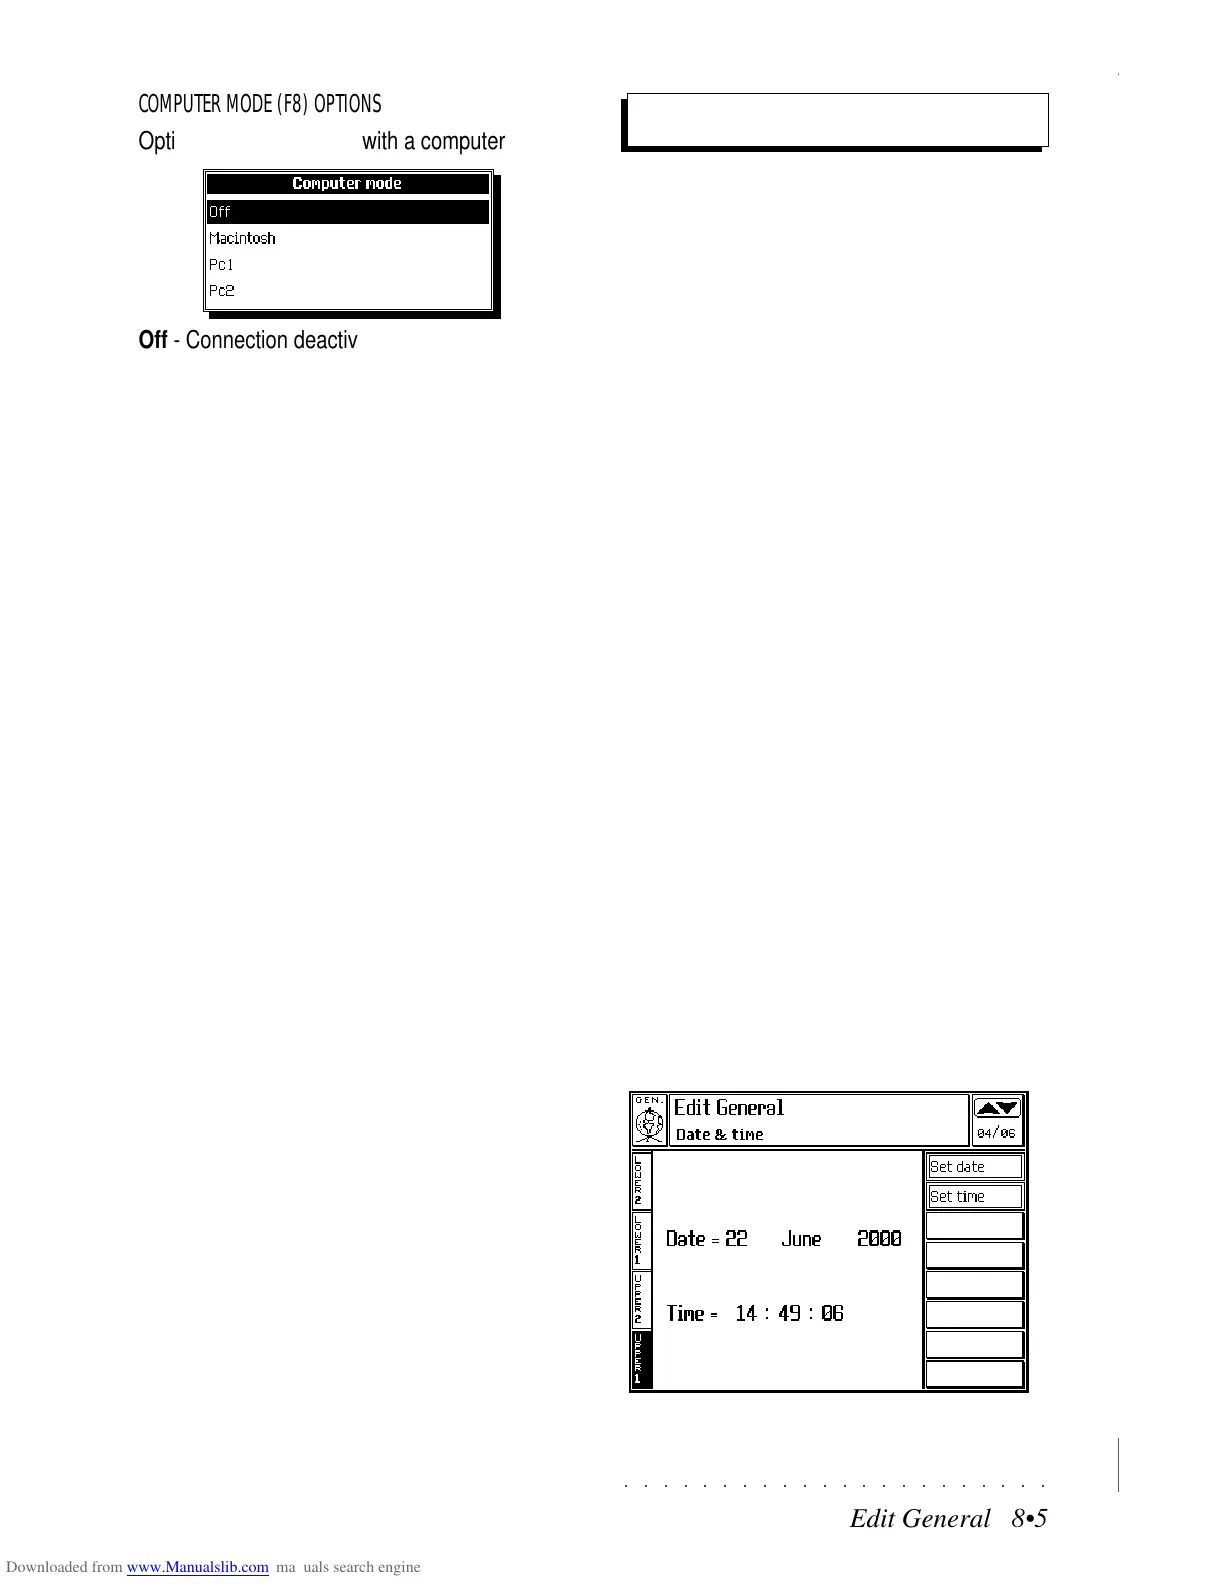
COMPUTER MODE (F8) OPTIONS
Options to communicate with a computer
Off - Connection deactivated.
Macintosh - To connect to an Apple Macintosh™
computer. A standard Mac serial cable is required
to connect to the Modem port. In the computer
software, set a communication velocity of 1 MHz.
PC1 - Allows serial connection with an IBM™
computer or compatible, with a communication
velocity of 31250 baud. A standard PC serial
cable must be connected to the RS-232 port of
the computer.
PC2 - As above, but with a communication ve-
locity of 38400 baud.
Date & Time
Sets the internal calendar and clock.
SET DATE (F1)
Sets the date in edit. Take the cursor to the day,
month and year and specify the value of each
parameter with the DIAL.
Confirm with ENTER or F1.
SET TIME (F2)
Sets the time in edit. Take the cursor to the hour,
minute and seconds with the cursor buttons and
specify the value of each parameter with the DIAL.
Confirm with ENTER or F2.
Edit General; Date & Time