○○○○○○○○○○○○○○○○○○○○○○
7•6 Vocal Processor
○○○○○○○○○○○○○○○○○○○○○○
7•6 Vocal Processor
Additional changes
VOCAL ON/OFF AND EQUALIZER
In «Edit General», the Mic/Line editor includes
an Equalizer which prompts the following window
when activated:
• High gain
• Middle Freq
• Middle gain
• Low gain
The Equalizer parameters exclusively affect the
Microphone signals at input 1 of the Mic/Line in-
terface.
The Vocal On/Off option enables/disables the
Vocal Processor.
The Mic/Line On/Off option enables/disables the
MIC/LINE interface.
NB. These parameters are memorized in Edit
General.
Edit Controller - Vocal Volume and Vocal On/Off assigned to
the pedals
Edit General - Equalizer
In addition to the above, the following additional
modifications are implemented by the Vocal Proc-
essor:
PEDALS
In «Edit Controllers/Pads”.
The following additional assignable functions are
implemented for the pedals and Pads:
• Vocal On/Off (Pedals)
• Vocal Volume (Pedals Assign.)
• Vocal Custom 1-16 (Pedals)
• Vocal Mute (Pedals)
• Vocal Chord/Vocoder/Unison (Pedals)
NB. All the parameters described above can be
memorized to the Performances.
○○○○○○○○○○○○○○○○○○○○○○
Quick Guide 1•43
○○ ○○○○○○○○○○○○○○○○○○○○
Quick Guide 1•43
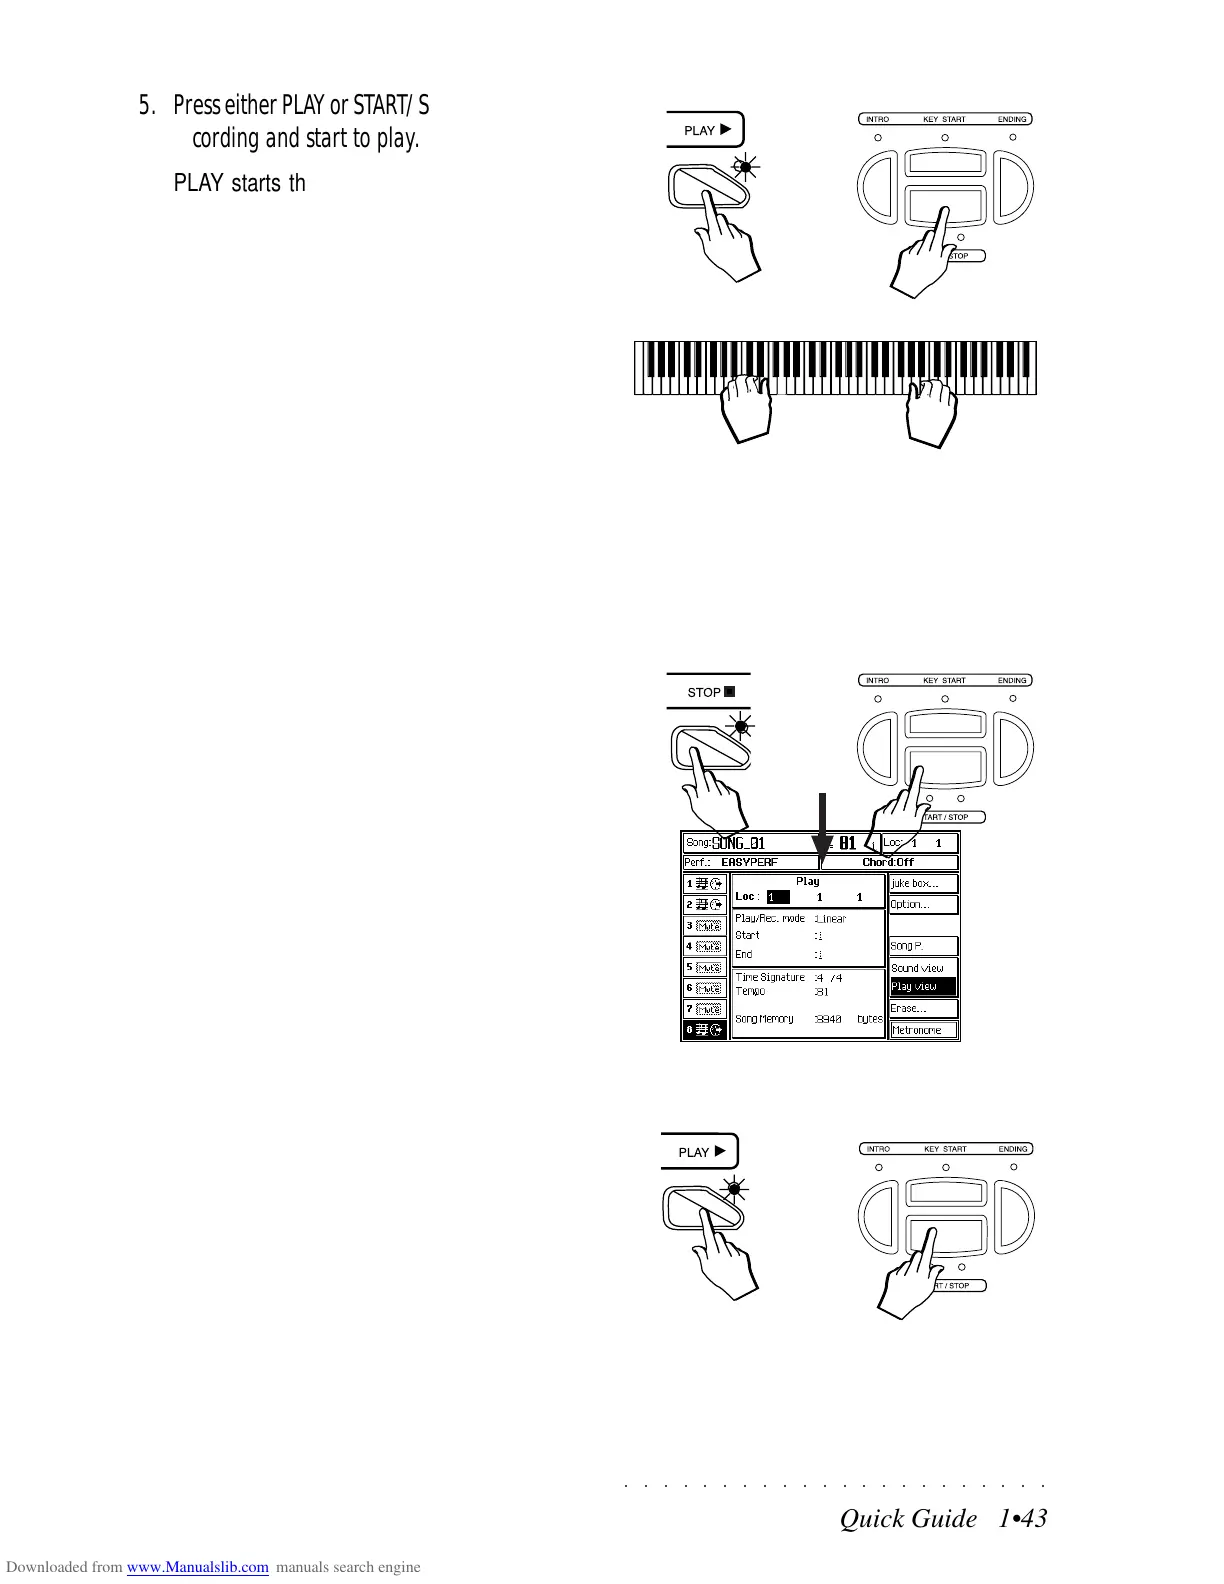
5. Press either PLAY or START/STOP to start the
recording and start to play.
PLAY starts the recording for the real time
tracks only. START/STOP starts the record-
ing and also engages the Style accompani-
ments tracks.
If you selected a Style in step 4 with SINGLE
TOUCH PLAY active and you also activate
KEY START, you will be able to start the re-
cording (Style and real time tracks) by play-
ing on the keyboard. You can also start with
an Intro by preselecting the INTRO, FILL or
ENDING button before record start.
As the recording proceeds, you can select
other Styles, introduce the Fills, change Per-
formances, activate or deactivate other real
time tracks, etc..
6. When you have finished, stop the recording
either with STOP or START/STOP.
STOP stops the sequencer and the record-
ing of both the accompaniment and keyboard
tracks, taking the Song pointer (locator) to
the starting position [1 1 1].
START/STOP stops the accompaniment
tracks but not the sequencer, allowing you to
continue recording the real time tracks with-
out accompaniment. The Song Pointer con-
tinues to monitor the recording. To stop the
recording completely, press STOP. The
RECORD ST/SONG button LED will turn off.
7. Press PLAY or START/STOP to listen to the
song playback.
In playback, you can stop the song with STOP
or START/STOP and start the song again
from the stop point with PLAY.
If you press STOP or START/STOP twice
during playback, the song returns to the start-
ing point (locator 1 1 1).
In EDIT SONG, you can enter a name for the
Song.
5
Or
Or
6
7
Or