Constellation™ Harris Corporation
LIST OF FIGURES
LIST OF FIGURES
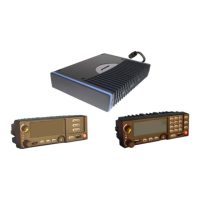
Figure 1-1: The Constellation Radio .................................................................... 1-7
Figure 1-3: Low/medium capacity, nonprotected Tx, SD Rx terminal ..................... 1-10
Figure 1-4: Low/medium capacity, protected terminal (HS, FD, and SD Rx) ........... 1-11
Figure 1-5: Low/medium capacity, nonprotected add-drop repeater ...................... 1-11
Figure 3-1: Constellation Radio, front view ........................................................ 3-11
Figure 3-2: Door latch .................................................................................... 3-12
Figure 3-3: Door straps .................................................................................. 3-12
Figure 3-4: Constellation Radio, repeater configuration ....................................... 3-14
Figure 3-5: Customer access area .................................................................... 3-15
Figure 3-6: Interconnection cabling, DS1 configuration ....................................... 3-16
Figure 3-7: Interconnection cabling, DS3 configuration ....................................... 3-16
Figure 3-8: Interconnection cabling, 4xDS3 configuration .................................... 3-17
Figure 3-9: Interconnection cabling, 3xDS3 + 28 DS1 configuration ..................... 3-17
Figure 3-10: Interconnection cabling, 3xDS3 configuration .................................. 3-17
Figure 3-11: Interconnection cabling, 2xDS3 + 28 DS1 configuration .................... 3-18
Figure 3-12: Interconnection cabling, 155 Electrical or Optical configuration .......... 3-18
Figure 3-15: ACU ........................................................................................... 3-21
Figure 3-16: Constellation backplane, terminal .................................................. 3-23
Figure 3-17: Fuse Panel, repeater .................................................................... 3-23
Figure 3-21: RSL measurement ....................................................................... 3-35
Figure 4-1: IF loopback test .............................................................................. 4-2
Figure 4-2: DS1 tributary loopback test .............................................................. 4-3
Figure 4-3: DS1 tributary remote loopback test ................................................... 4-4
Figure 4-4: OC3/STS3 loopback test ................................................................... 4-5
Figure 4-5: OC3 remote loopback test ................................................................ 4-6
Figure 4-6: 3DS3/4DS3 loopback test ................................................................. 4-7
Figure 4-7: 3DS3/4DS3 remote loopback test ...................................................... 4-8
Figure 4-8: Wayside loopback test ..................................................................... 4-9
Figure 4-9: Wayside remote loopback test ......................................................... 4-10
Figure 4-10: BER testing of a 3xDS3/4xDS3 system with add-drop configuration .... 4-11
Figure 5-1: DS3 only ........................................................................................ 5-2
Figure 5-2: DS4 only ........................................................................................ 5-2
Figure 5-3: Example of DS3 channel with partial add/drop, back-to-back terminals ... 5-3