MAN0923_Issue 3_04/15 Touchpoint Pro
Operating Instructions
119
8. Maintenance
8.5 How to add a new I/O Module
The Touchpoint Pro system can easily be expanded by adding new I/O modules.
Caution: When installing or replacing an I/O module, avoid static discharge
Note: Administrator level access is required
Note: A module which has previously been congured in one system cannot be added to another system,
unless it was correctly removed from the original system’s conguration.
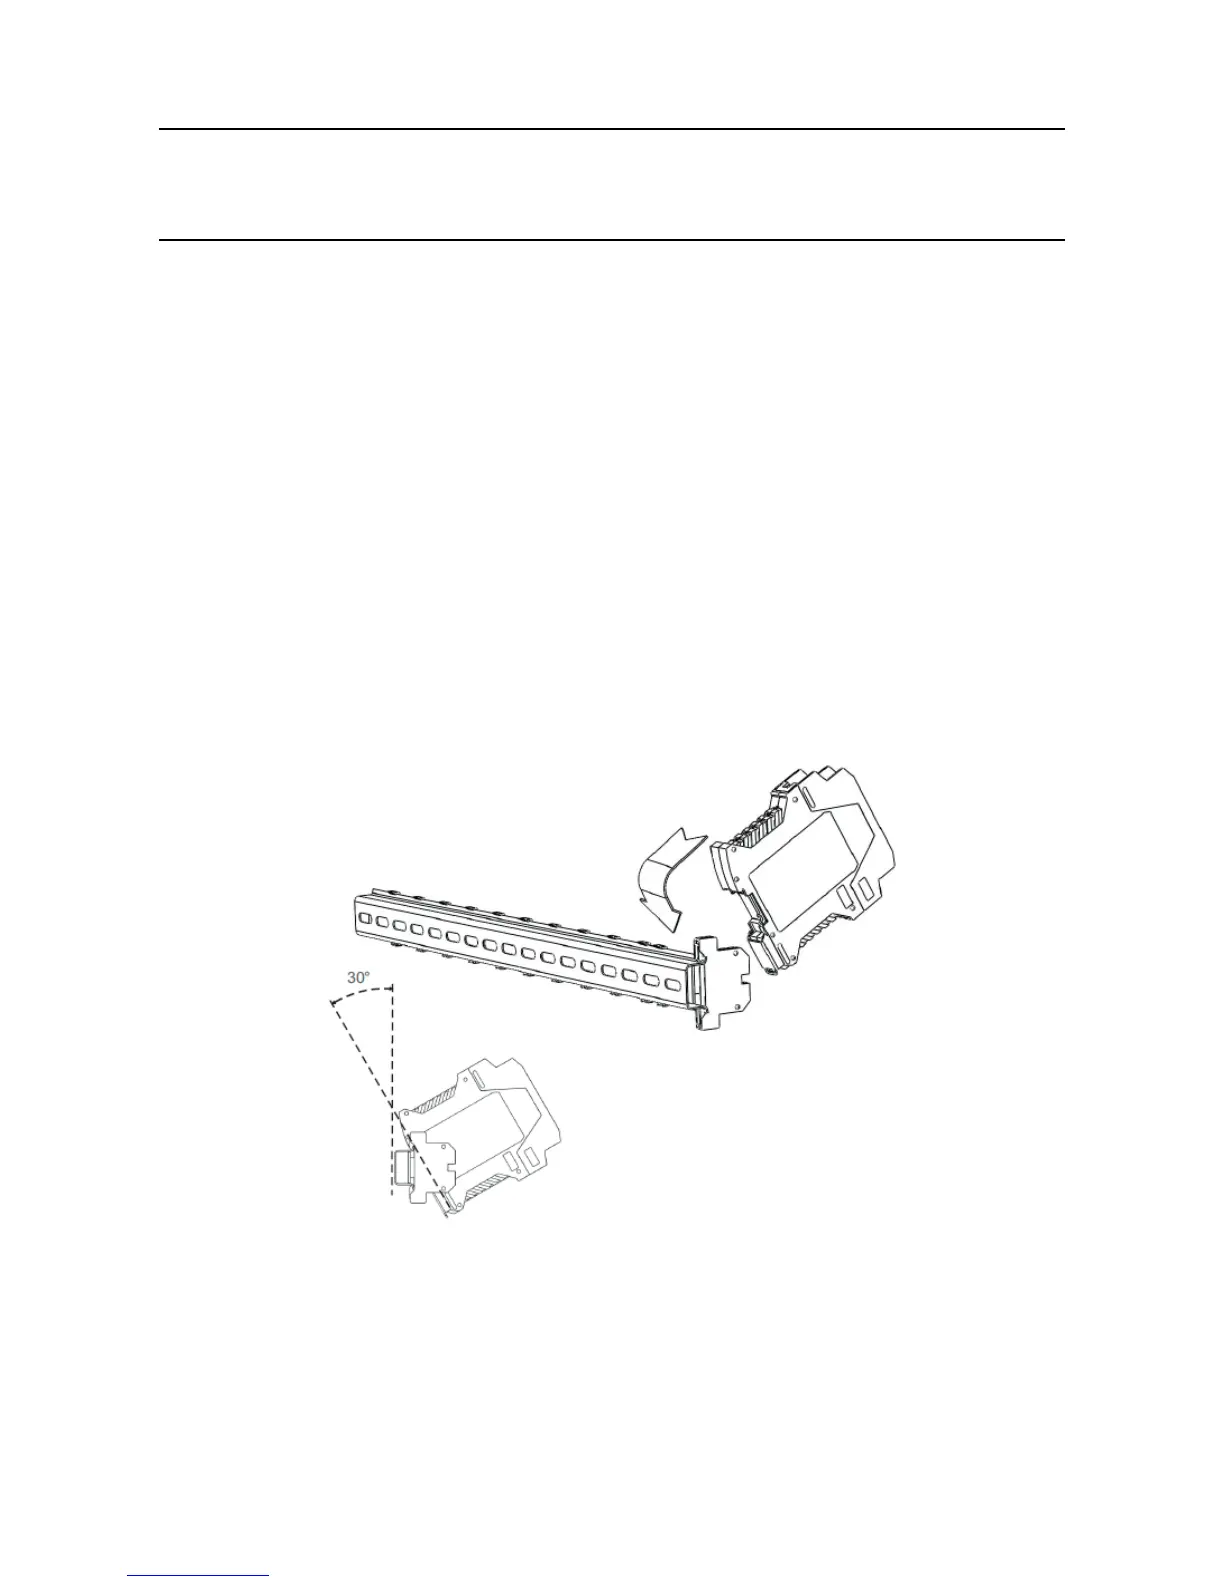
1. Fit a new module of the required type to an empty slot on the Communication / Power Rail:
• Ensure that the module is the correct way up with the label towards you
• Hold the module at an angle with the plastic side (top) closest to the DIN rail
• Hook the plastic side on to the edge of the DIN rail
Figure 8.4 Attaching a module
• Push the bottom of the module into place so that it clips onto the DIN rail.
Caution: Clipping the module to the DIN rail should not require any force. If the module
does not clip easily, check that it is correctly aligned to the connector on the DIN rail.
 Loading...


