MAN0923_Issue 3_04/15 Touchpoint Pro
Operating Instructions
41
3. Mechanical Installation
1. Insert mounting brackets into mounting points. Tighten the M6 bolts to a torque of 6 Nm.
2. Select a suitable mounting position, taking into account the siting considerations above.
3. Mark and drill four holes corresponding to the mounting hole positions.
4. Secure the Battery Box enclosure in place. The mounting holes are 10 mm in diameter. Fixing bolts
should be minimum diameter 8 mm, to a depth of minimum 50 mm.
Caution: It is the installer’s responsibility to select the appropriate xings taking into account the
structure of the mounting surface and the weight of the enclosure.
3.7.3 Touchpoint Pro Battery Box Assembly
Identify all required parts as follows:
• Two batteries - 12 Ah size (small) or 27 Ah size (large)
• Connecting cable and fuse assembly
• Kitoflugs,nuts,boltsandwashers(usedwithlargebatteriesonly)
WARNING
When handling the batteries, take great care not to connect the terminals together, e.g. by a
tool such as a screwdriver.
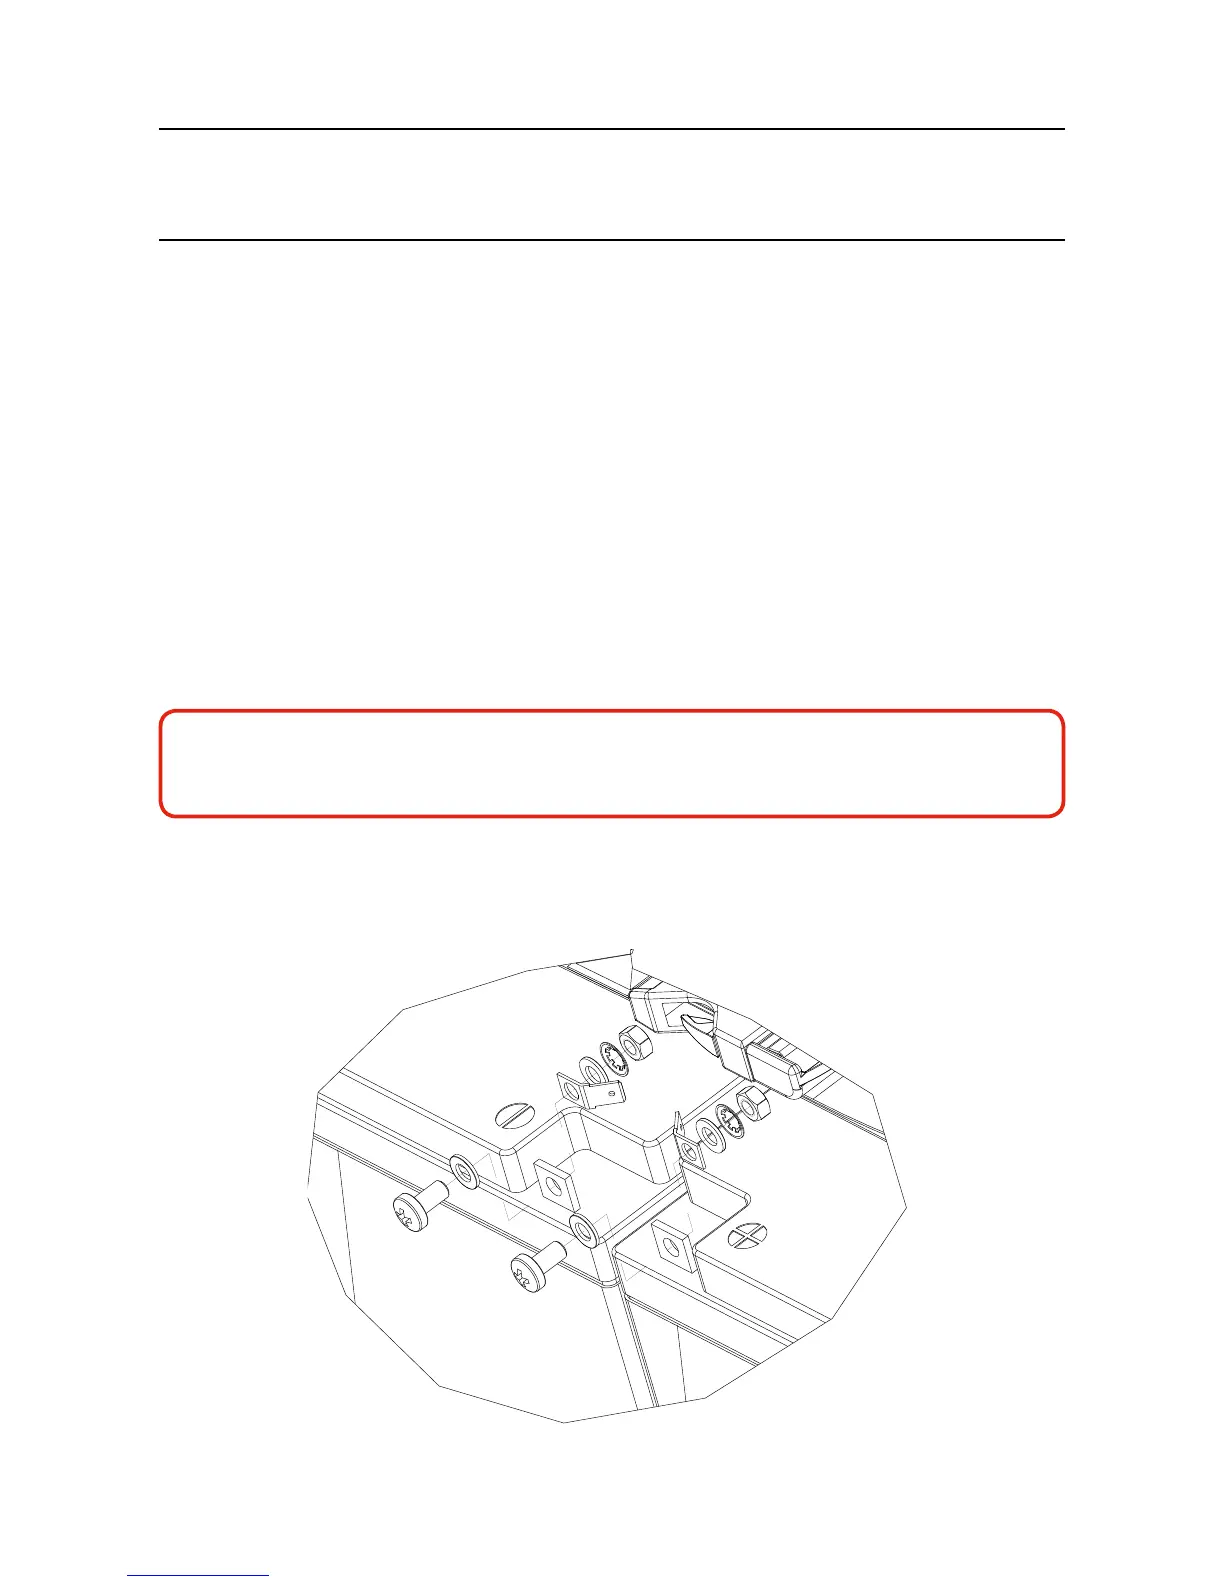
1. Forthelargebatteriesonly,talug(supplied)toeachbatteryterminalusingthexingssupplied.
Thecorrectsequenceforthexingsis–bolt,atwasher,batteryterminal,lug,atwasher,spring
washer, nut, as shown below:
2. Ensure that the securing strap supplied is open and clear of the battery seating surface