Chapter 6: Console Configuration
The Personal Console Builder: Making Fader Assignments
Eclipse User Guide 2.0 223/ 526
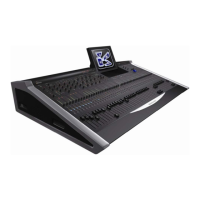
Making Fader Assignments
1. Position the cursor over the assignment box – for
example, to assign an INPUT to Fader 27:
• You can press the SEL button on the Fader strip.
• Then use the up and down arrows on the console
keyboard to select the channel type.
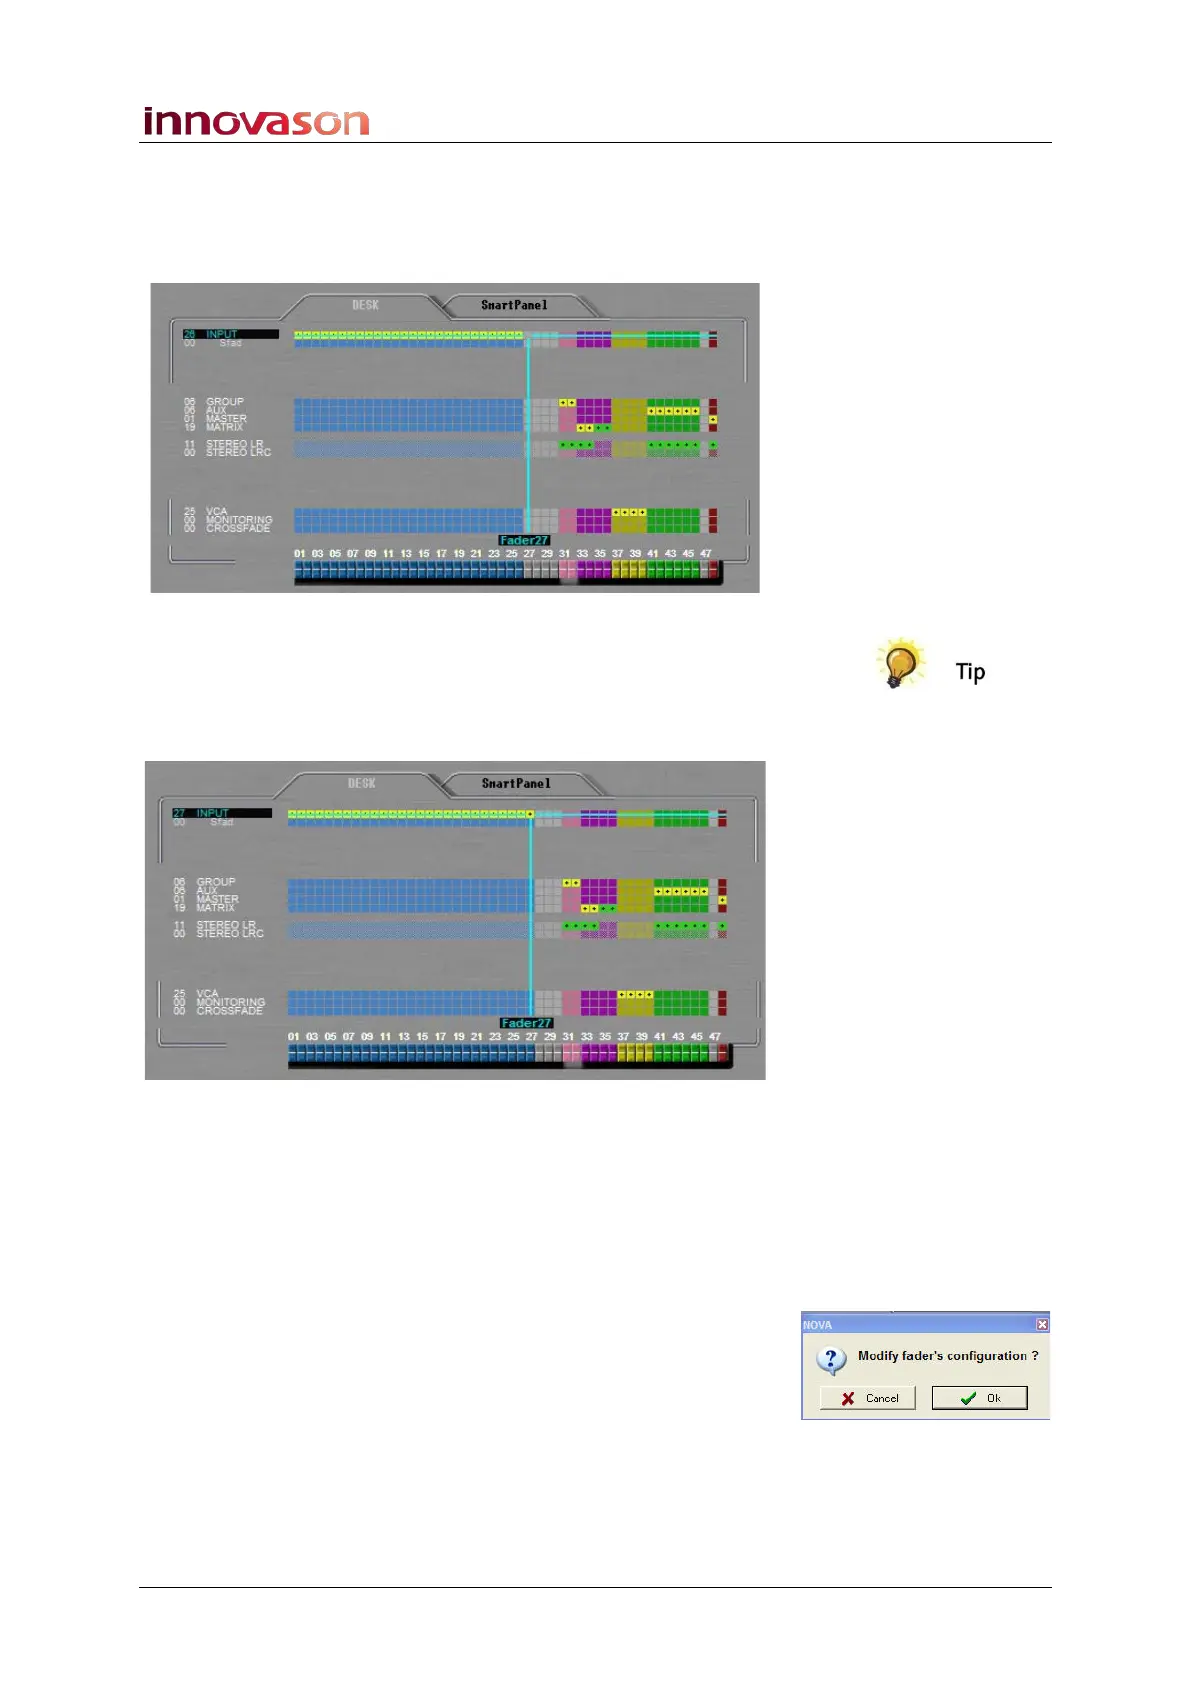
2. Then press the [SPACE bar] on the console keyboard:
3. To remove an existing assignment press the [SPACE
bar] again.
The assignment is removed; this will create an empty Fader
strip on the console surface once the configuration is loaded.
Note that the console does not update when you modify the
PCB display. You must first create your configuration and then
load it to the console as follows:
4. Press OK.
A confirmation pop-up asks you to confirm the load.
5. Confirm by pressing OK again.
The fader configuration is loaded to the console and the PCB
display closes. The configuration will overwrite any existing
fader assignments, so be sure before you confirm!
To explain the different fader types, let’s take some examples.