Chapter 6: Console Configuration
The Patch Output Display
252/ 526 2.0 Eclipse User Guide
6. To patch a stereo bus to multiple destinations, keep the
same fader selected and repeat steps 2 and 3.
Each time you make a patch, you assign the next component
channel: left, right (and centre if the bus is LRC).
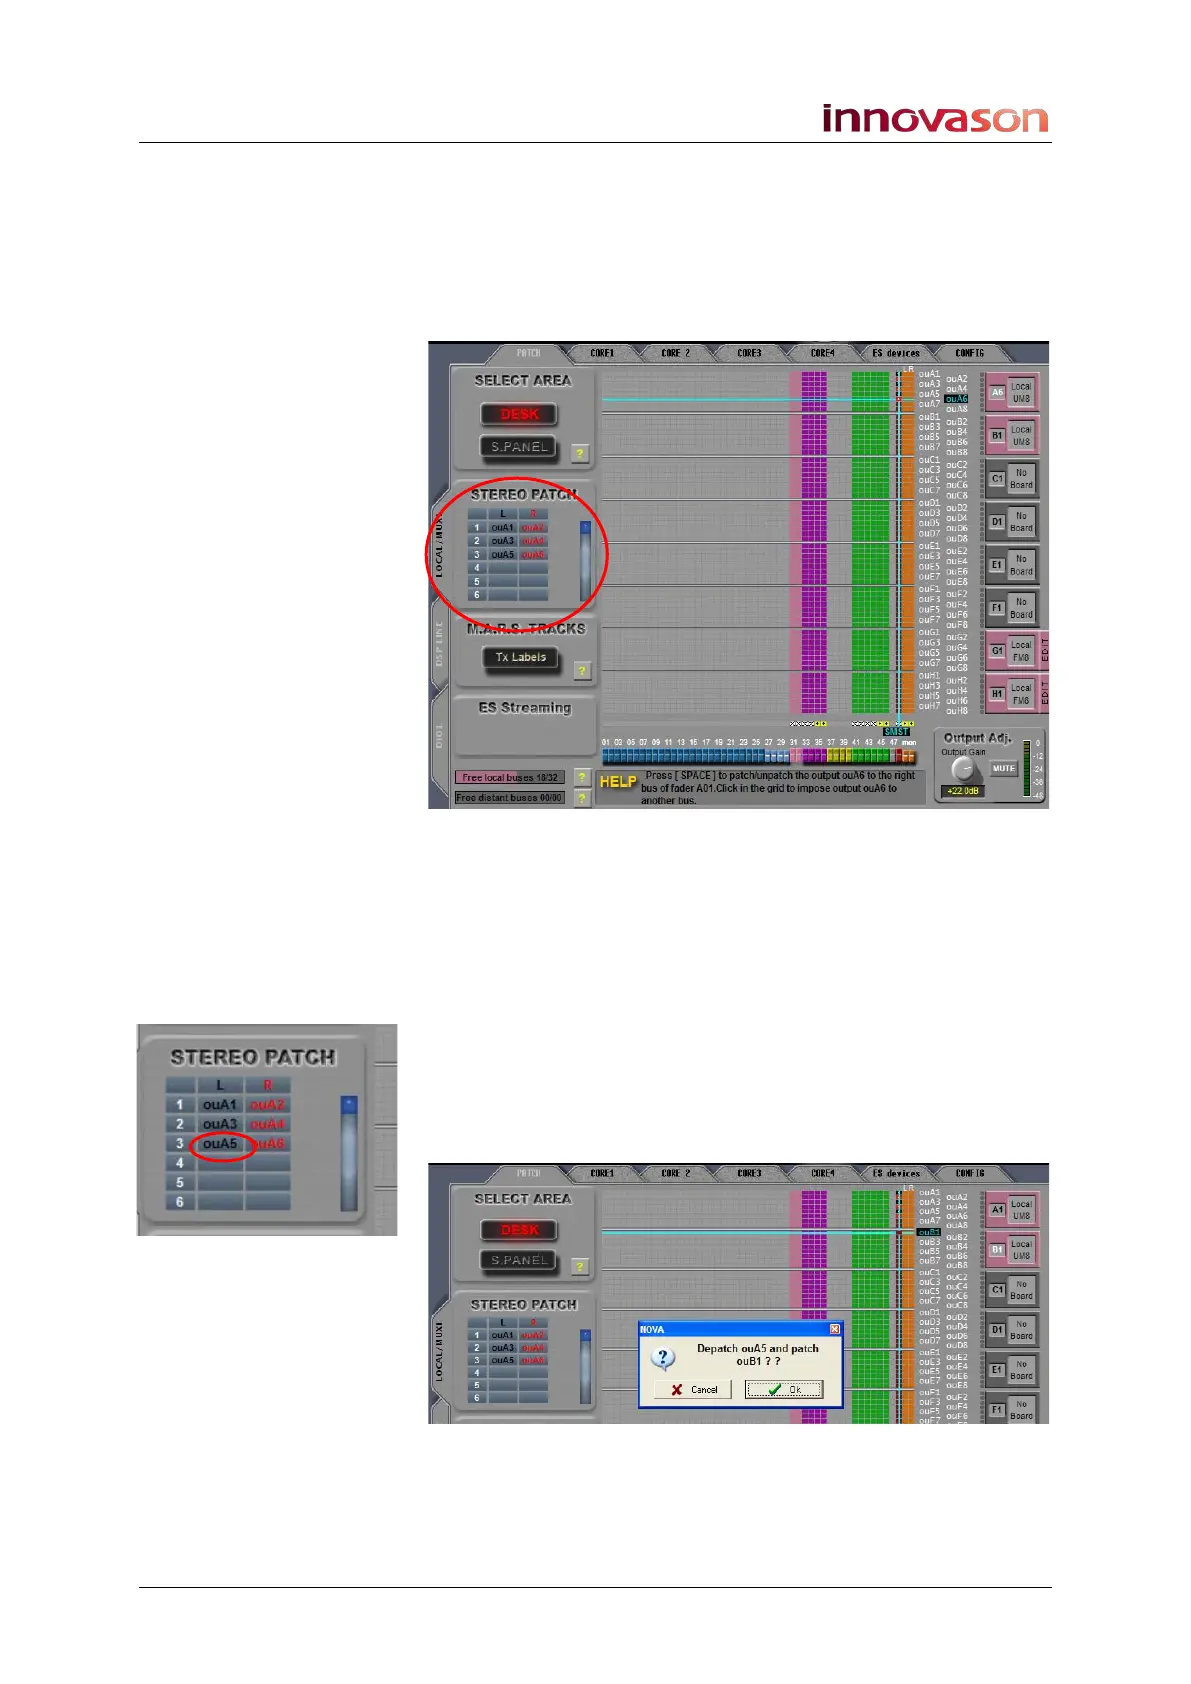
As you patch, notice that the STEREO PATCH area on the left
of the display updates:
This list shows the output Label for each left, right (and centre)
assignment. In our example, we have patched the selected
fader 3 times.
You can use this list to make patches or edit existing ones. This
is particularly useful if you are patching stereo busses to non-
consecutive outputs. For example:
7. Position the cursor over the new destination (e.g. ouB1)
and then click on the STEREO PATCH Label you wish
to update – in our example, click on ouA5 to update the
left side of output pair 3:
A pop-up appears asking you to confirm the operation:
8. Press OK to confirm.
The output patch is updated.