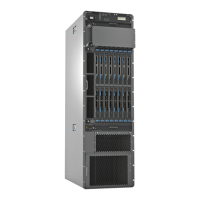
Tools and Parts Required to Remove Components from a PTX5000 Packet Transport
Switch
To remove components from the packet transport switch or the packet transport switch
from a rack, you need the following tools and parts:
•
2.5-mm flat-blade (–) screwdriver, for detaching alarm relay terminal block
•
7/16-in. (11 mm) nut driver
•
Blank panels to cover empty slots
•
Electrostatic bag or antistatic mat, for each component
•
Electrostatic discharge (ESD) grounding wrist strap
•
Flat-blade (–) screwdriver
•
Mechanical lift (for the chassis)
•
Phillips (+) screwdrivers, numbers 1 and 2
•
Rubber safety cap for fiber-optic interfaces and cable
•
Wire cutters
Related
Documentation
Packing the PTX5000 Packet Transport Switch for Shipment on page 277•
• Packing the Packet Transport Switch Components for Shipment on page 278
Packing the PTX5000 Packet Transport Switch for Shipment
To pack the packet transport switch for shipment:
1. Retrieve the shipping crate and packing materials in which the packet transport switch
was originally shipped. If you do not have these materials, contact your Juniper
Networks representative about approved packaging materials.
2. Attach an electrostatic discharge (ESD) grounding strap to your bare wrist, and connect
the strap to one of the ESD points on the chassis.
3. On the console or other management device connected to the master Routing Engine,
enter CLI operational mode. To power off the packet transport switch, see “Powering
Off the PTX5000 Packet Transport Switch” on page 98.
4. Disconnect power from the packet transport switch. For instructions, see the procedure
to disconnect power in“Replacing a PTX5000 PDU” on page 194.
5. Remove the cables that connect to all external devices..
6. Remove all Field Replaceable Units (FRUs) from the packet transport switch.
7. Remove the packet transport switch from the rack. Place the mechanical lift platform
under the packet transport switch, unscrew and remove the mounting screws from
the rack, and move the packet transport switch to the shipping crate.
277Copyright © 2012, Juniper Networks, Inc.
Appendix F: Contacting Customer Support and Returning Packet Transport Switch Hardware

 Loading...