Diagnostic information 2-127
5026
Dead printer service check
A dead printer is a condition where the display is blank, the LED on the operator panel is off, no fans turn, no
motors turn, and the fuser lamp does not come on.
If a 550-sheet option assembly is installed, remove the option and check the base printer for correct operation. If
the base printer operates correctly, replace the 550-sheet option assembly.
Warning: Observe all necessary ESD precautions when removing and handling the system board or any
installed option cards or assemblies. See “Handling ESD-sensitive parts” on page 4-2.
Remove any input and output paper handling options from the printer.
Networking service check
Note: Before starting this service check, print out the network setup page. This page is found under Menu—
Reports—Network Settings. Consult the network administrator to verify that the physical and wireless network
settings displayed on the network settings page for the device are properly configured. If a wireless network is
used, verify that the printer is in range of the host computer or wireless access point, and there is no electronic
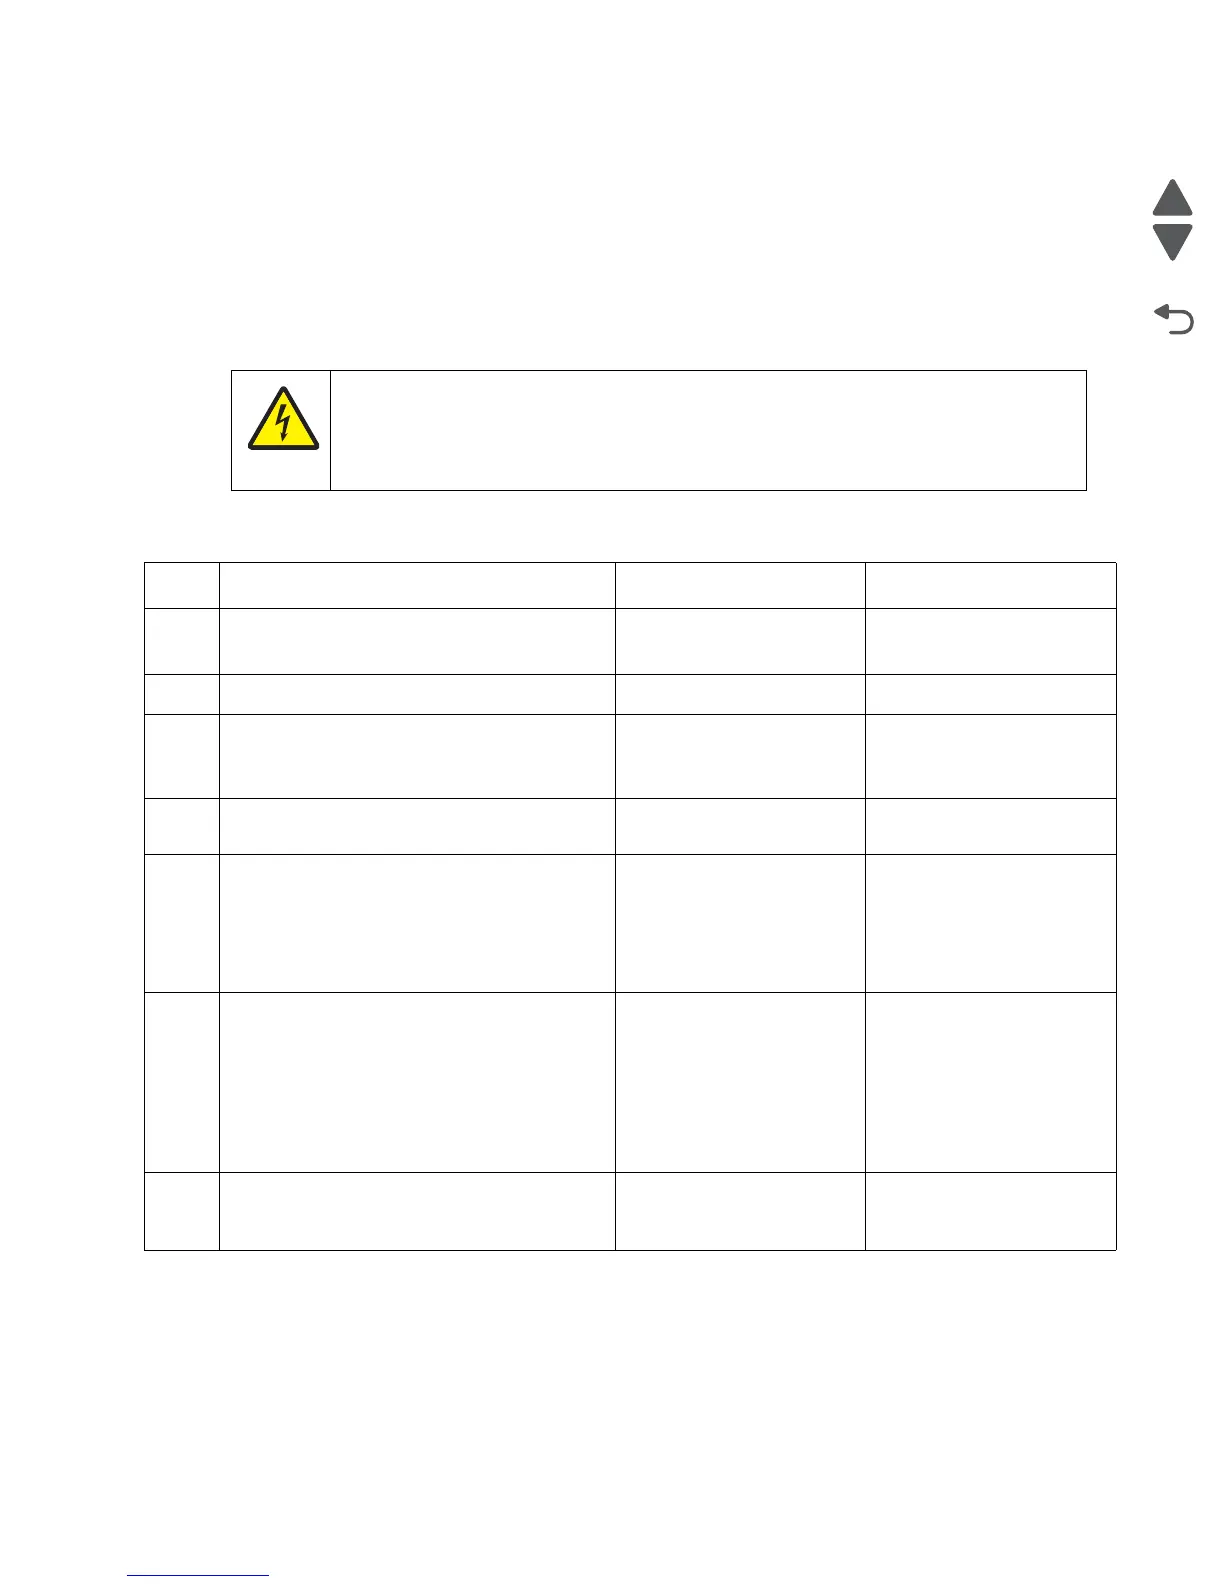
Step Questions / actions Yes No
1 Check the AC line voltage.
Is the line voltage correct?
Go to step 2. Inform the customer.
2
Is the AC line cord damaged? Replace the line cord. Go to step 3.
3
Check the system board for +5 V dc between
JLVPS2 pin 1 and ground.
Is the voltage correct?
Replace the system board.
See “System board
removal” on page 4-163.
Go to step 4.
4
Is the JLVPS2 cable correctly installed at
JLVPS2 on the system board?
Go to step 5. Reseat the JLVPS2 cable.
5
Turn the printer off. Disconnect the JLVPS2
cable from the system board. Turn the printer
on, and then measure the voltage between
the JLVPS2 cable pin 1 and the JLVPS2
pin 14 (black wire).
Does this measure approximately +5 V dc?
Go to step 6. Replace the LVPS. See
“Low-voltage power
supply (LVPS) removal”
on page 4-127.
6
1. Turn the printer off.
2. Disconnect the cables in J5, JCARTS1,
JCARTS2, JDVR1, JFDPCK1, JFUSER1,
JINT1, JOPT1, and JTLBT1.
3. Connect the JLVPS2 cable to the system
board.
4. POR the printer.
Does the printer still appear dead?
Contact your next level of
support.
Go to step 7.
7
1. Connect one cable at a time, and POR the
printer.
2. Is the printer dead?
The part connected to that
cable is faulty. Replace the
failing part.
Connect another cable and
continue with this step.
CAUTION
When you see this symbol, there is a danger from hazardous voltage in the area of the product
where you are working. Unplug the product before you begin, or use caution if the product
must receive power in order to perform the task.