EasyManuals Logo

Lexmark CS748de User Manual

Lexmark CS748de
504 pages
To Next Page IconTo Next Page
To Previous Page IconTo Previous Page
Page #465 background imageLoading...
Page #465 background image
Repair information 4-213
5026
Go Back
Previous
Next
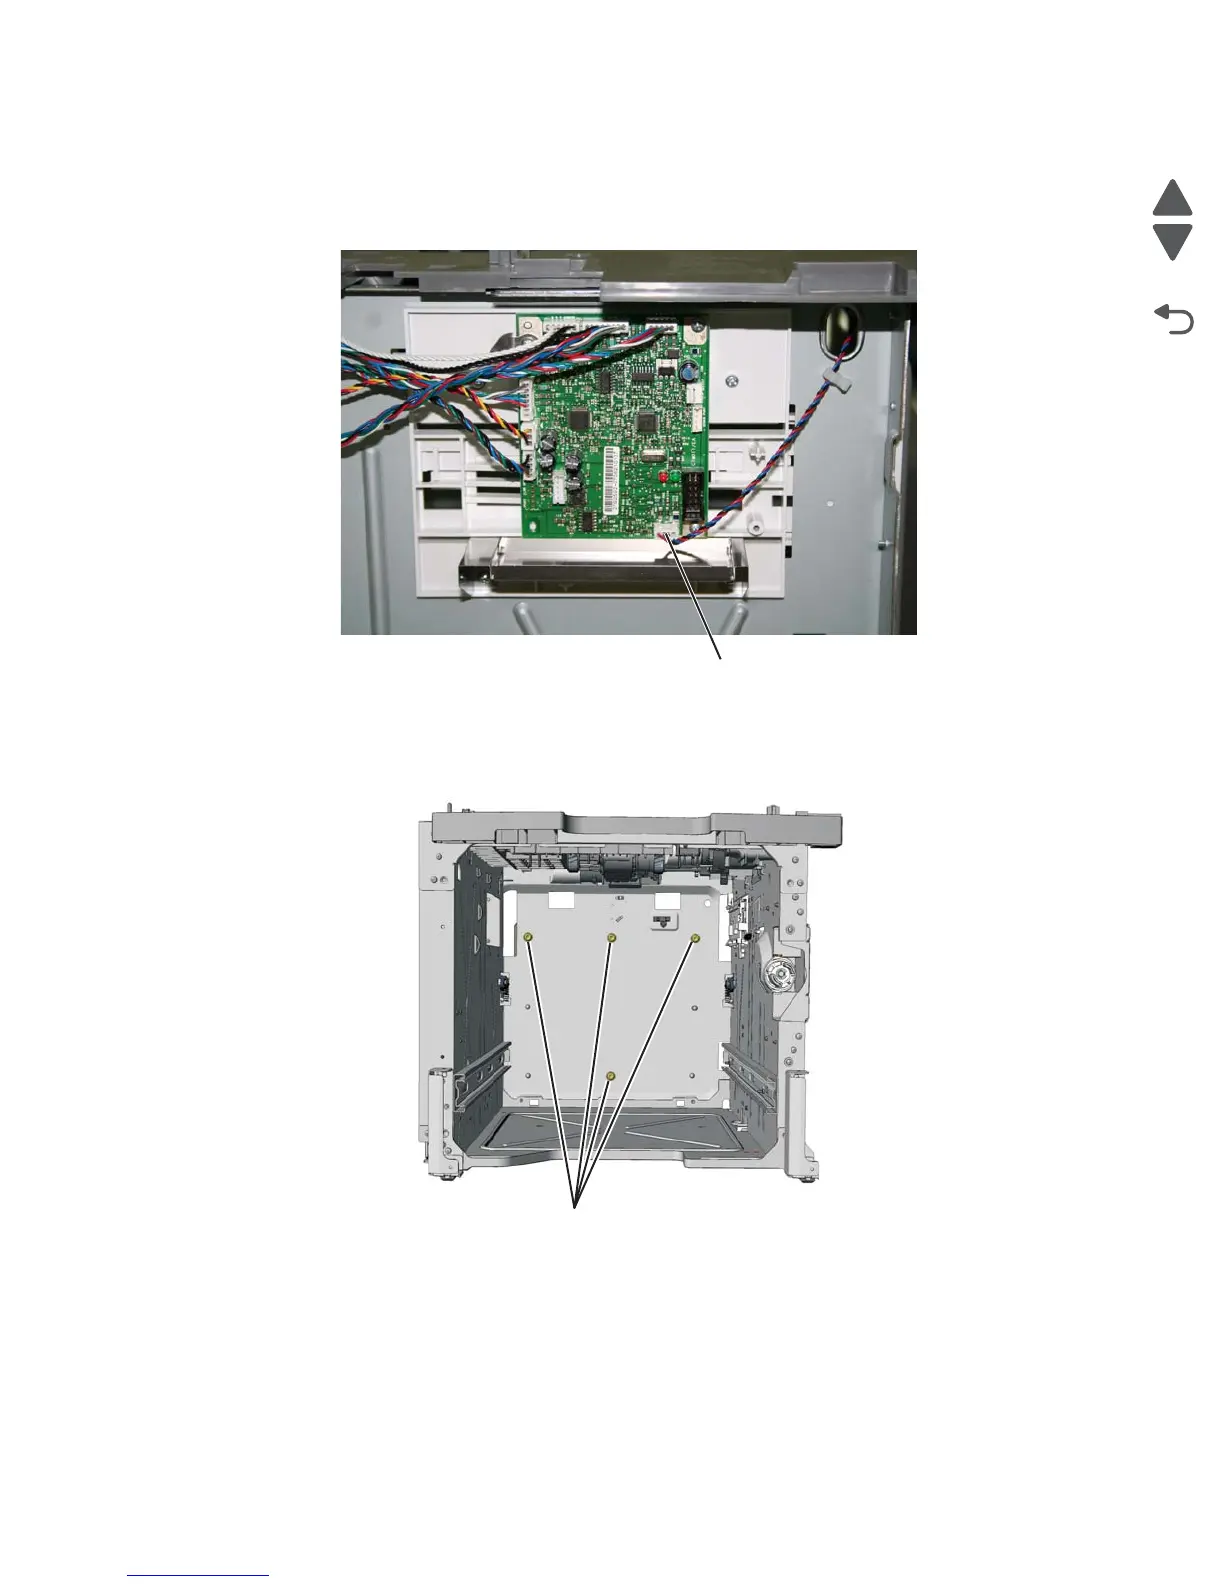
Photointerrupter sensor with cable assembly removal
1. Remove the high-capacity input tray (HCIT) right cover. See “HCIT right cover removal” on page 4-204.
2. Disconnect the photo interrupter sensor cable connector (A) from the HCIT controller board.
3. Turn the drawer rear side down, and use 4.0 mm wrench to remove the four Allen screws (B) securing the
counterweight to the rear frame.
Warning: Do not remove the screws without turning the drawer rear side down first. The counterweight is
very heavy; it might fall and cause damage.
A
B

Table of Contents

Other manuals for Lexmark CS748de

Questions and Answers:

Question and Answer IconNeed help?

Do you have a question about the Lexmark CS748de and is the answer not in the manual?

Lexmark CS748de Specifications

General IconGeneral
BrandLexmark
ModelCS748de
CategoryPrinter
LanguageEnglish

Related product manuals