Repair information 4-29
5026
Cover removals
Front access cover assembly removal
See Front access door cover assembly for the part number for the models you need on page 7-3.
1. Remove the paper tray.
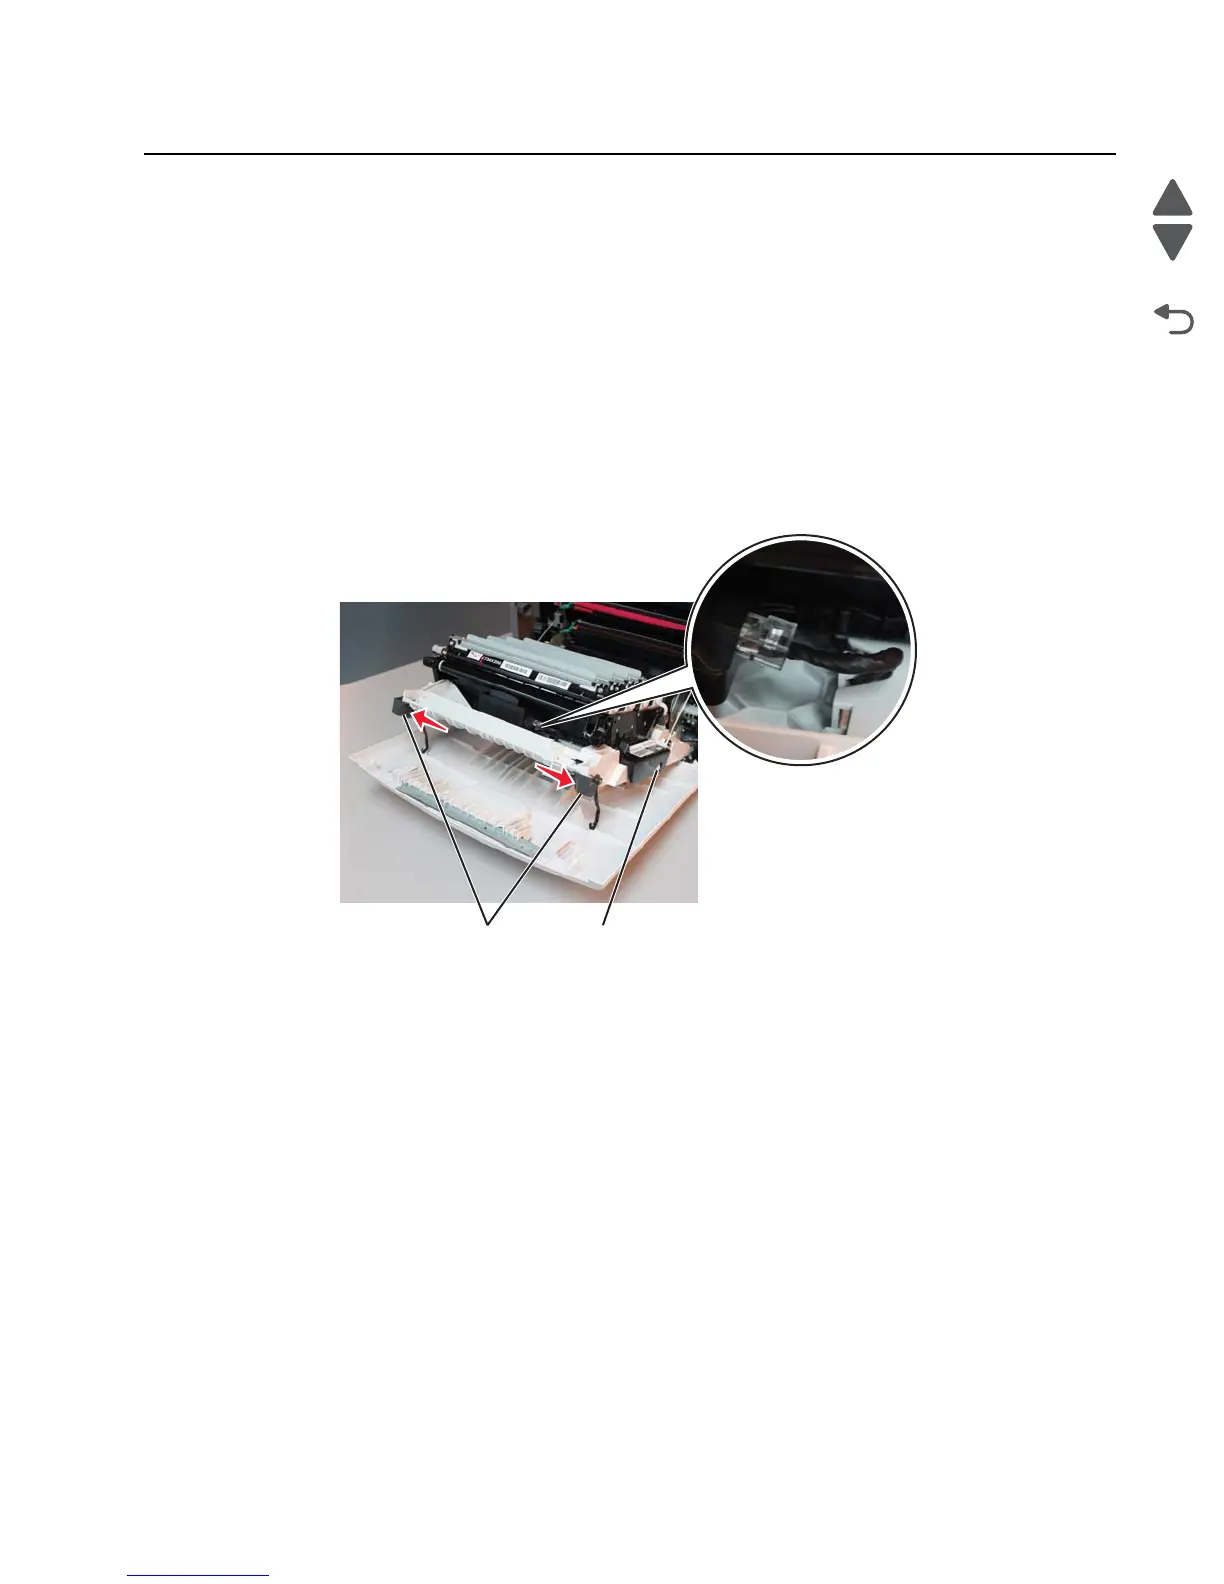
2. Disconnect the transfer module cable (A).
3. Press the two tabs (B) to release the front access door cover assembly.
4. Press the two tabs (C) on either side of the transfer module, and lift out the transfer module.
Note: Leave the photoconductor units on the transport belt when removing.
Warning: To avoid damaging the photoconductor drum, hold the photoconductor units by their handle and
place the photoconductor units on a clean surface. Never expose the photoconductor units to light for a
prolonged period of time. See “Handing the photoconductor unit” on page 4-2 for additional
information.
 Loading...