Repair information 4-51
5026
Right cover removal
See “Right cover” on page 7-3 for the part number.
1. Remove the power cord from the printer.
2. Remove the paper tray.
3. Remove the rear upper cover. See “Rear upper cover removal” on page 4-50.
4. Open the front cover.
5. Open the top access cover.
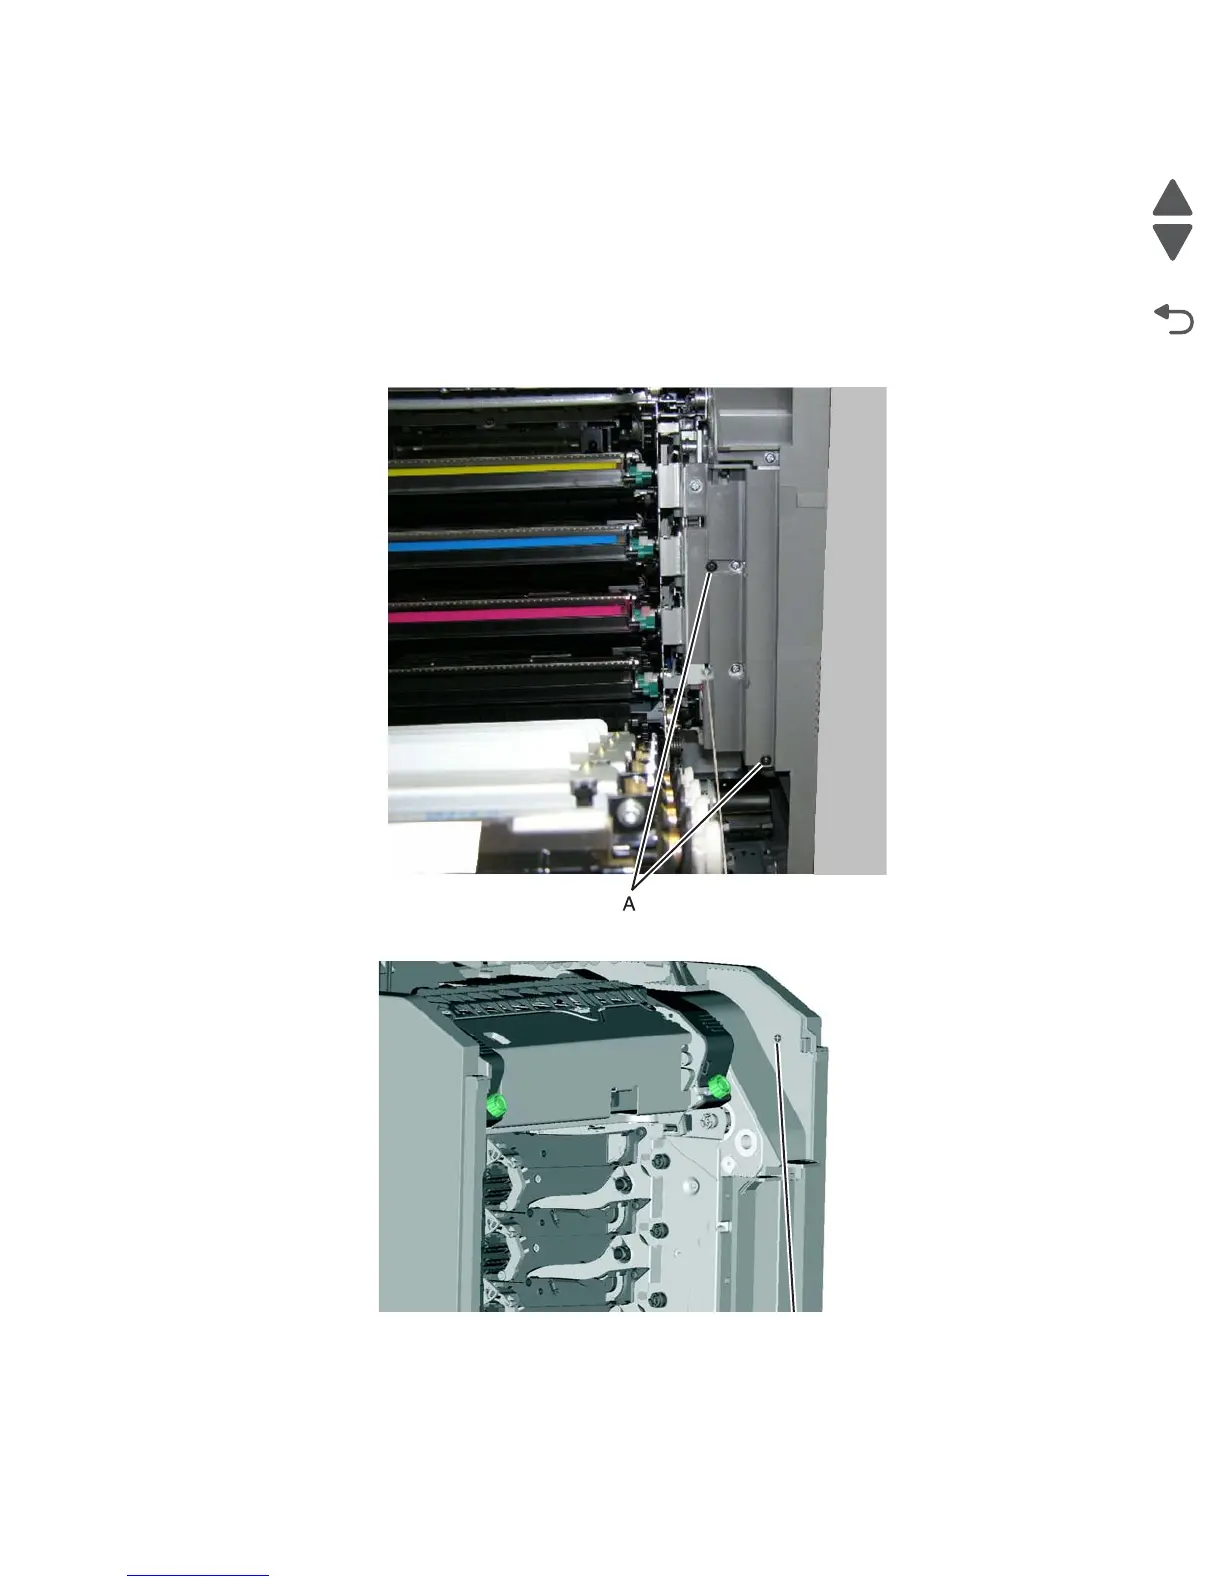
6. Remove the two screws (A) on the inside front.
7. Remove the plastic screw (B) on the inside front.