4-14 Service Manual
5026
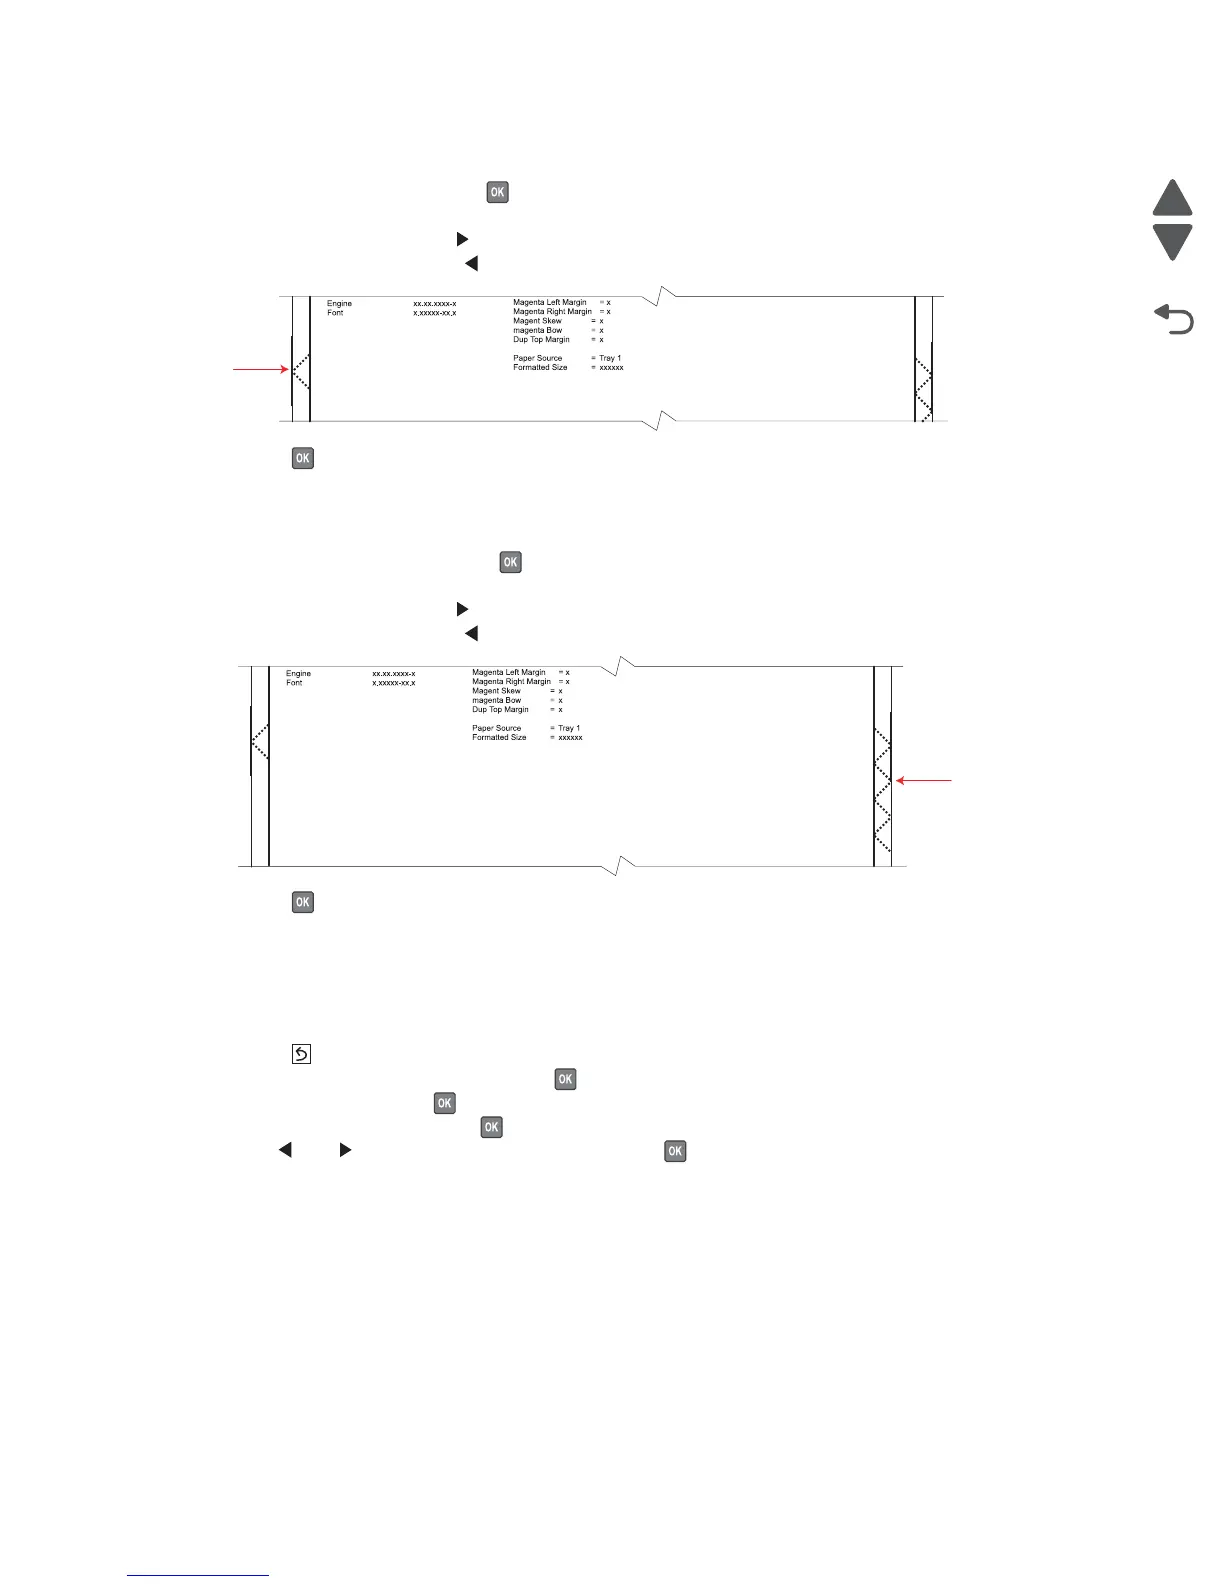
Left Margin
1. Select Left Margin, and press .
2. Adjust the left margin until the points of the left alignment marks touch the edge of the page.
• Increasing the value ( ) moves the left alignment marks away from the edge of the page.
• Decreasing the value ( ) moves the left alignment marks toward the edge of the page.
3. Press to save the value.
4. Print the Quick Test page, and check the left alignment marks each time until you are satisfied.
Right Margin
1. Select Right Margin, and press .
2. Adjust the right margin until the points of the left alignment marks touch the edge of the page.
• Increasing the value ( ) moves the right alignment marks away from the edge of the page.
• Decreasing the value ( ) moves the right alignment marks toward the edge of the page.
3. Press to save the value.
4. Print the Quick Test page, and check the results. Repeat if necessary.
5. When the registration is complete, proceed to the color alignment.
Alignment (cyan, yellow, and magenta)
1.
Press until you reach the top menu.
2. Select ALIGNMENT MENU, and press .
3. Select Cyan, and press .
4. Select Top Margin, and press .
5. Use and to set Top Margin to zero, and press to save the value.
6. Do the same for Left Margin, Right Margin, Bottom Margin, Skew, and Bow.
It is important to set all the values to zero before starting.