2-50 Service Manual
5026
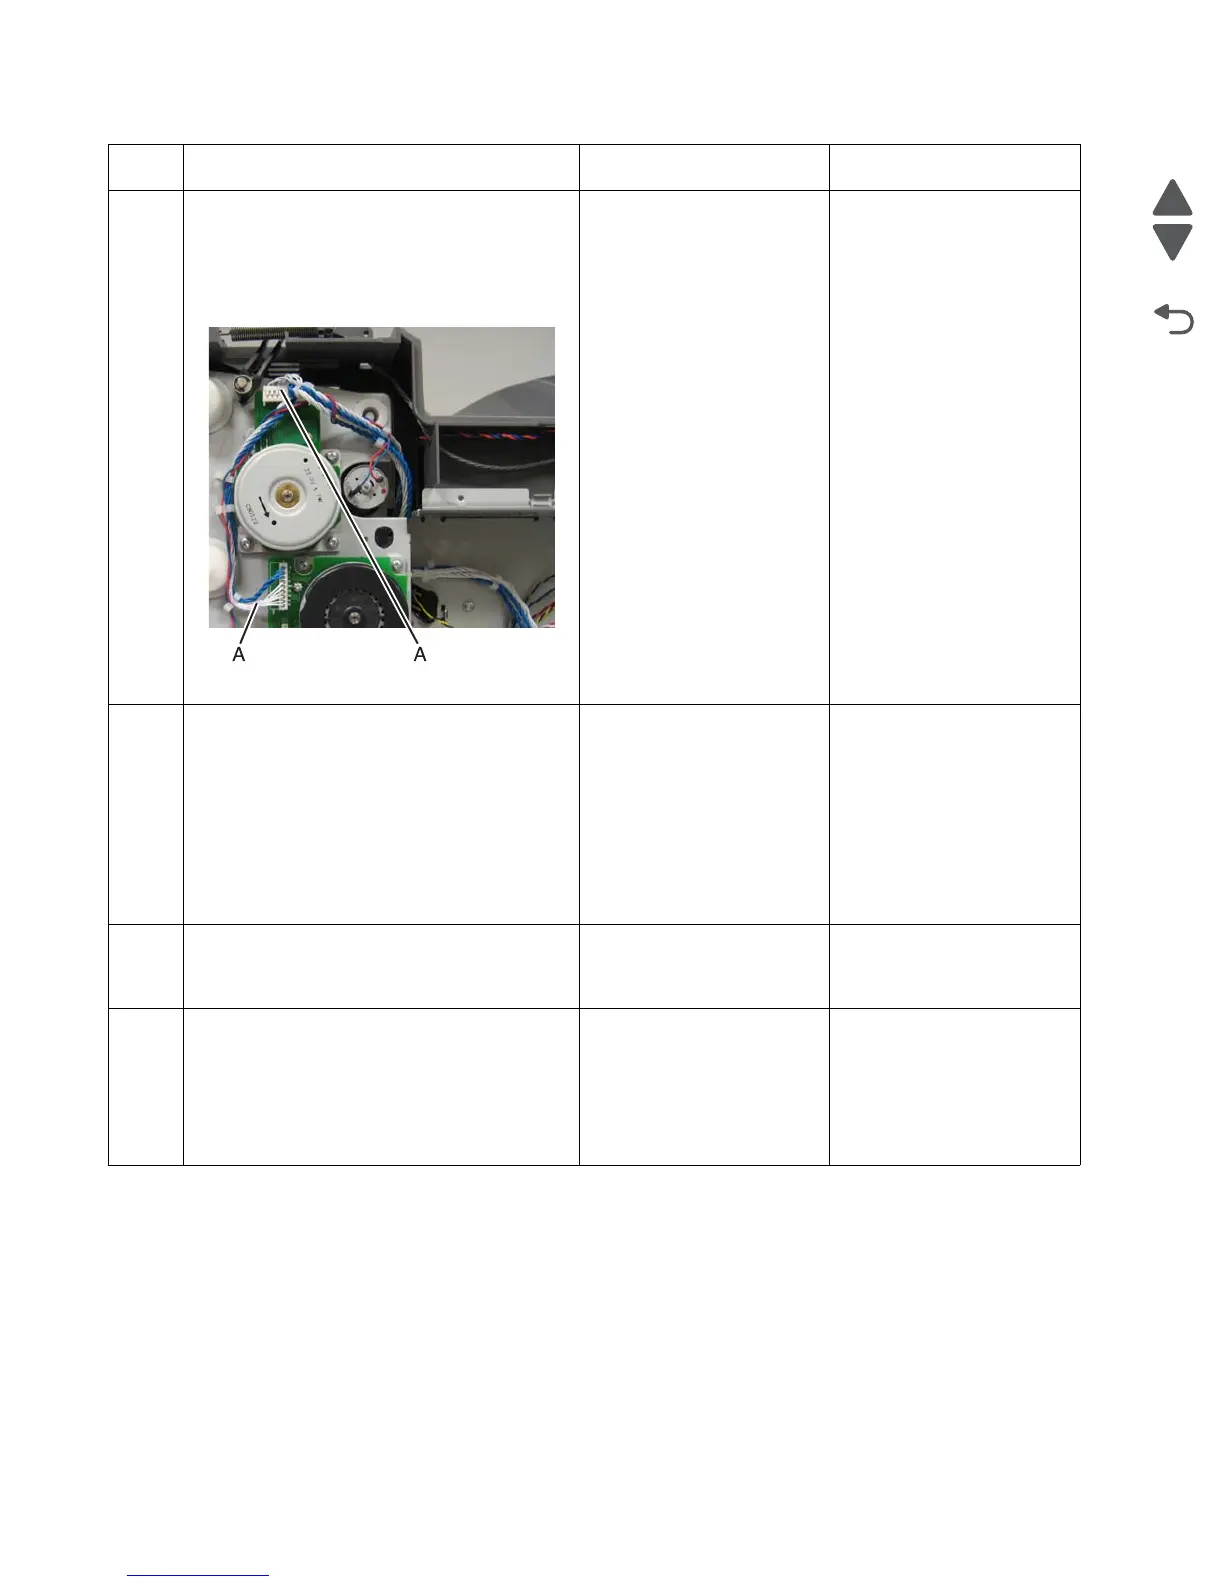
2
1. Remove the right cover. See “Right
cover removal” on page 4-51.
2. Check the cartridge motor 1/fuser motor
cable for proper connection to the EP
drive assembly (A), for pinch points for the
cable, and for cable or connector damage.
Is either cable damaged?
Go to step 3. Go to step 4.
3
Replace the cartridge motor1/fuser motor
cable. See “Cartridge motor 1/fuser cable
removal” on page 4-74.
Note: Make sure to check the replacement
cable first before installation, leaving the
original cable in place. Make sure to verify if
the new cable is working properly. If new
cable does not correct problem, do not install
it.
Did the error clear?
Problem resolved. Go to step 4.
4
Measure the continuity across all of the fuses
on the system board.
Are any of the fuses blown?
Replace the system board.
See “System board
removal” on page 4-163.
Go to step 5.
5
1. Plug the cartridge motor1/fuser motor
cable to a new EP drive assembly.
2. Bring the printer up in Diagnostics Menu
(Turn off the printer, press and hold
buttons 3 and 6, then turn on the printer).
3. Navigate to MOTOR TESTS > Tray 1.
Did the error clear?
Replace EP drive
assembly. See
“Electrophotographic
(EP) drive assembly
removal” on page 4-98.
replace the system board.
See “System board
removal” on page 4-163.
Step Questions / actions Yes No