Create a stamp
Introduction
In the custom preset section of the 'Copy job defaults' in Océ Express WebTools, you
can enable the stamp functionality. Under the 'Stamping' tab you can create your own
predefined stamp.
Note:
For more information, on how to enable a stamp, see ‘Set the copy presets’ on page 142.
Create a stamp
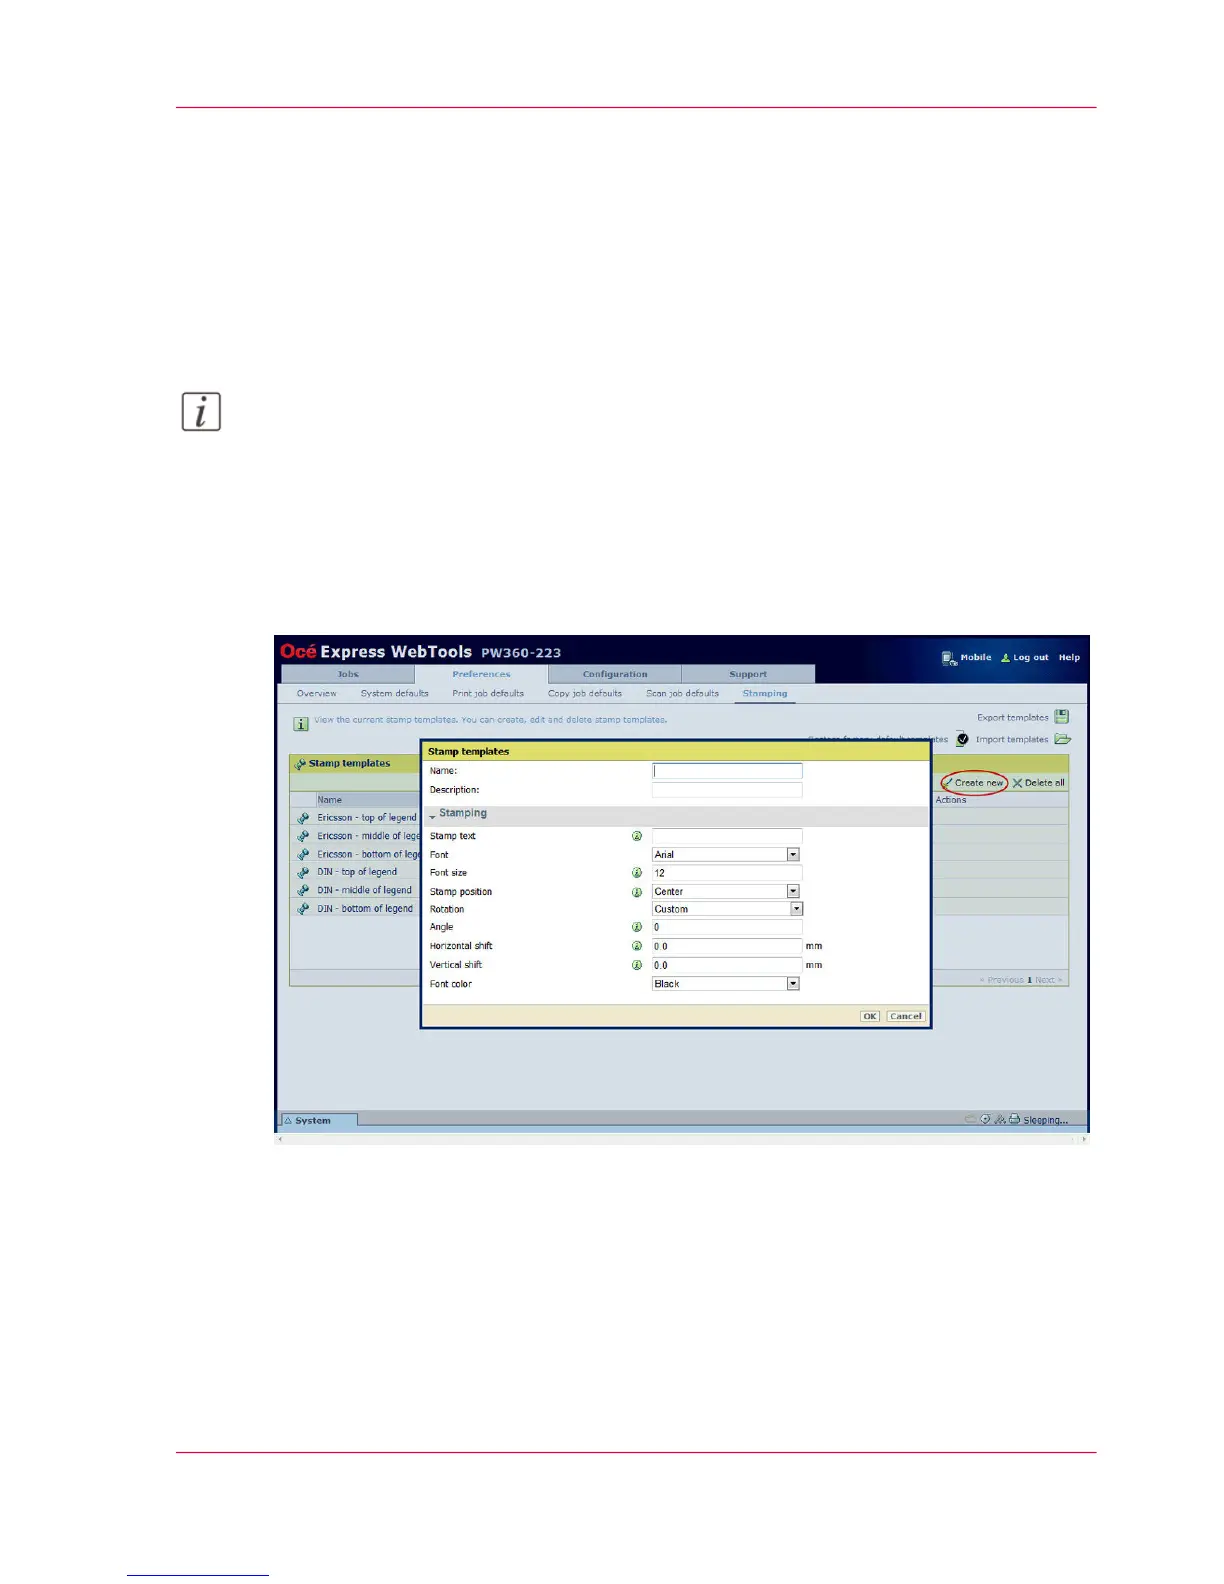
Open 'Preferences' - 'Stamping' tab:
1.
Click on 'Create new' in the upper right-hand corner.
2.
Enter a 'Name' recognizable for the user.
3.
Enter a 'Description' of the stamp.
4.
Enter the 'Stamp text' that will appear on the stamp. If you insert text, also choose the
'Font' and the 'Font size'.
5.
Choose the "Position" of the stamp on the original.
6.
Choose the 'Rotation' and the 'Rotation' 'Rotation angle', if you want to turn the stamp
on the original.
Chapter 3 - Define your Workflow with Océ Express WebTools 151
Create a stamp