Use the Smart Inbox to send a print job
Introduction
If you have already added a job to the Smart Inbox in Océ Express WebTools, you can
print this job via the Smart Inbox.
Note:
For more information on how to create a Smart Inbox, see ‘Create and open a Smart Inbox
for print jobs’ on page 117 and ‘Create and open a Smart Inbox for scan jobs’ on page 119.
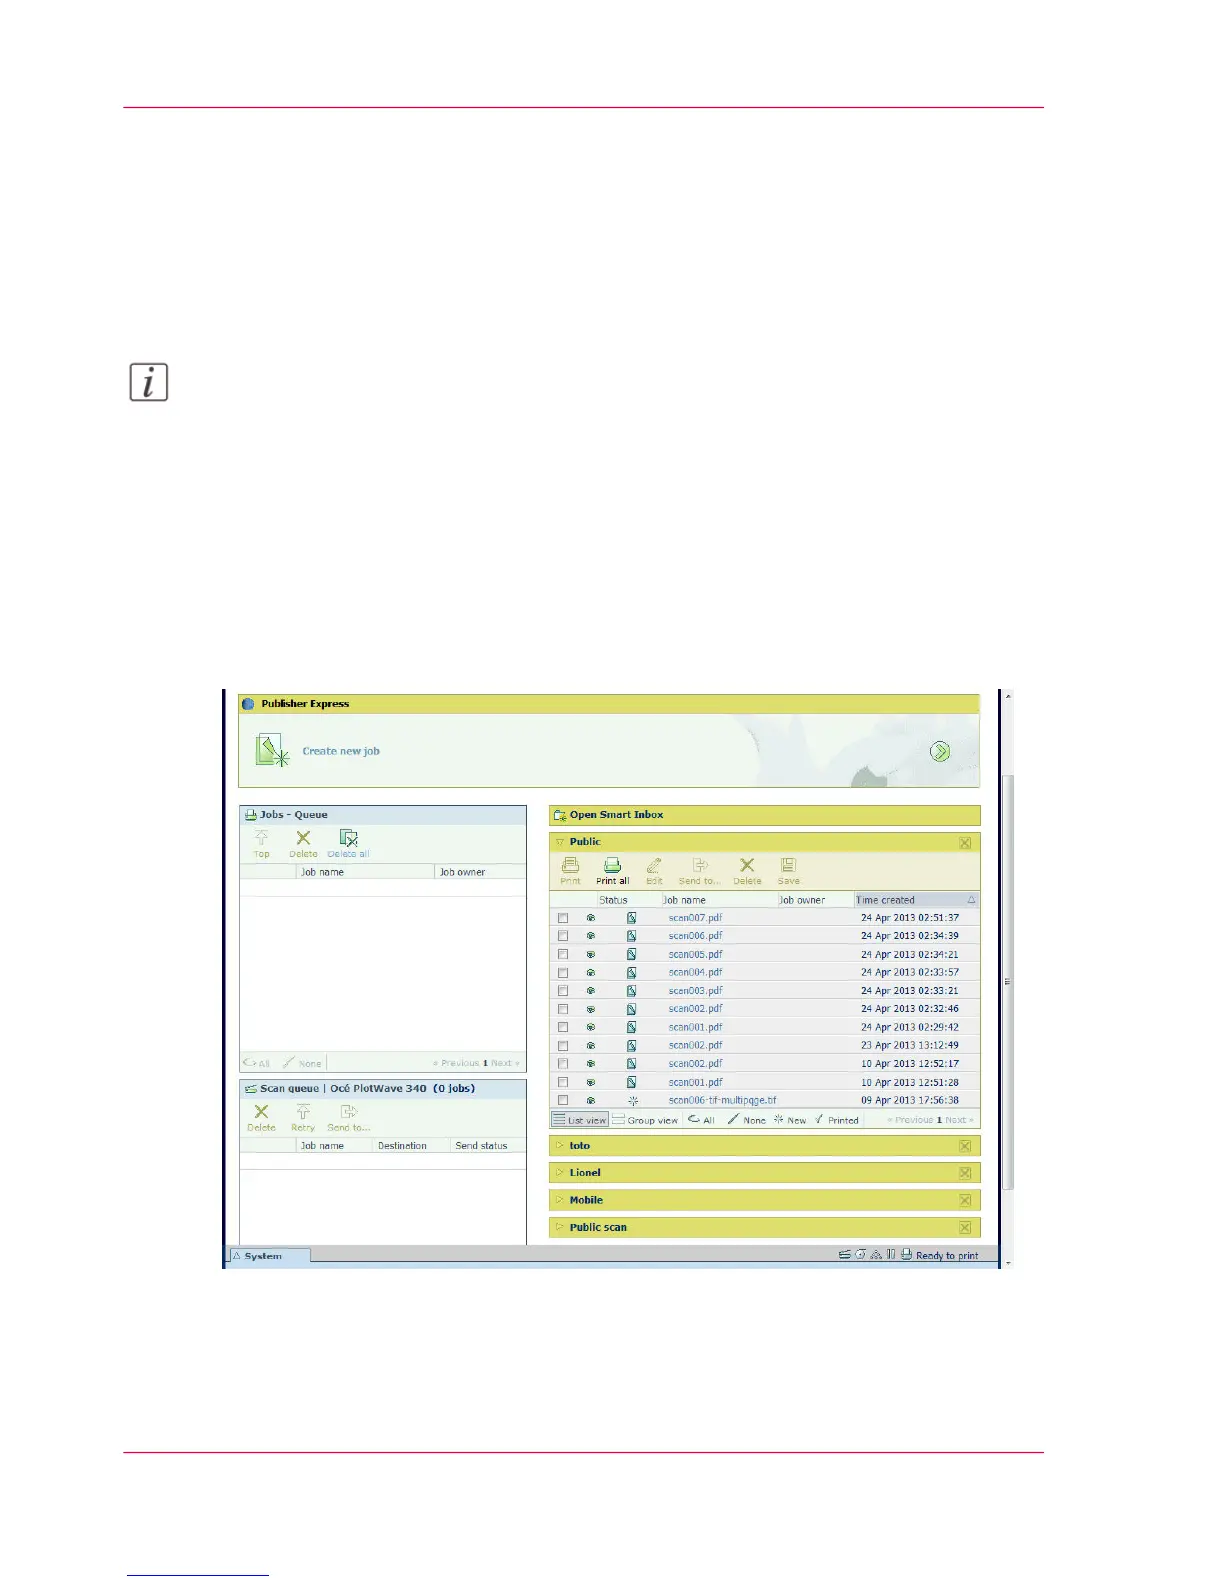
How to print a job from the Smart Inbox
In Océ Express WebTools:
1.
Select the 'Jobs' tab.
2.
Click on "Open Smart Inbox".
3.
Click on the white field and select the correct Smart Inbox.
4.
Select the job and click 'Print'. The job is copied into the queue.
Chapter 4 - Use the Printing System196
Use the Smart Inbox to send a print job