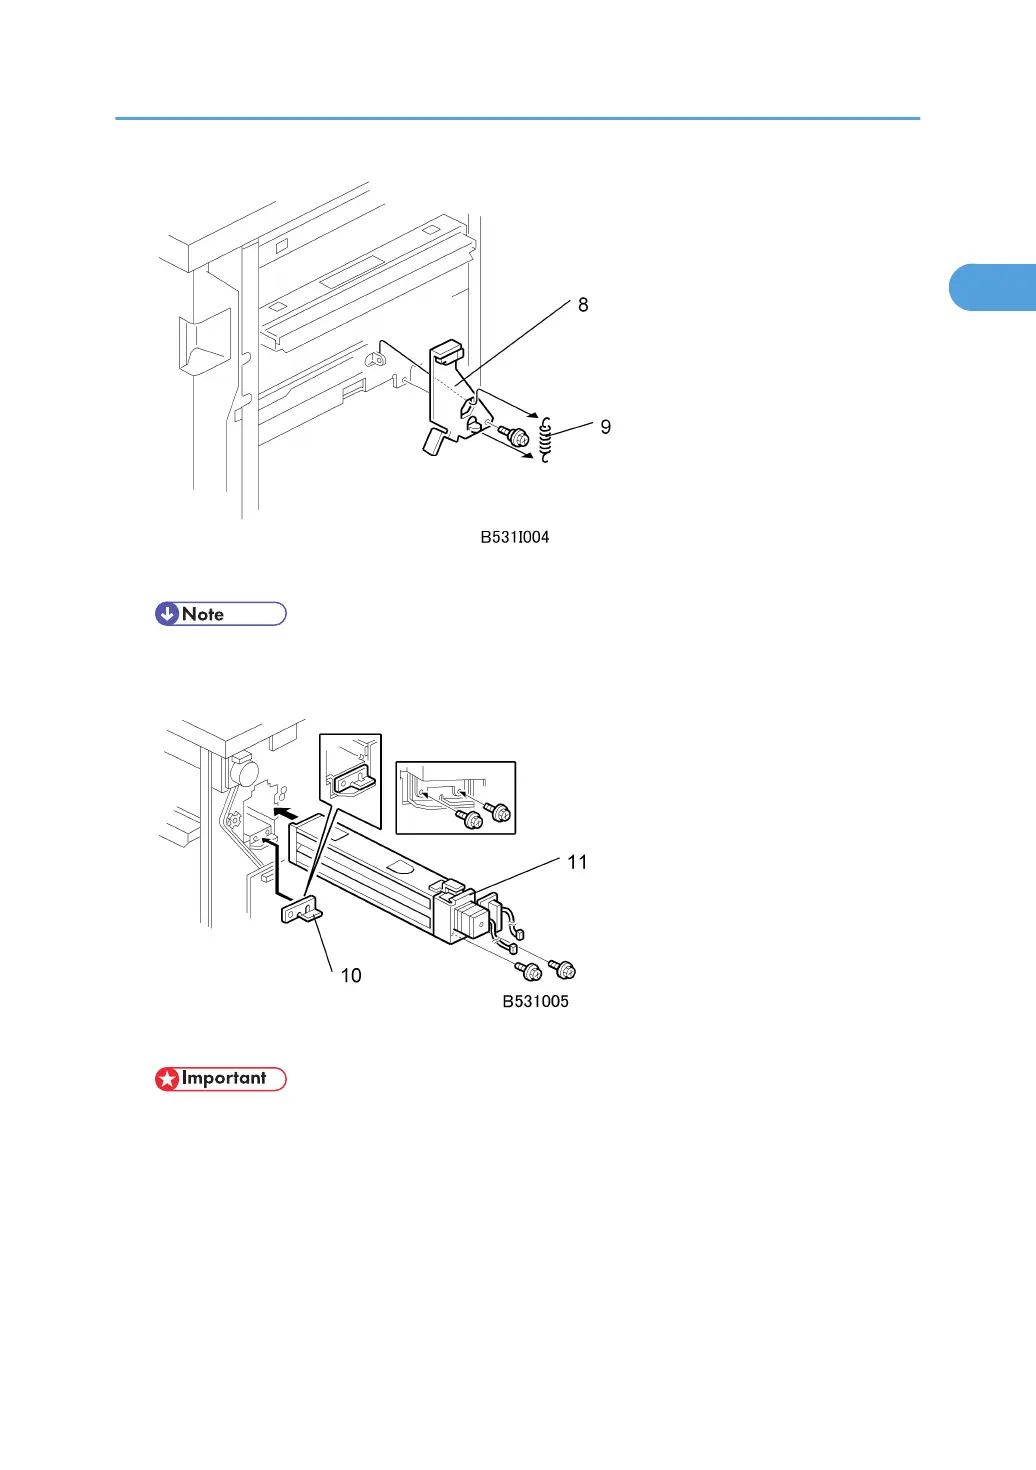
8. Install the sensor arm [8] ( x 1, small step screw (M3 x 4).
• Make sure that the sensor arm swings freely on the step screw.
9. Attach the spring [9].
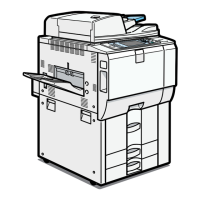
10. At the rear, position the 2 mm spacer [10] and attach the punch unit [11] ( x 2, M4 x 10).
• At the hole just above the lock lever, use one of the screws from the paper guide removed above
to fasten the remaining two spacers to the frame. These extra spacers are used to adjust the
horizontal position of the punch holes.
Punch Unit (B531/A812)
75