2.13
Date Code 20150130 Instruction Manual SEL-787 Relay
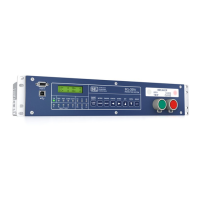
Installation
I/O Configuration
Perform the following steps to replace the existing CPU board with a new
board:
Step 1. Turn off the power to the relay.
Step 2. Use a ground strap between yourself and the relay.
Step 3. Disconnect the terminal blocks and CT/PT wires.
Step 4. Remove the rear panel.
Step 5. Remove the main board from its slot and insert the new board.
Step 6. Attach the rear panel (new if applicable) and reconnect the
terminal blocks and CT/PT wires.
Step 7. Apply new side stickers to the relay.
Step 8. Turn on the relay and log in via the terminal emulation
software.
Step 9. Issue the STA command and accept the new configuration.
Step 10. From Access Level 2, type CAL to enter the CAL level.
Do not modify any settings other than those listed in this
procedure.
The CAL level default password is CLARKE.
Step 11. From the CAL level, issue the SET C command.
Step 12. Enter the serial number and part number to the appropriate
values, then type END and save the settings.
Step 13. Issue the STA C command to reboot the relay.
Step 14. Issue the STA command to verify that the serial number and
part number of your relay are correct.
Slot A Power Supply Card
If replacing a power supply card, change the part number accordingly, using
the PARTNO command from the 2AC level. Install new side stickers on the
side of the relay.
Analog Input (4 AI/
4 AO Card) Voltage/
Current Jumper
Selection
Figure 2.3 shows the circuit board of an analog I/O board. Jumper x (x =5–8)
determines the nature of each channel. For a current channel, insert Jumper x
in position 1–2; for a voltage channel, insert Jumper x in position 2–3.
Figure 2.3 Circuit Board of Analog I/O Board, Showing Jumper Selection
Analog Output (4 AI/
4 AO Card) Voltage/
Current Jumper
Selection
Figure 2.4 shows the locations of JMP1 through JMP4 on an analog output
board. You can select each of the four analog output channels as either a
current analog output or a voltage analog output.
JMPX
213 213
JMPX
Position 2 – 3 = V (voltage) mode
Where "JMPX" is the jumper for AI channel "X"
Position 1 – 2 = I (current) mode