2.16
SEL-787 Relay Instruction Manual Date Code 20150130
Installation
I/O Configuration
the relay to SELBOOT, place the jumper in Position C, as shown in Figure 2.7
(SEL
BOOT Forced). After the relay is forced to SELBOOT, you can only
communicate with it via the front-panel port.
To gain access to Level 1 and Level 2 command levels without passwords,
position the jumper in position A, as shown in Figure 2.7 (Password
Bypassed). Although you gain access to Level 2 without a password, the alarm
contact still closes momentarily when accessing Level 2. See Table 2.12 for
the functions of the three sets of pins and their jumper default positions.
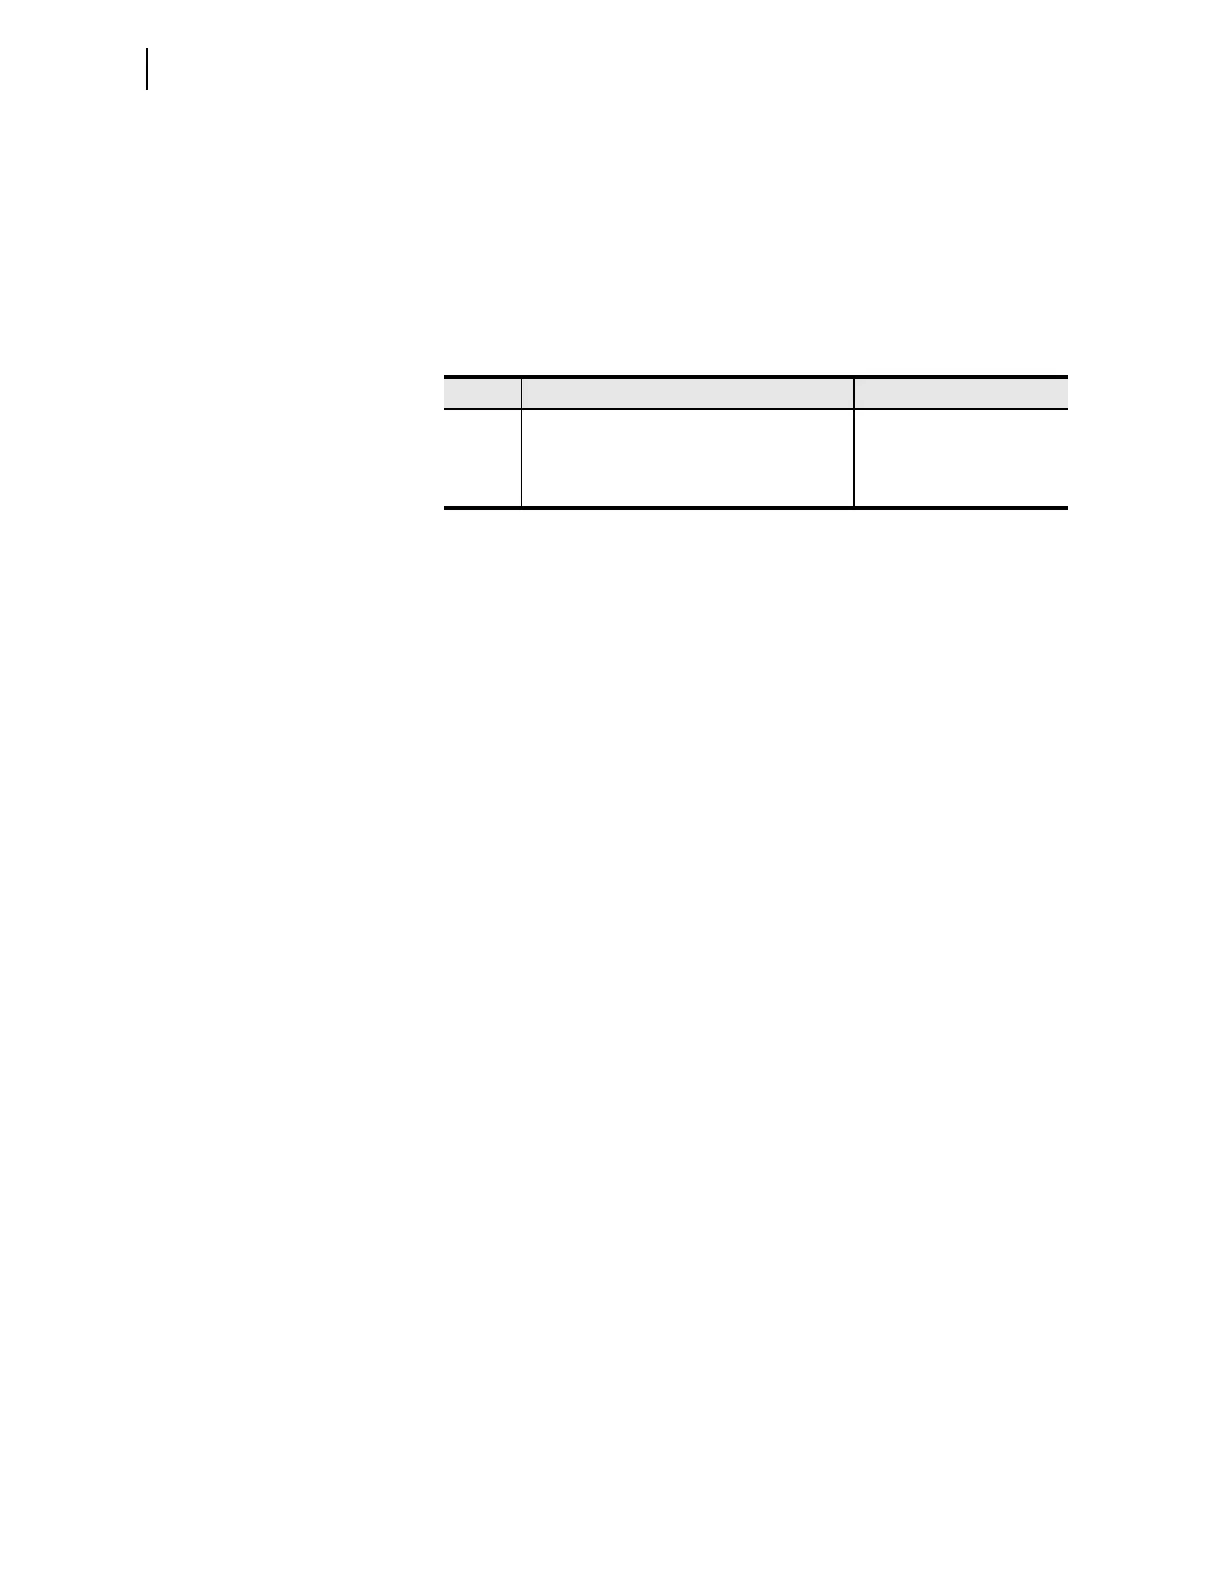
Table 2.12 Jumper Functions and Default Positions
Pins
Jumper Default Position Description
A Not bypassed (requires password) Password bypass
B Off (breaker control disabled) Enable breaker control
a
a
Jumper position affects breaker control using the PULSE, OPEN, or CLOSE command via the
serial port, front panel, or communications protocols. Jumper position does not affect
breaker control using remote bits, which are always enabled.
C Not bypassed (not forced SELBOOT) Forced SELBOOT