2.31
Date Code 20150130 Instruction Manual SEL-787 Relay
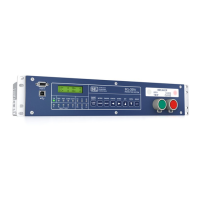
Installation
Field Serviceability
Field Serviceability
The SEL-787 firmware may be upgraded in the field; refer to Appendix B:
Firmware Upgrade Instructions for firmware upgrade instructions. You may
know when a self-test failure has occurred by configuring an output contact to
create a diagnostic alarm as explained in Section 4: Protection and Logic
Functions. By using the metering functions, you may know if the analog
front-end (not monitored by relay self-test) is functional. Refer to Section 10:
Testing and Troubleshooting for detailed testing and troubleshooting
information.
The only two components that may be replaced in the field are the power
supply fuse and the real-time clock battery. A lithium battery powers the clock
(date and time) if the external power source is lost or removed. The battery is a
3 V lithium coin cell, Ray-O-Vac
®
BR2335 or equivalent. At room
temperature (25°C), the battery will operate nominally for 10 years at rated
load. When the relay is powered from an external source, the battery
experiences a low self-discharge rate. Thus, battery life may extend well
beyond 10 years. The battery cannot be recharged.
Fuse Replacement
To replace the power supply fuse, perform the following steps:
Step 1. De-energize the relay.
Step 2. Remove the four rear-panel screws and the relay rear panel.
Step 3. Remove the Slot A printed circuit board.
Step 4. Locate the fuse on the board.
Step 5. Remove the fuse from the fuse holder.
Step 6. Replace the fuse with a BUSS S505 3.15A (ceramic),
Schurter T3.15AH250V, or equivalent.
Step 7. Insert the printed circuit board into Slot A.
Step 8. Replace the relay rear panel and energize the relay.
Real-Time Clock
Battery Replacement
To replace the real-time clock battery, perform the following steps:
Step 1. De-energize the relay.
Step 2. Remove the four rear-panel screws and the relay rear panel.
Step 3. Remove the Slot B printed circuit board.
Step 4. Locate the battery clip (holder) on the board.
Step 5. Carefully remove the battery from beneath the clip.
Properly dispose of the old battery.
Step 6. Install the new battery with the positive (+) side facing up.
Step 7. Insert the printed circuit board into Slot B.
Step 8. Replace the relay rear panel and energize the relay.
Step 9. Set the relay date and time.
Equipment components are sensitive
to electrostatic discharge (ESD).
Undetectable permanent damage can
result if you do not use proper ESD
procedures. Ground yourself, your
work surface, and this equipment
before removing any cover from this
equipment. If your facility is not
equipped to work with these
components, contact SEL about
returning this device and related SEL
equipment for service.
Disconnect or de-energize all external
connections before opening this
device. Contact with hazardous
voltages and currents inside this
device can cause electrical shock
resulting in injury or death.
There is danger of explosion if the
battery is incorrectly replaced.
Replace only with Ray-O-Vac
®
no.
BR2335 or equivalent recommended
by manufacturer. See Owner's Manual
for safety instructions. The battery
used in this device may present a fire
or chemical burn hazard if
mistreated. Do not recharge,
disassemble, heat above 100°C or
incinerate. Dispose of used batteries
according to the manufacturer’s
instructions. Keep battery out of
reach of children.