Installing cable fittings
OmniTrax Product Guide Page 131
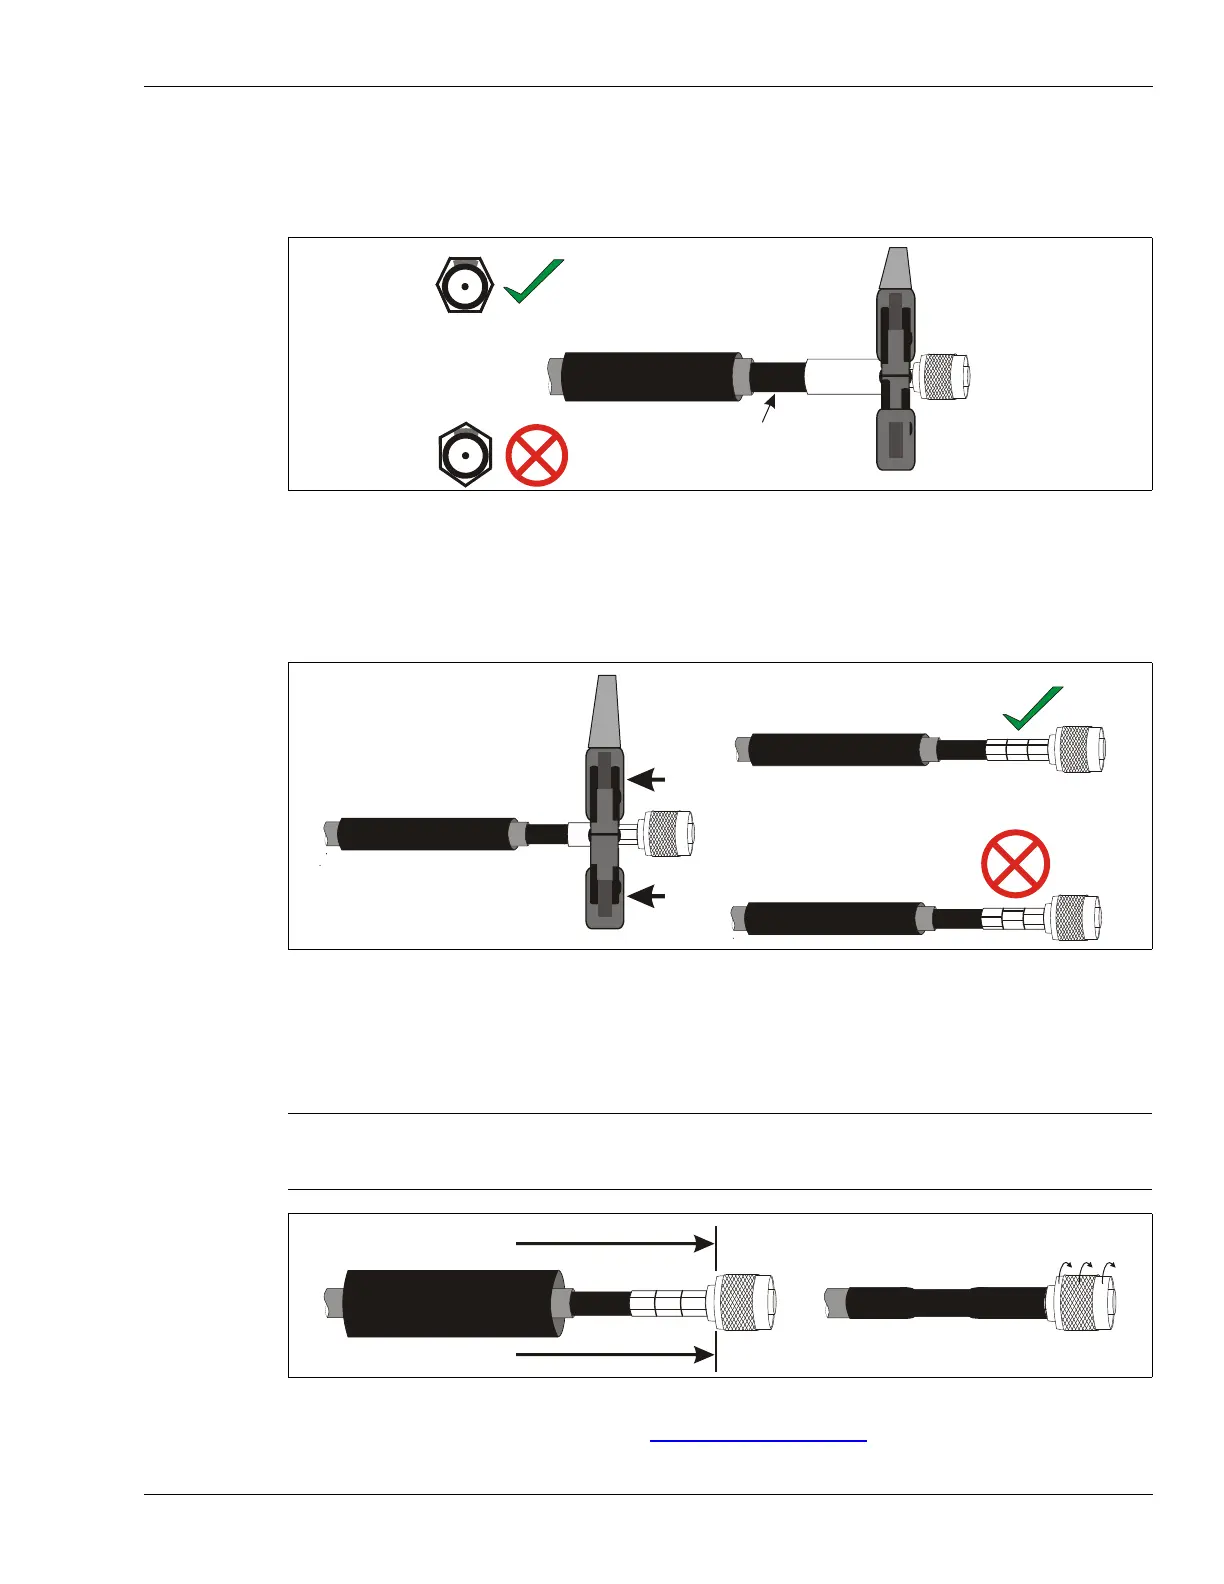
10. Using the large hexagonal hole in the crimp tool, position the crimp tool over the crimp ring so
that the edge of the tool is above the edge of the crimp ring, and a flat surface of the crimp tool
is directly over the drain braid.
Make the first crimp.
11. Slide the crimp tool along the crimp ring and make a second crimp beside the first.
Do NOT rotate the crimp tool, connector, or cable. Do NOT overlap the crimps.
12. Make a third crimp so that the crimp ring is fully crimped and the three crimps are lined up
straight.
13. Slide the heatshrink over the crimp until it butts up against the rotating portion of the
connector.
Using a heat gun, apply heat evenly across the length of the heatshrink until it fits tightly over
the assembly and the weather sealant is visible at both ends.
14. Verify the connector installation (see Cable tests
on page 146).
Figure 106: Making the first crimp
Figure 107: Completing the crimps
Note Do NOT cover any portion of the rotating head of the connector. The
rotating end must turn freely.
Hold the cable steady until the heatshrink has completely cooled.
Figure 108: Sealing the heatshrink
crimp ring
make the first crimp next
to the head of the connector
app. 20 mm of exposed black jacket
flat crimping surface over drain braid
make the second crimp beside, and
in-line with the first crimp
make the third crimp beside, and
in-line with the first two crimps
misaligned crimps may not provide
adequate mechanical support