Installing the Disposables
4-6
20077/021 US XTRA Operator’s Manual
Step 3: Setup of the Vacuum Line
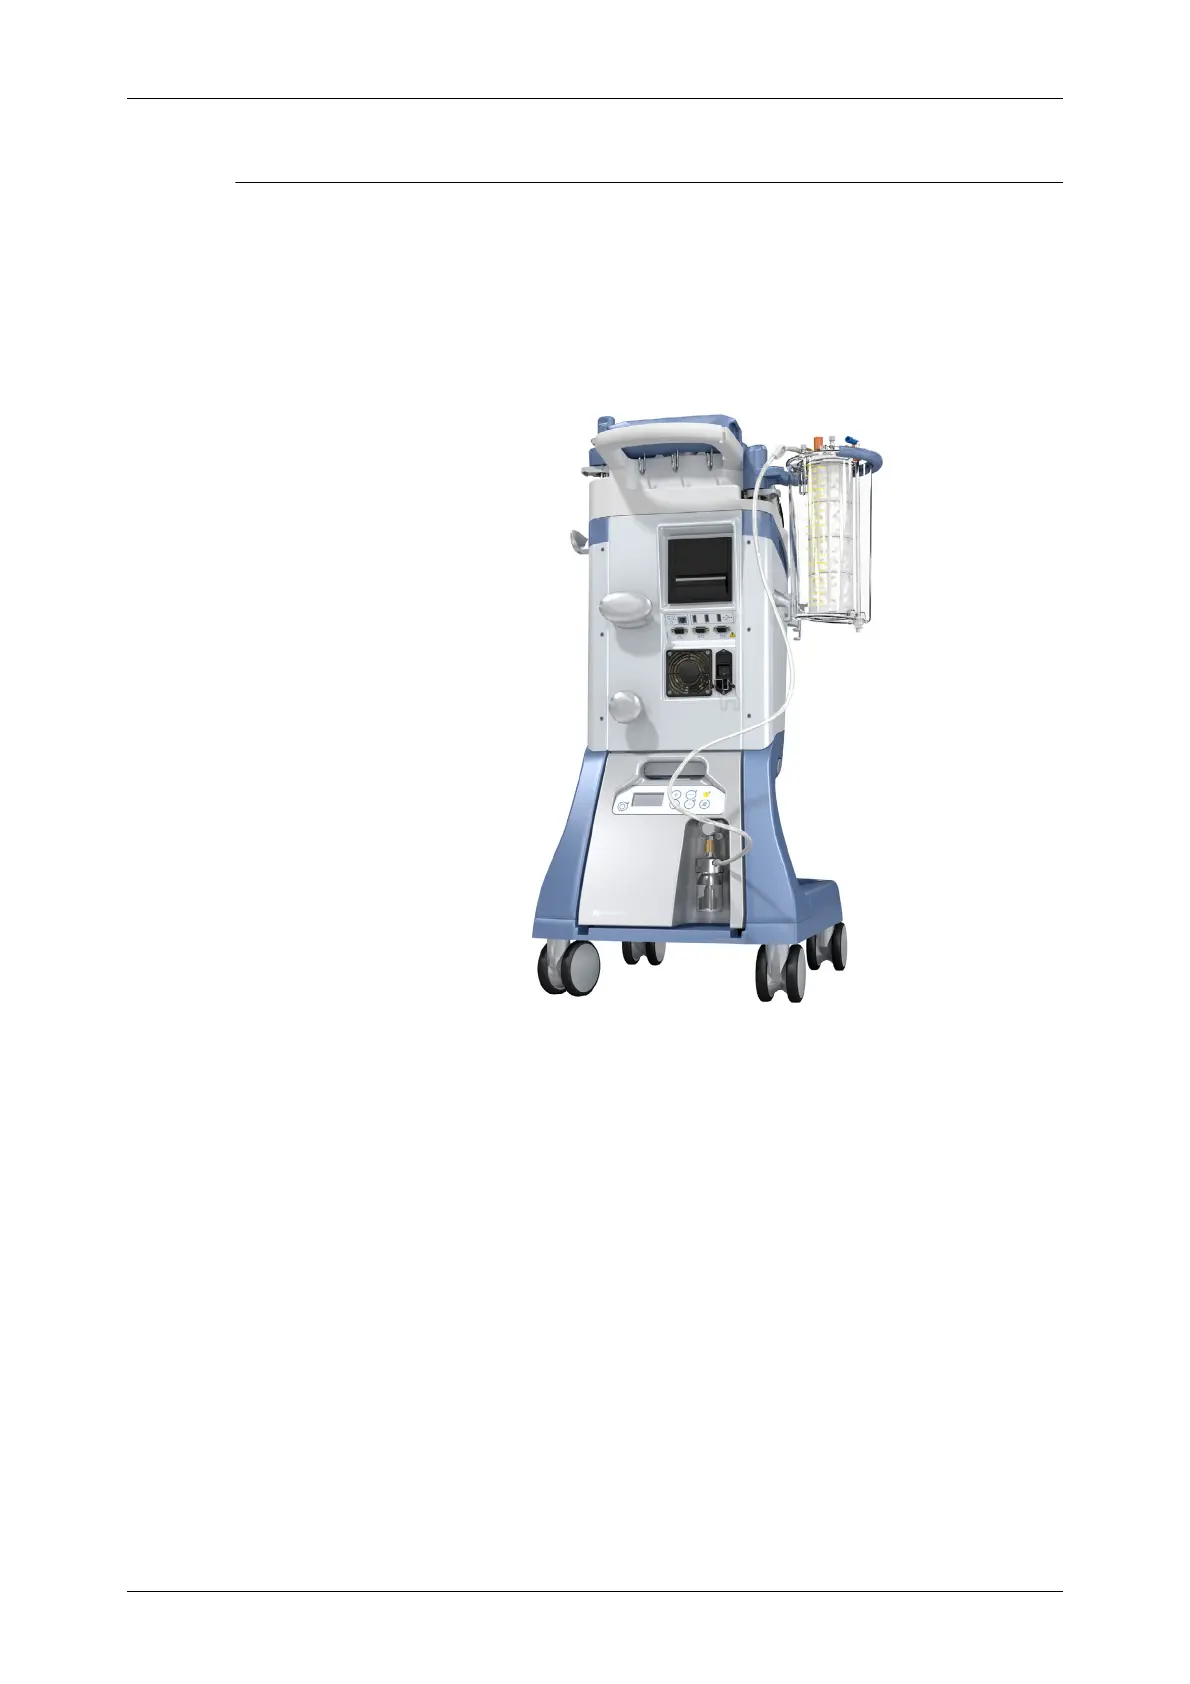
1. Attach one end of the vacuum line to the XVAC system (or another vacuum source) and the other
to the vacuum port (yellow capped) on the lid of the reservoir (see Figure 4-4).
Figure 4-4 Positioning the Blood Collection Reservoir on the Reservoir Holder
If you want to start aspirating from the field:
2. Make sure the power switch on the back of the X
VAC is on ON.
Note: Remove any USB sticks from the rear panel before switching X
TRA on. The presence of a USB
stick may slow down the booting phase.
3. Turn on the X
TRA
Note: When the XTRA system is booting up or a fatal error occurred on the XTRA system, the XVAC
vacuum module can be controlled using its built-in control panel (see Figure 3-21). In such cases you
can turn on and control the level of aspiration directly from the X
VAC control panel (refer to
Chapter
13: Vacuum Module
for detailed information).
Once the machine is ready, the X
VAC will be controlled only from the XTRA screen.
4. Regulate the vacuum at a level no greater (in absolute value) than 150 mmHg (20 kPa) in
accordance with the AABB guidelines.
5. Verify that the protective cover on the end of the suction line in the sterile field has been removed
and that the aspiration tip is open to the atmosphere (not blocked).
6. With the X
VAC system ON, open the roller clamp on the small bore tubing and allow 200 ml of
anticoagulant solution to be drawn into the Blood Collection Reservoir. This volume should ensure
adequate wetting of the blood contact surfaces. Close the roller clamp if there will be any delay
before processing.
CAUTION
Use aseptic technique when installing disposables.