282 TimeHub 5500 User’s Guide 097-55501-01 Revision M – January 2009
Chapter A
Making Ground and Power Connections
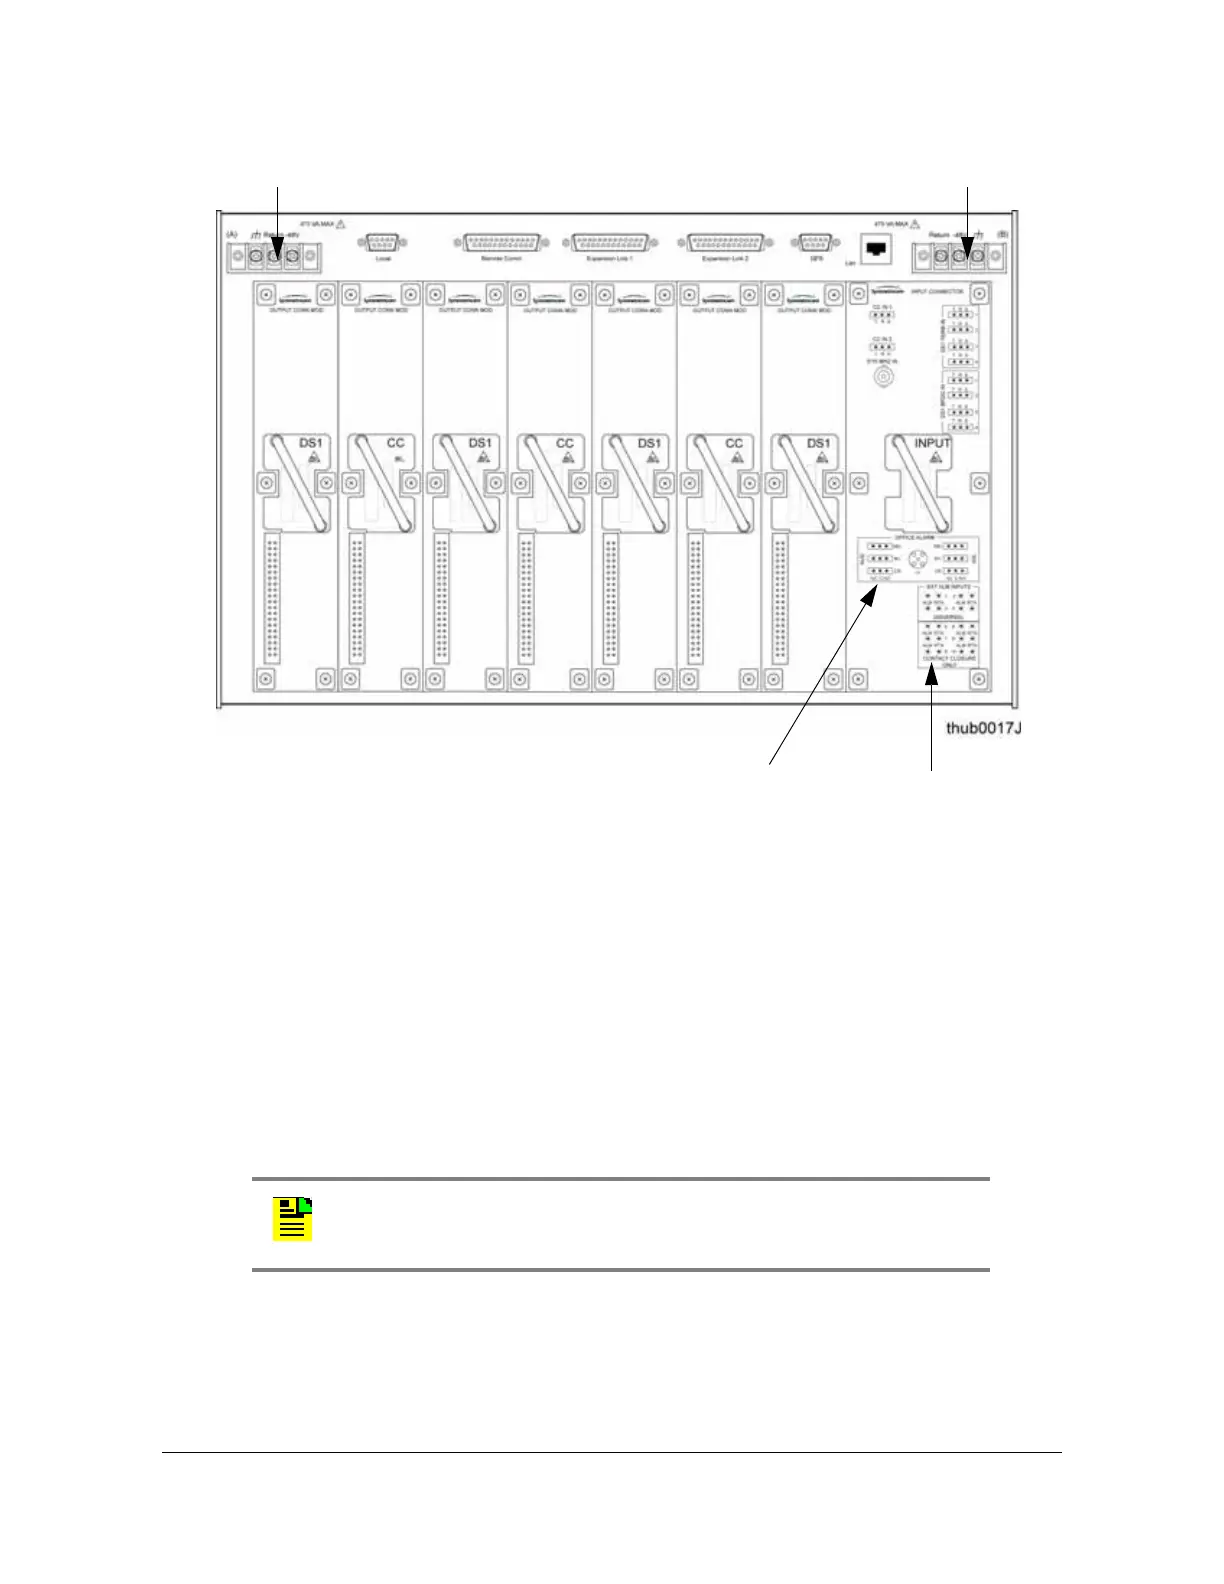
Figure A-1. Connectors on the Rear Panel of the Master Shelf
With Ground Rod
Solder each 1.5 mm
2
/ 16 AWG ground wire to the 16 mm
2
/ 6 AWG frame ground
rod that is run vertically on each side of the rack, if provided. Two methods are
acceptable:
Crimp an appropriate-size spade lug to the 1.5 mm
2
/ 16 AWG wire, bend the lug
around the 16 mm
2
/ 6 AWG rod, and solder.
Strip enough insulation from the 1.5 mm
2
/ 16 AWG wire to permit three complete
turns around the 16 mm
2
/ 6 AWG rod and solder.
Without Ground Rod
Crimp the supplied spade lug to the 1.5 mm
2
/ 16 AWG wire, and screw the lug to a
screw hole on the rack. Remove the paint and sand the area around the screw hole
to ensure proper conductivity. Coat the connection with an electrically conductive
antioxidant compound such as Kopr-Shield spray.
Note: Use an appropriate soldering iron to ensure the 16 mm
2
/ 6
AWG rod is heated sufficiently to prevent a cold solder connection.
Battery A Battery B
Shelf Alarms
External Alarms

 Loading...

