284 TimeHub 5500 User’s Guide 097-55501-01 Revision M – January 2009
Chapter A
Making Ground and Power Connections
1. Remove both fuses from the front panel of the shelf. You will replace them at the
end of the installation procedure.
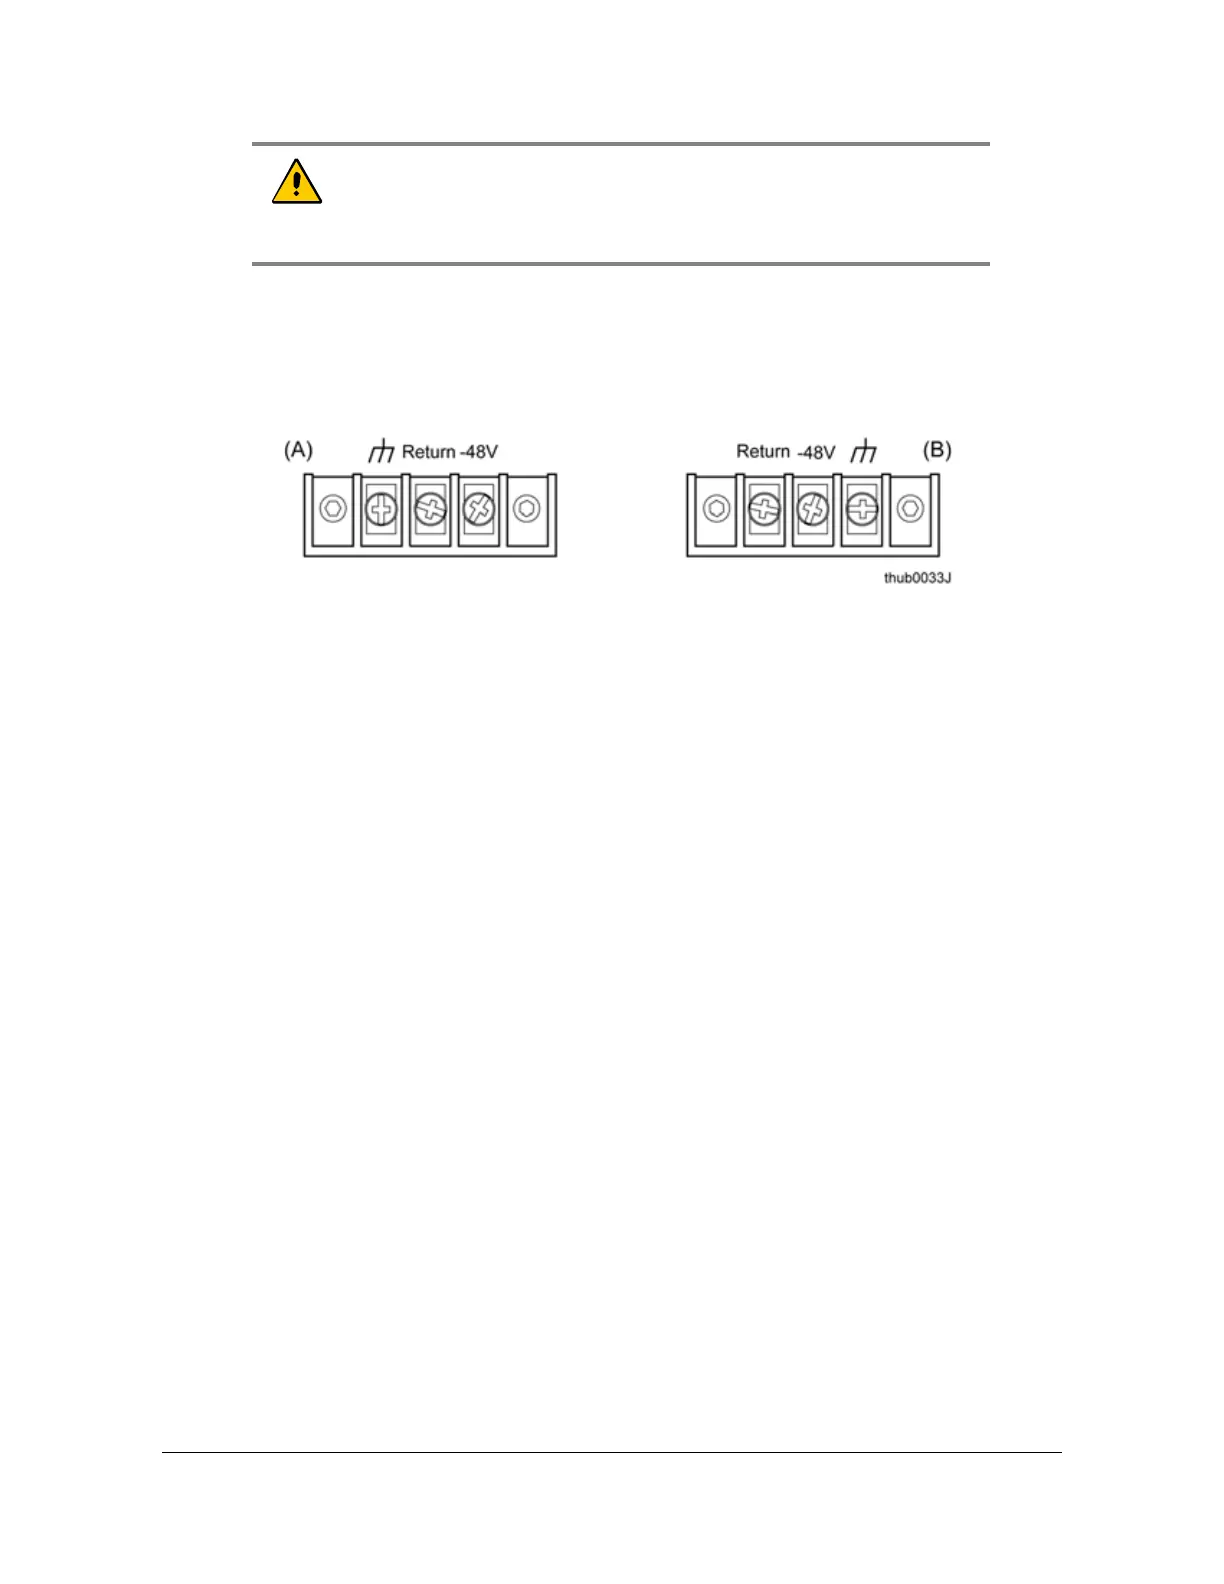
2. Locate the power terminal blocks on the rear panel (Figure A-3).
Figure A-3. Power and Ground Connections on the Master Shelf
3. Using 1 mm
2
/ 18 AWG (minimum) stranded wire, connect primary power to the
A terminal screws and secondary power to the B terminal screws. Symmetricom
recommends that you use a #6 spade lug termination for each power lead. If
separate power supplies are not available, connect both A and B power from the
same source.
Use 10 A fuses in the source that supplies power to the TimeHub shelf.
Testing Power Connections
To verify that the power connections to the TimeHub main shelf are correct, follow
the steps in this section. Use a digital multimeter (Fluke 77 or equivalent) to make
the measurements. Refer to Figure A-1 and Figure A-3. Use this procedure for
Master/Remote and Expansion shelves.
1. Remove all fuses that supply power to the shelf from the fuse panel and from the
front of the shelf.
2. Ensure that no Clock, Management, or Output Driver cards are installed in the
shelf.
3. Disconnect the
–48V battery A and battery B leads from the shelf power terminal
blocks TB1 and TB2 (Figure A-3). Leave the Return battery leads connected to
the shelf.
4. At the shelf end of the battery leads, use the multimeter to measure the voltage
between the following test points:
Caution: To avoid damage to the shelf, remove the fuses in the fuse
panel which powers the
TimeHub Shelf before you make power
connections. Also make sure to remove the fuses from the
TimeHub
shelf before connecting power.
A. TB1 Connections
(Office Battery A)
B. TB2 Connections
(Office Battery B)

 Loading...

