110 TimeHub 5500 User’s Guide 097-55501-01 Revision M – January 2009
Chapter 3 Installing the TimeHub 5500
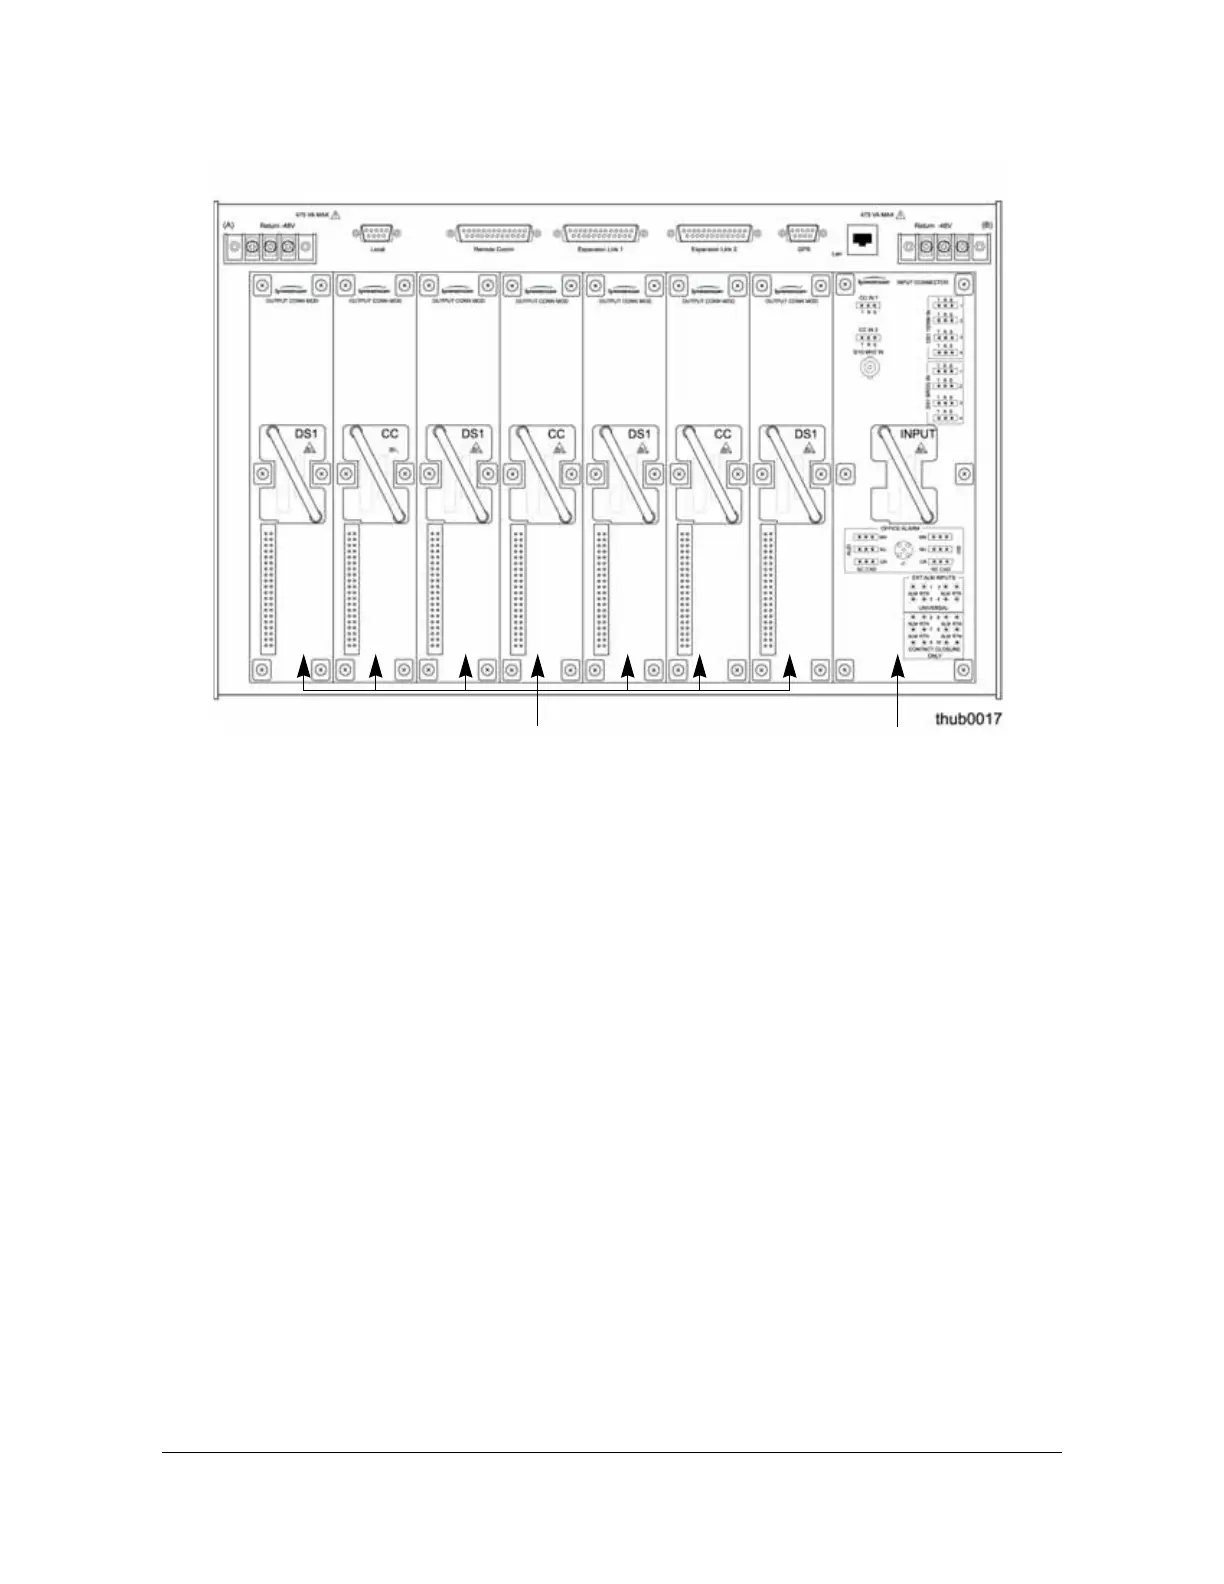
Installing Modules into the Rear Panel
Figure 3-11. Location of Output Connector Modules on the Rear Panel of the Master/Remote Shelf
Installing the Input/Alarm Connector Module
The Input/Alarm Connector module (part number 090-55561-01) mounts on the
rightmost position on the rear panel of a Master or Remote shelf (see Figure 3-11).
The module is shown in Figure 2-7. Expansion shelves do not use an Input/Alarm
Connector module.
To install the module, align the pins on the rear of the module with the connector on
the shelf. Carefully seat the module onto the shelf. Tighten the six captive screws to
complete the installation.
Installing Output Connector Modules
You can install up to seven Output Connector modules in any of the locations on the
rear panel of a Master or Remote shelf (see Figure 3-11). The Output Connector
module determines the type of output signal generated. Each Output Connector
module provides connections for 20 signals from the Output Driver cards. The
Output Connector modules for a Master/Remote shelf cannot be used on an
Expansion shelf.
Input/Alarm
Connector Module
Output Connector Modules

 Loading...

