5-13
POWR
E
INSTALLING THE DRIVEN SPROCKET 5
Install:
• Driven sprocket bolt
Å For USA and Canada
ı For worldwide
T
R
.
.
Driven sprocket bolt
60 Nm (6.0 m • kgf, 43 ft • lb)
Flywheel magnet assembly
holder
YB-06139 / 90890-06522
Å
ı
5160
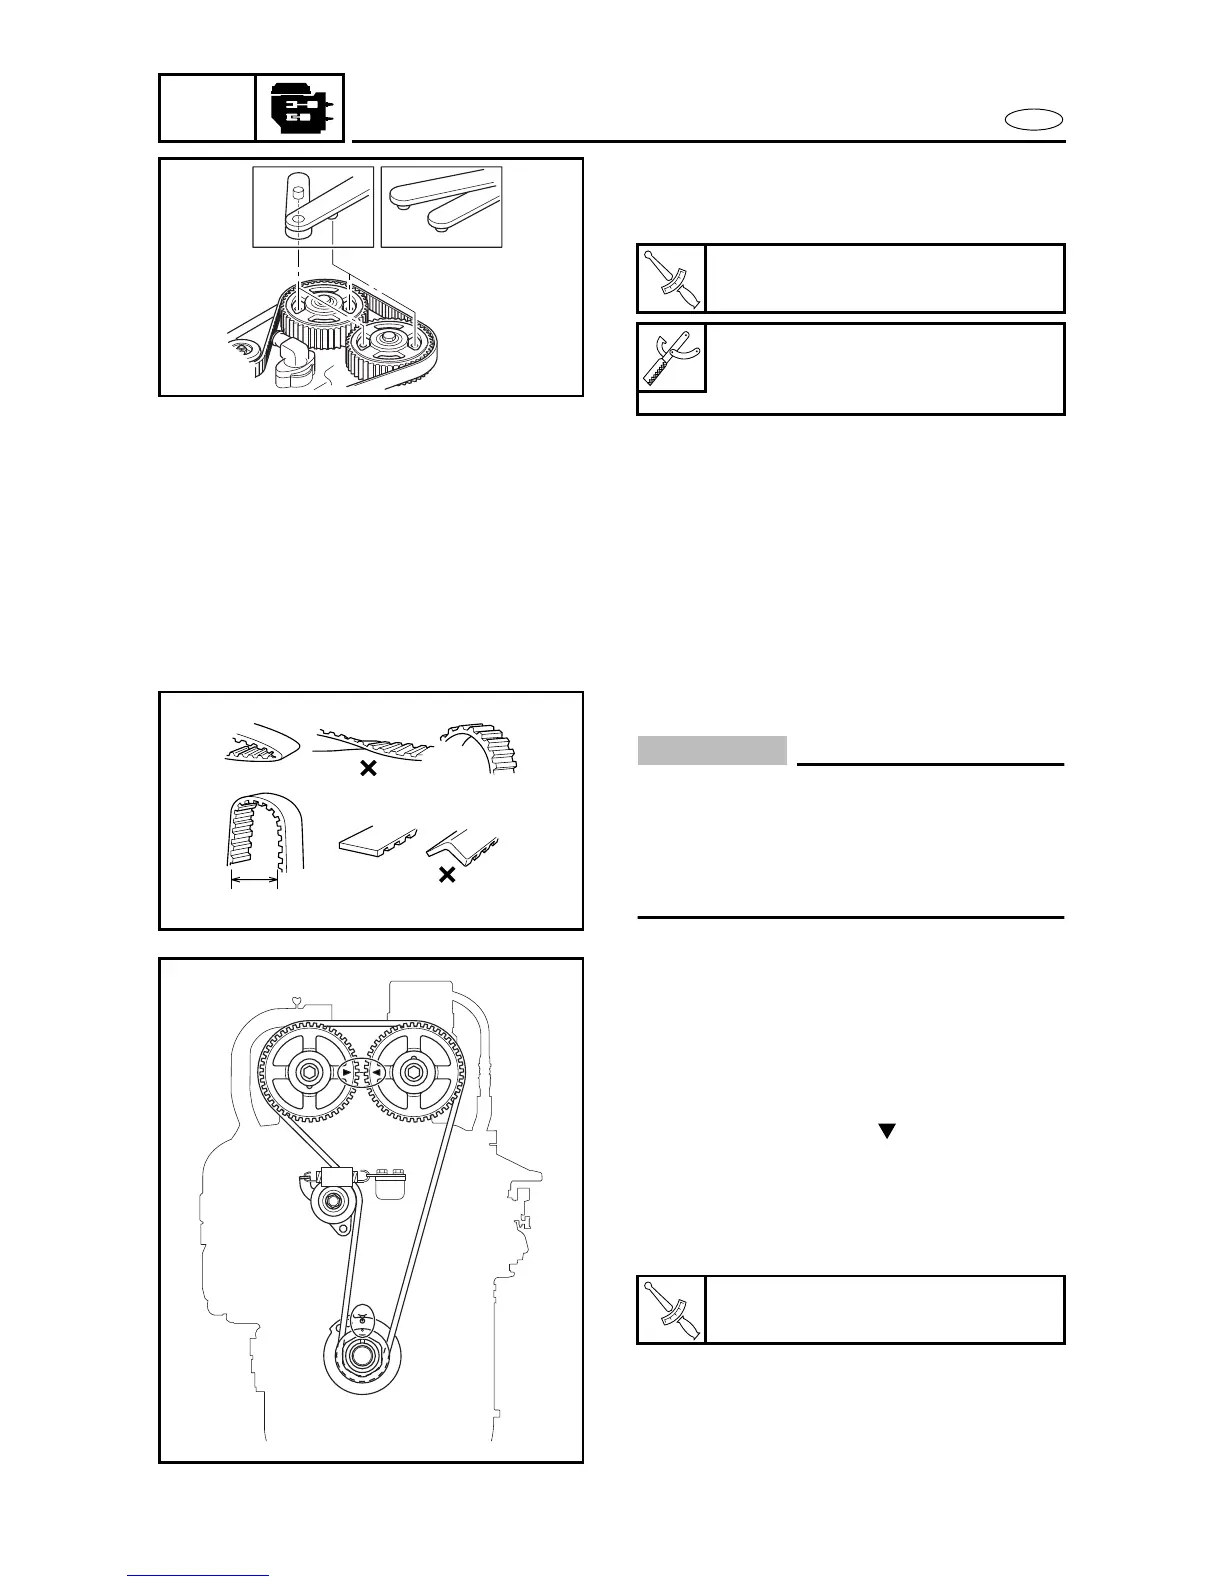
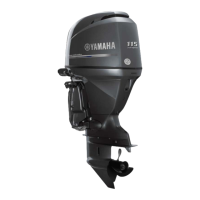
INSTALLING THE TIMING BELT 5
CAUTION:
• Never forcefully twist, turn inside out, or
bend the timing belt.
• Do not let oil or grease get onto the tim-
ing belt.
• A Minimum 25 mm (1.0 in)
Install:
• Timing belt
• Tensioner
Installation steps
(1) Align ø6 hole on the pickup rotor with
the notch in the cylinder block.
(2) Align the marks “ ” on the driven
sprockets with the top edge of the cyl-
inder head.
(3) Install the timing belt onto the driven
sprockets and drive sprocket.
(4) Install the tensioner.
(5) Turn the crankshaft clockwise two
times and make sure the drive
sprocket and driven sprockets are cor-
rectly aligned with the marks.
T
R
.
.
Tensioner bolt
40 Nm (4.0 m • kgf, 29 ft • lb)
A
5170
5180
TIMING BELT