| Getting Started | 17
Port Name Description
① USB
• Connect to a USB flash drive.
Insert a USB flash drive for storing
screen shots, the recorded videos
and captured packets. If multiple USB
flash drives are connected, only the
last one can be identified.
• Connect to an audio input device via
a USB to line input adapter.
• Connect to an audio output device
via a USB to line input adapter.
• Insert a WF50 Wi-Fi USB Dongle for
connecting to Wi-Fi or providing
wireless AP.
• Insert a BT42 Bluetooth USB Dongle
for connecting to the CPW90-BT
Bluetooth wireless microphones.
• Insert a PSTN box CPN10 for
connecting to the PSTN (Public
Switched Telephone Network).
② VC Hub/Phone
• For wired content sharing, connect
this port to the Codec port on the
VCH50 video conferencing hub.
• If you need an audio device, connect
this port to the Internet port on the
CP960 Conference phone.
• Connect to VCM34. (It is not
applicable to PVT950)
③ DC48V Connect to the power source via a
power adapter.
④ HDMI Connect to a monitor.
⑤ Internet Connect to the network device.
⑥ Reset Key Reset the system to factory defaults.
⑦ Security Slot Allow you to connect a universal
security cable to the codec, so you can
lock the codec down. The system cannot
be removed when locked.
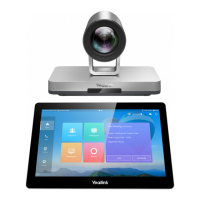
Hardware of VC200 Codec
Yealink VC200 is an entry-level smart video conferencing endpoint designed for small and huddle room.
VC200 possesses many features, including ultra HD 4K, 4 x digital zoom camera, 103° super-wide angle
lens, white balance automatic gain and others. With 6 beamforming microphone arrays for direct voice
pickup and Yealink Noise Proof Technology, VC200 brings excellent audio effect in small rooms and
ensures that everyone can be heard clearly.
• Front Panel of VC200 Codec
• Rear Panel of VC200 Codec
• Bottom of VC200 Codec
 Loading...