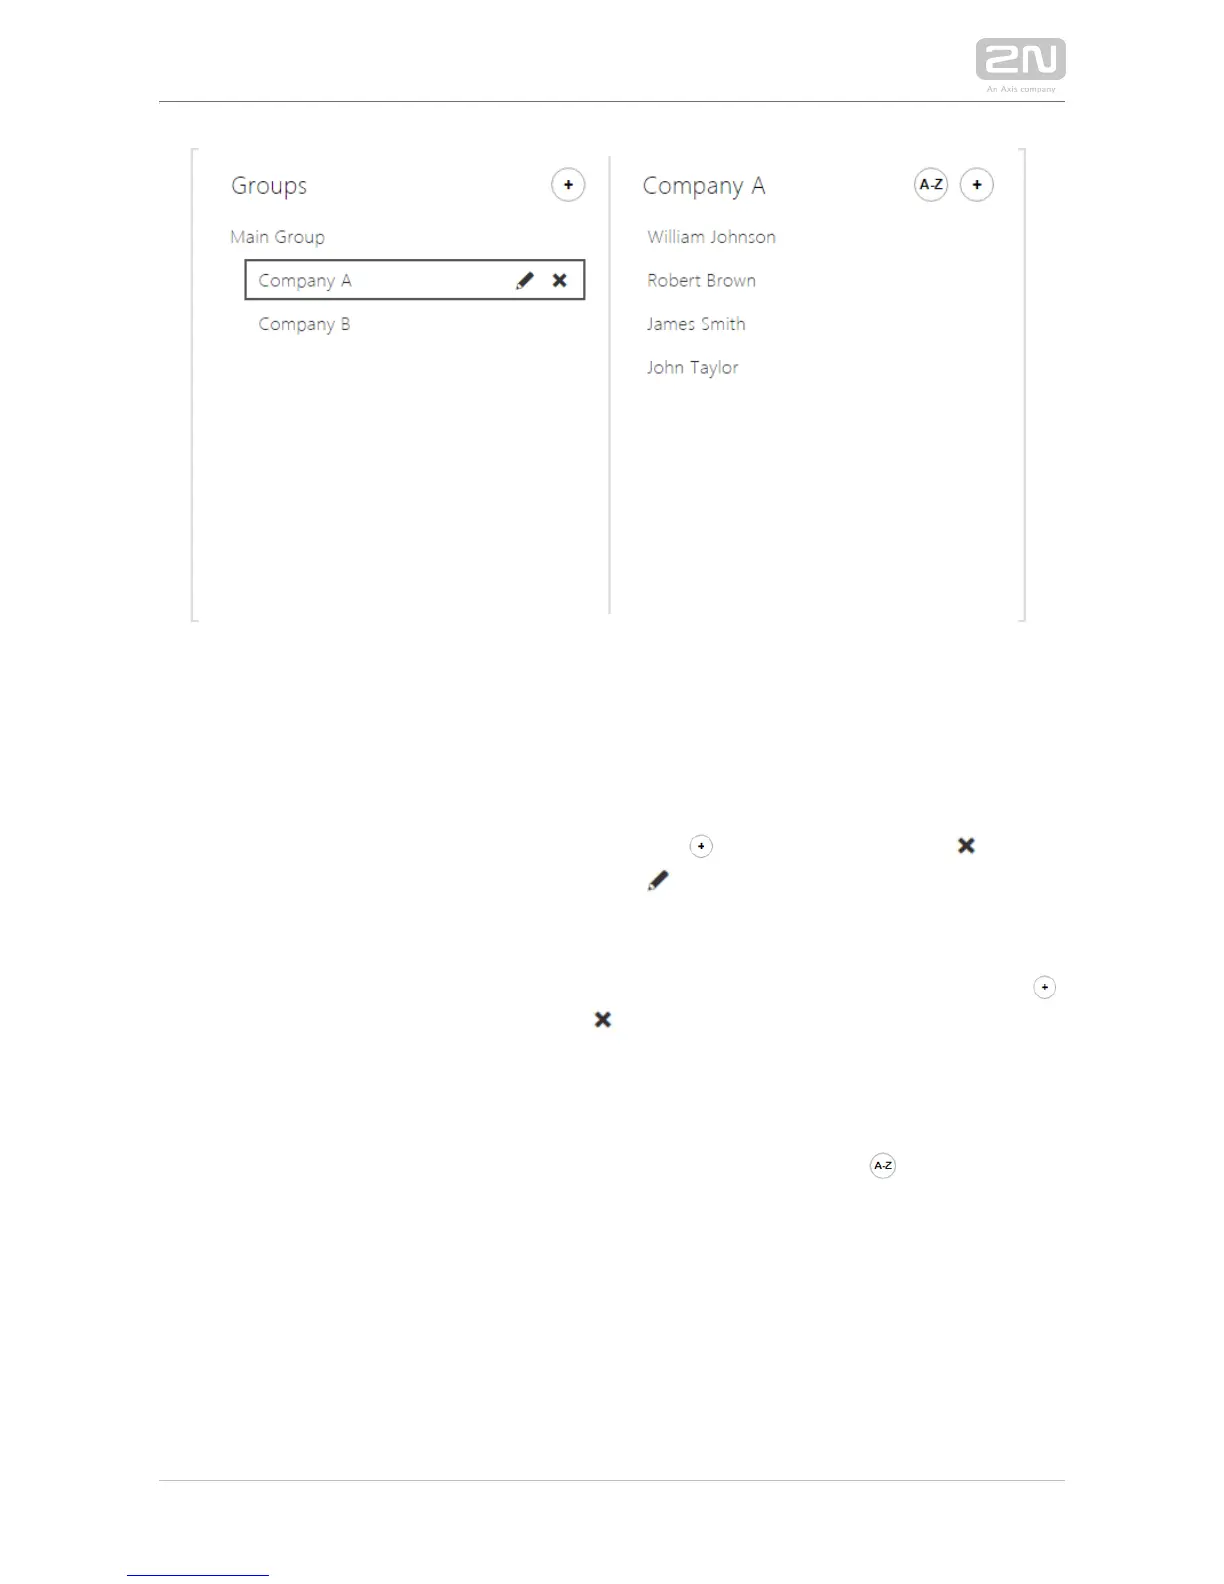
This tab helps you configure a structured list of users. You can create practically any
count of groups and assign any count of users to each of the groups. One user cannot
be assigned to one group more times, but one user can be assigned to more groups at
the same time.
The created groups are displayed to the left. Click to add a group. Press or DEL
to remove a group including its users. Click or ENTER to rename a group. The
currently selected group is marked with a black oblong. Use the mouse to move (nest)
the groups created.
The users assigned to the currently selected group are displayed to the right. Click
to add a user from the phonebook. Press or DEL to remove a user.
The is created by default to which you can directly add users from the Main Group
phonebook. The Main Group cannot be deleted or renamed.
The users are displayed in the order in which they were added to the group. Move a
user up/down with the mouse to change the user order. Or, press to arrange the
users in a group alphabetically.
This tab helps you set the users to be displayed in the Name Tags mode. Select up to
4 users from the phonebook and assign them to the buttons on the display sides. If
you do not assign any user, the Name Tags mode will be inactive. In the Name Tags
mode, the user names are displayed with guidelines and arrows pointing to the right
button on the display sides.