2.5 Normal Measurement
HA-8190V 2-23
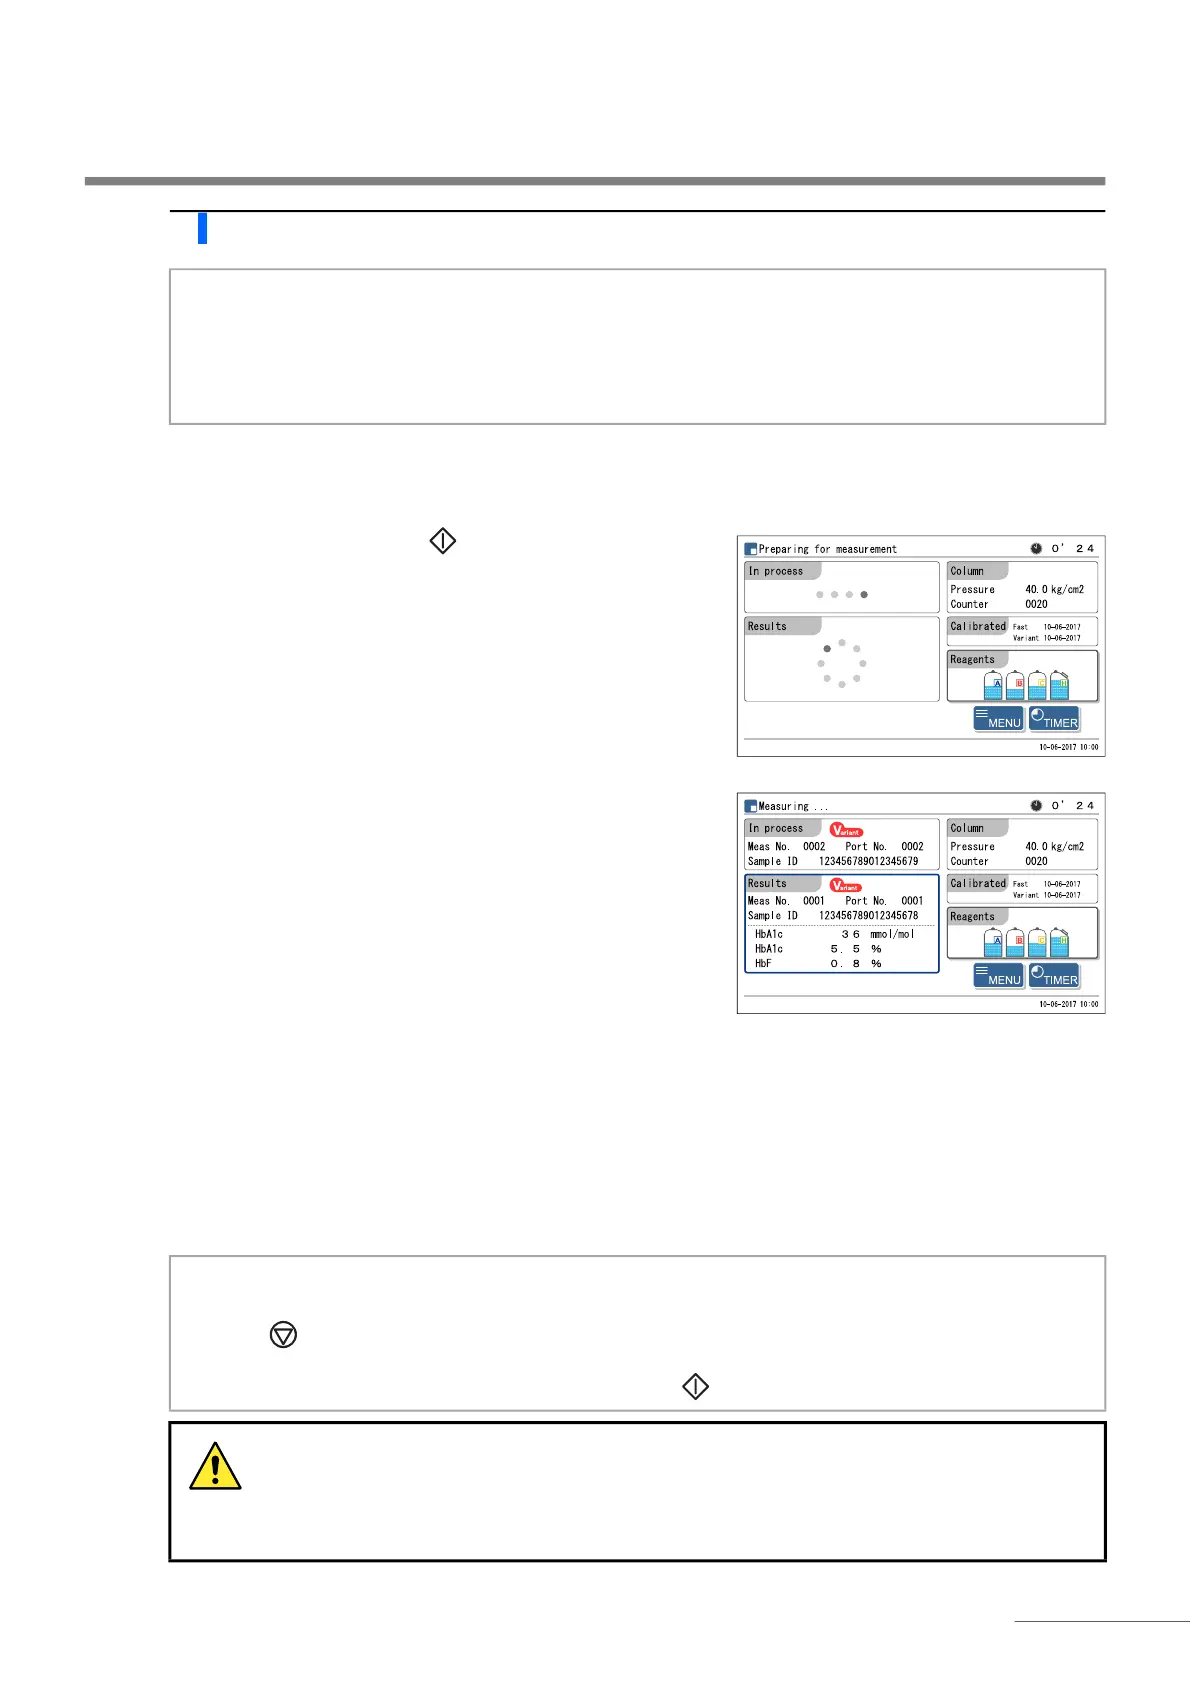
2 Start measurement.
a On the standby screen, check the <Meas. mode> setting.
• To change the mode, see “2.4. Measurement Mode Selection (Variant or Fast)” on page 2-14.
b On the standby screen, press .
“Preparing for measurement”
• The sample rack will move to the stirring position.
• The first sample will be stirred (only if a sample tube is
prepared with whole blood).
• Then, the sample rack will move to the aspirating position.
“Measuring ...”
• The first sample will be aspirated.
• The measurement number and port number for the sample will
be displayed.
“Results”
• The obtained measurement result is displayed.
• At the same time, the measurement result is printed out.
• See “2.9. Displayed and Printed Reports” on page 2-44.
NOTE:
This instrument stirs samples before measuring them. Due to a possible risk of injury, do not touch the
spinning unit or sample container, or insert anything in-between the STAT port cover and front cover while the
sample tube is spinning. Also, check that the STAT port cover is attached correctly before starting
measurement.
REFERENCE:
The sample ID appears after the barcode has been read
from the sample tube.
For detailed measurement result reports and timer settings,
see “2.5.3. Viewing Measurement Results in Detail” on page
2-24/“3.3.2. Setting the Startup Timer and Entering the
Sleep Mode” on page 3-6.
NOTE:
To stop measurement:
Press . Depending on when the button is pressed, some samples may be unloaded without being
measured. If pressed while measurement is in progress, see the printed measurement results to check if all
samples were measured. To restart measurements, press .
Additional sample racks can be loaded onto the sampler while measurement is in progress.
Do not add sample racks or push the racks by hand while the sampler is operating. Touching
racks during transportation may result in injury, damage to the piercing nozzle, or incorrect
reading of sample IDs and sample rack types.