4.2 Replacement of Consumables
HA-8190V 4-11
4.2.4 Replacing the Column
Carefully read the package insert that comes with the column for the replacement of the column. If the message
“Column should be replaced” appears on the display, use this as a reference for deciding when to replace the column.
Do not use a column beyond its expiration date, since accurate measurement results may not be obtained.
Prepare: COLUMN UNIT 90, tissue paper
and protective gloves
1 Access the maintenance screen.
a On the standby screen, touch , <2. Reagent replace menu> and <5. Column replacement> in that order.
• The [Column replacement] screen will appear.
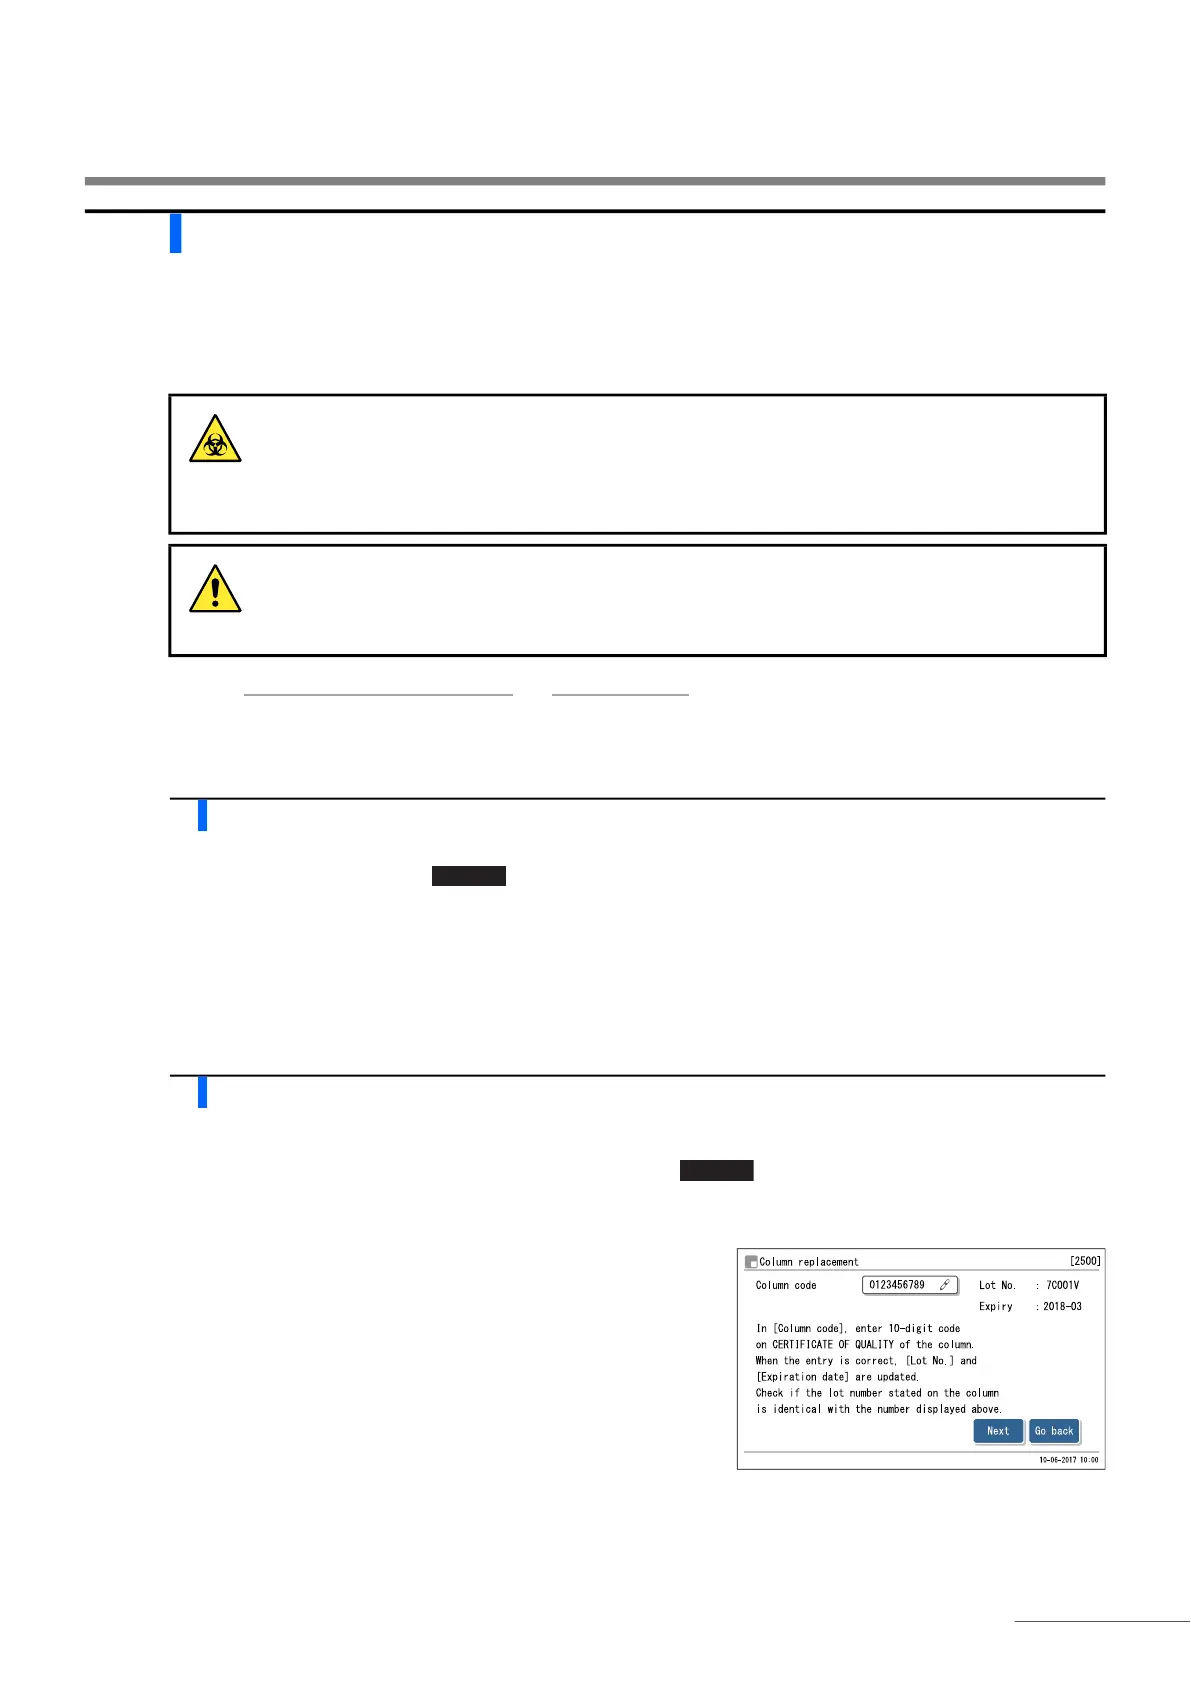
2 Set the reagent information on a new column.
a Enter the 10-digit reagent information code that is written on the
“CERTIFICATE OF QUALITY”.
Wear protective gloves to prevent exposure to pathogenic microbes.
Discard used columns, cleaning tools and protective gloves in accordance with local
regulations for biohazardous waste.
Be sure to operate the buttons on the screen by following the instructions described below
when replacing the column. Disobeying the instructions may cause fluid to splatter during
replacement work. Be careful not to allow bubbles to enter the joints.
REFERENCE:
Priming will automatically start after eluent A, eluent B, eluent CV or hemolysis washing solution has been
replaced. The [Column replacement] screen appears after priming has finished.
REFERENCE:
Reagent information setting can be omitted. To do so, touch without entering anything and go to step 3.
To set reagent information after replacing the column, see “3.10. Reagent Information Settings” on page 3-41.
MENU