User's Manual 15. Network
Version 6.8 137 Mediant 500L MSBR
15 Network
This section describes the network-related configuration.
15.1 Configuring Underlying Ethernet Devices
The Ethernet Device table lets you configure up to 16 Ethernet Devices (underlying
devices). An Ethernet Device represents a Layer-2 bridging device and is assigned with a
VLAN ID. An Ethernet Device is associated with an IP network interface in the Interface
table ('Underlying Device' field) and/or with a static route in the Static Route table ('Device
Name' field). Multiple IP interfaces can be associated with the same Ethernet Device and
thereby, implement mutihoming (multiple addresses on the same interface/VLAN).
The Ethernet Device table lets you configure Ethernet Devices by defining a VLAN ID and,
assigning it an arbitrary name for future reference to other configuration items.
You can view configured Ethernet Devices that have been successfully applied to the
device (saved to flash), in the Ethernet Device Status Table page. This page is accessed
by clicking the Ethernet Device Status Table button, located at the bottom of the Ethernet
Device Table page. The Ethernet Device Status Table page can also be accessed from the
Status & Diagnostics tab > VoIP Status menu > Ethernet Device Status Table (see
''Viewing Ethernet Device Status'' on page 694).
Note: You cannot delete an Ethernet Device that is associated with an IP network
interface (in the Interface table). Only after the Ethernet Device has been
disassociated from the IP network interface can it be deleted.
The following procedure describes how to configure Ethernet devices in the Web interface.
You can also configure this using the table ini file parameter, DeviceTable or CLI
command, config-voip > interface network-dev.
To configure an Ethernet Device:
1. Open the Ethernet Device Table page (Configuration tab > VoIP menu > Network >
Ethernet Device Table).
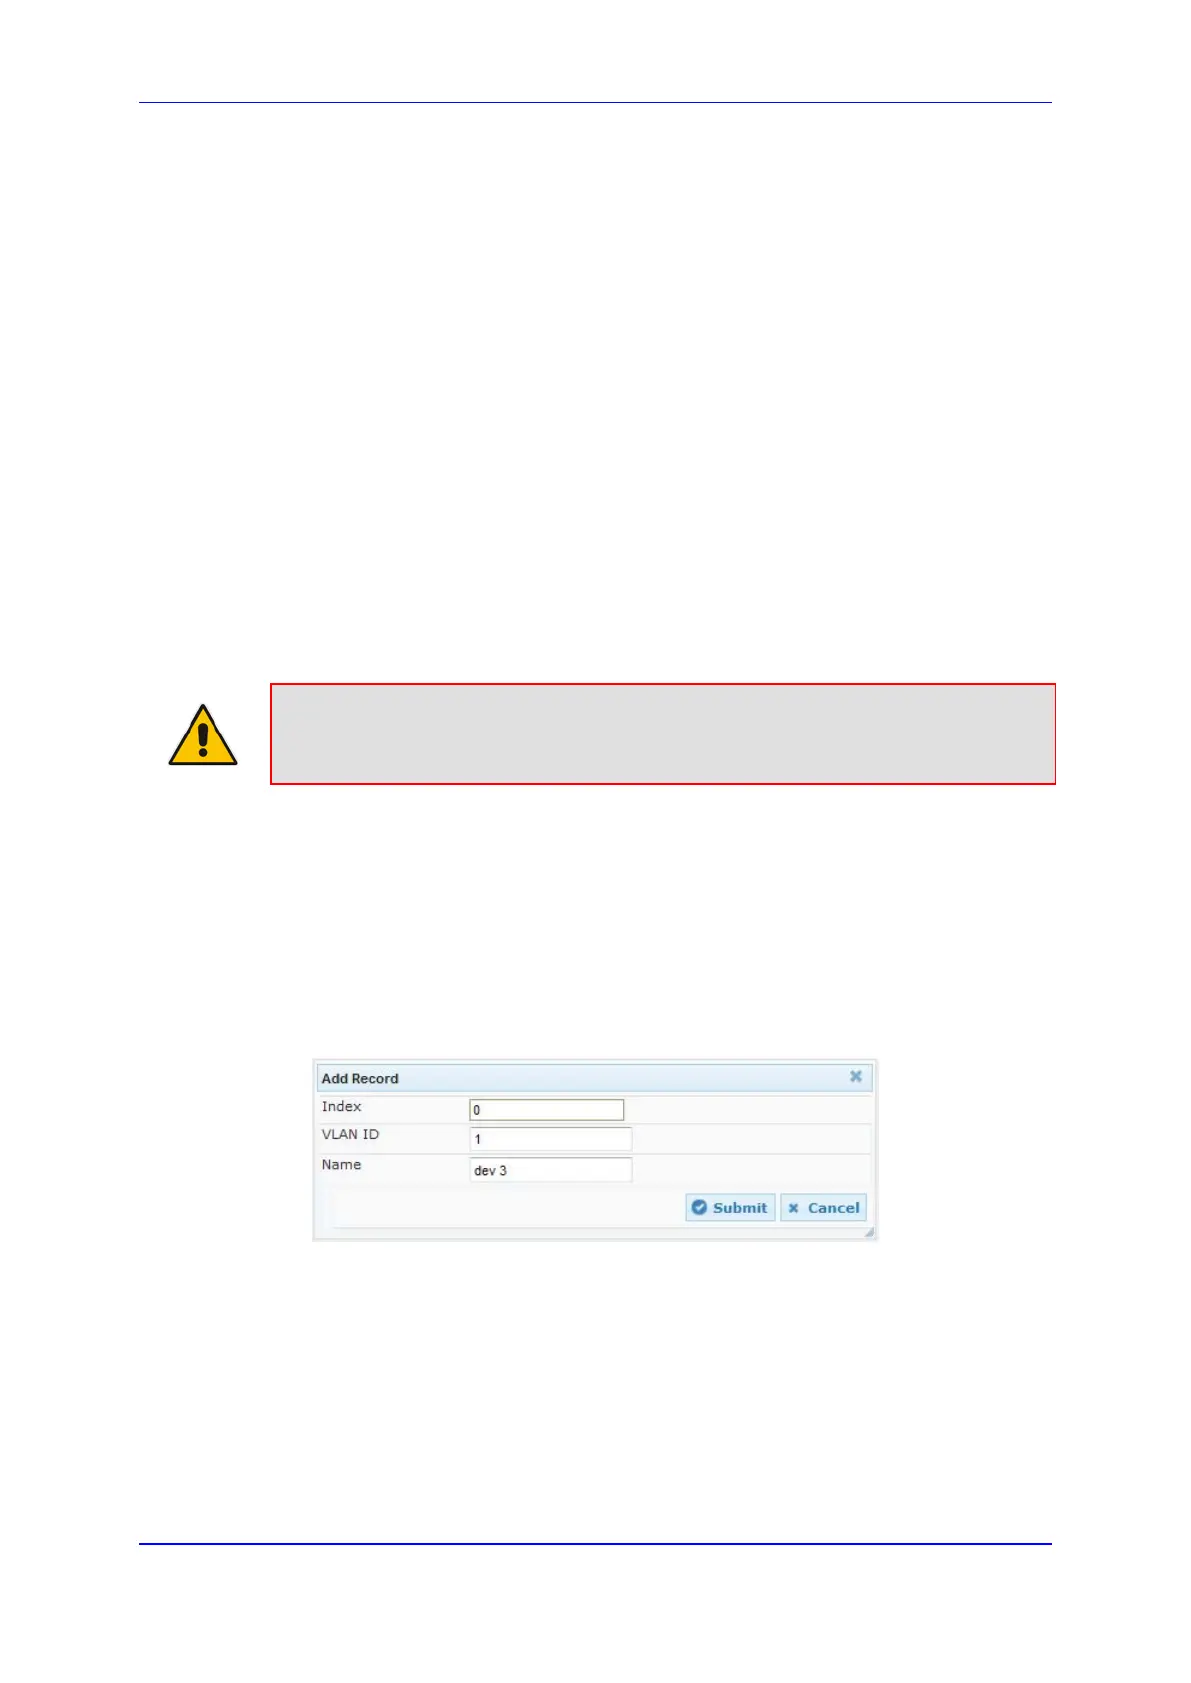
2. Click Add; the following dialog box appears:
Figure 15-1: Ethernet Device Table - Add Record
3. Configure an Ethernet Device according to the parameters described in the table
below.
4. Click Submit, and then reset the device with a burn-to-flash for your settings to take
effect.
 Loading...