7. Lenses & lens holder
11
1121
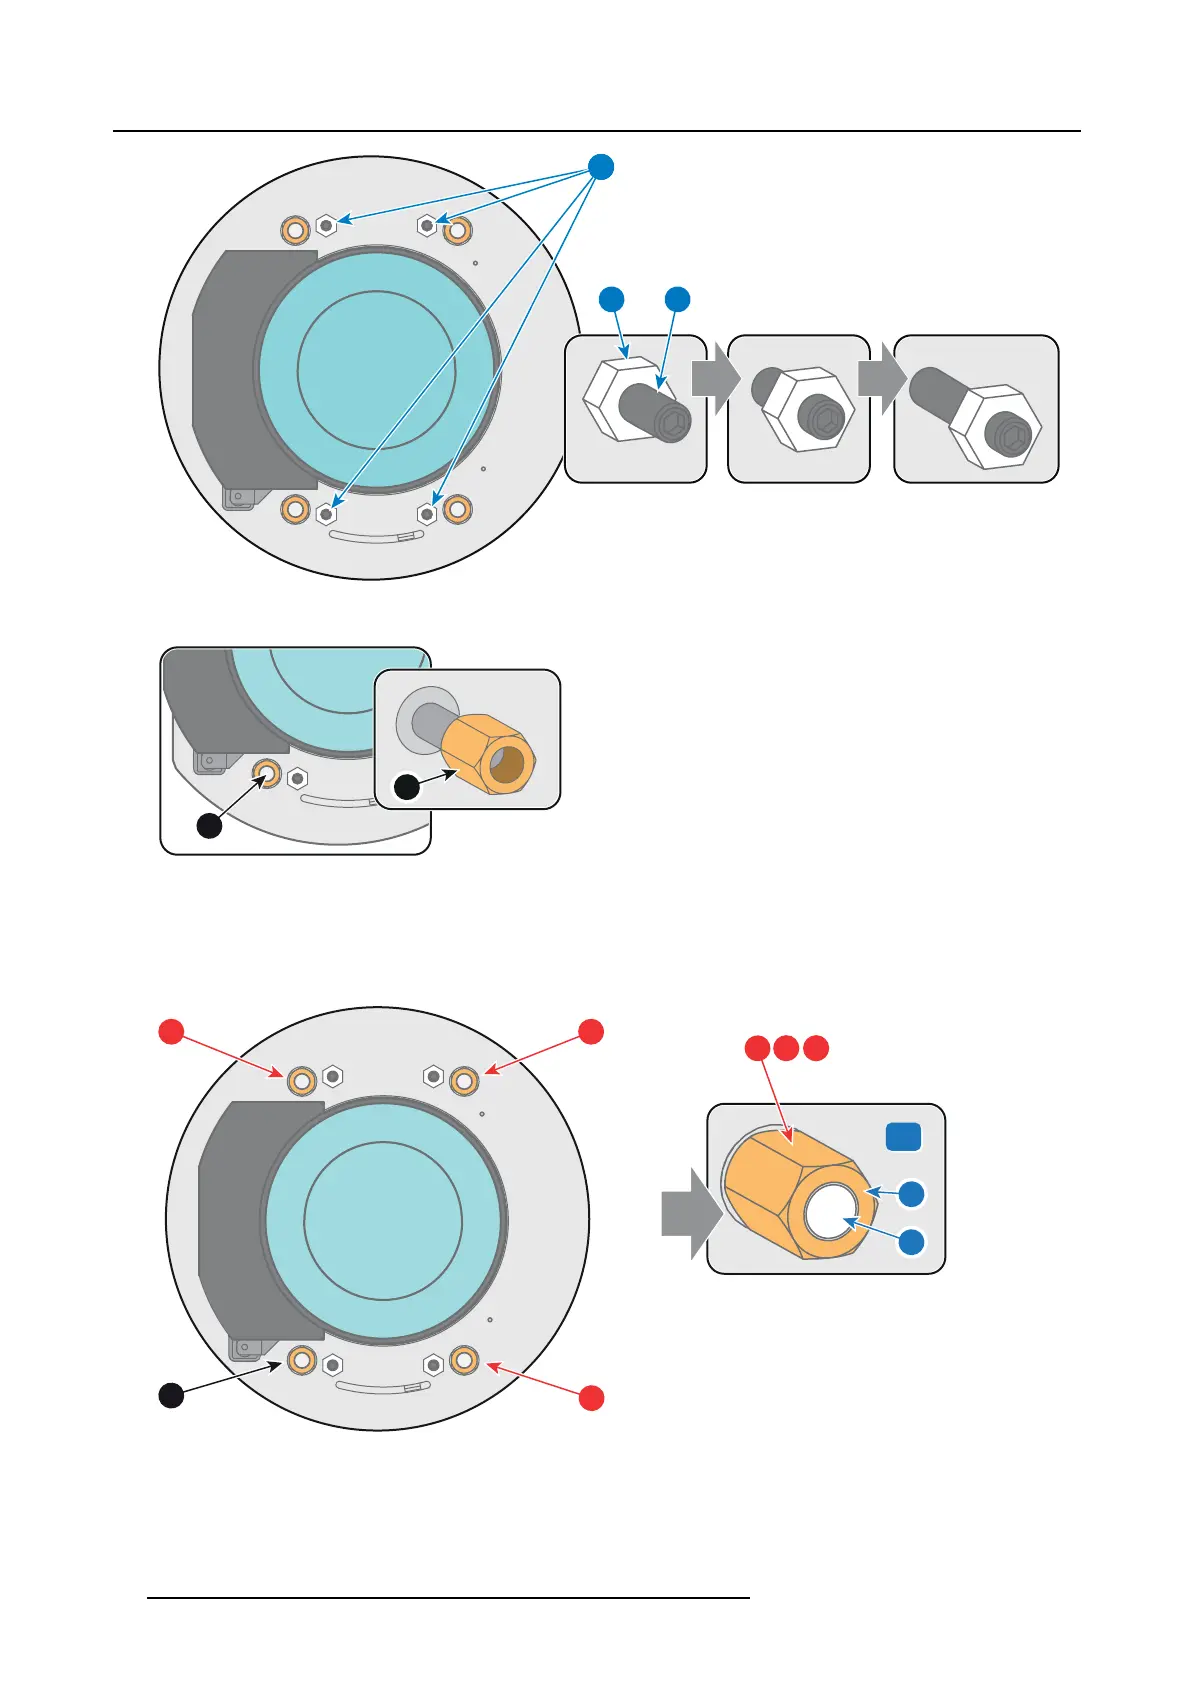
Image 7-22
2. F ully loosen the Sc heimpflug nut at the lower left of the Lens Holder (reference 4 image 7-23). Use a 13mm nut driver.
4
4
Image 7-23
3. Turn the three S cheimpflug adjustment nuts, reference 1, 2 and 3 image 7-24, until the front of the nut (reference 5 image 7-24)
is equally aligned w ith the front of the threaded rod (reference 6 im age 7-24). U se a 13mm nut driver.
Note: This is the nom inal pos ition of the Lens Holder.
Caution: Do not remove any of the Sc heimpflug adjustment nuts completely from the threaded rod. Otherwise the lens holder
front plate with lens will fall off.
1
4
2
5
6
x
3 x
1
2 3
3
Image 7-24
4. Z oom the lens for maxim um image on the screen (WIDE) and focus the center of the projected image using the motorized focus
control (Local Keypad).
72
R5906753 DPXK BLP SERIES 20/11/2017