Note
If you delete the boot configuration via the GUI (menu Maintenance->Software
&Configuration) all passwords are also reset and the current boot configuration is de-
leted. The next time, the device will boot with the standard ex works settings.
You can now configure your device again as described from Basic configuration on page 25
.
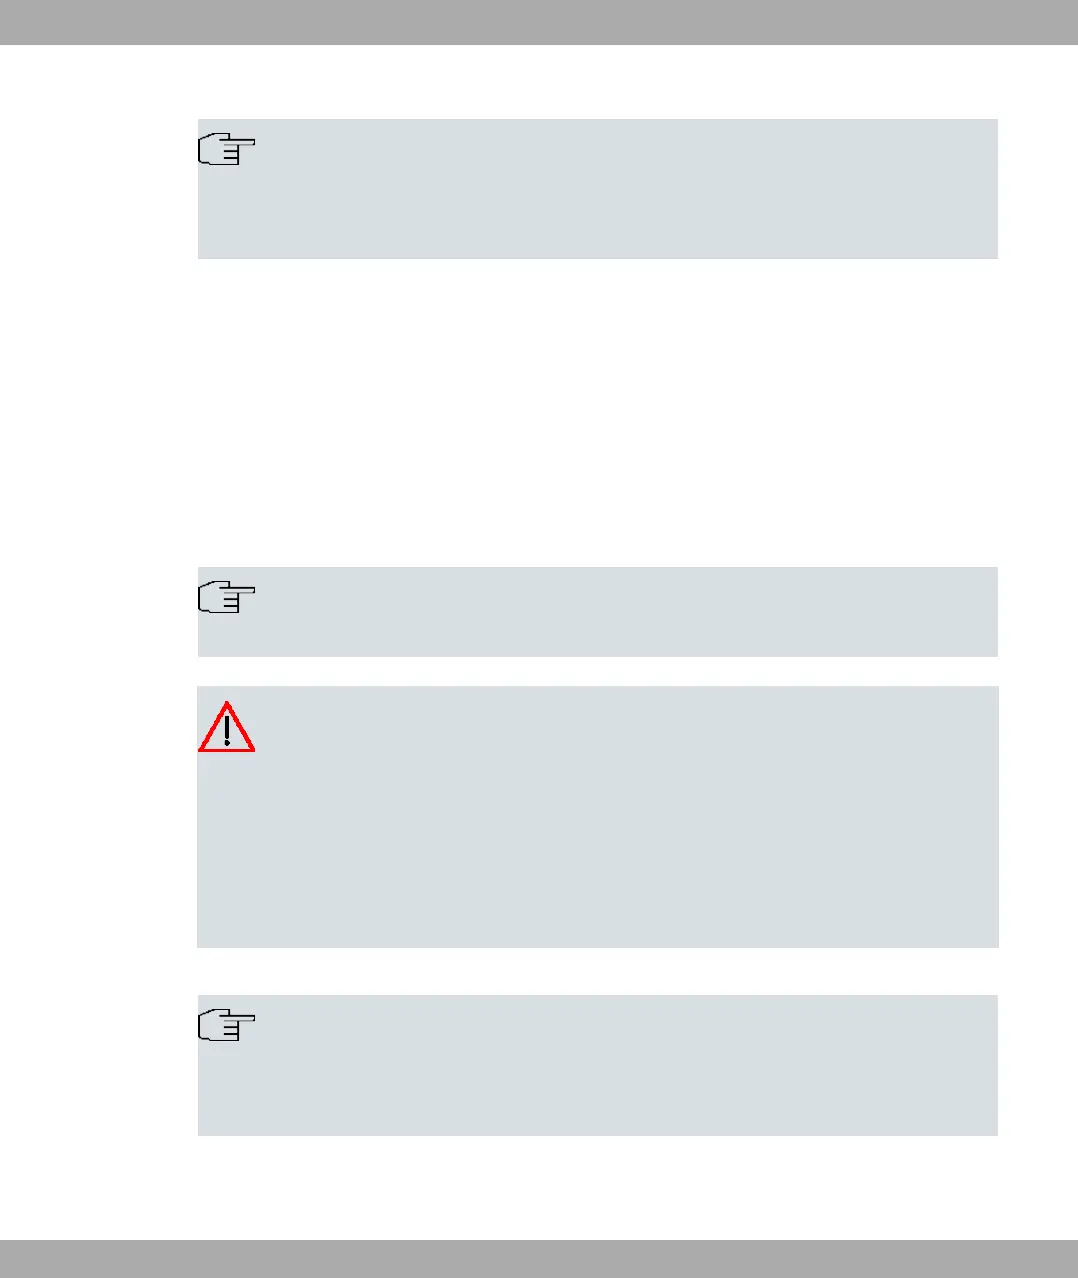
1.2 bintec RS123, bintec RS123w, bintec RS353a and
bintec RS353aw
1.2.1 Setting up and connecting
Note
All you need for this are the cables and antennas supplied with the equipment.
Caution
The use of the wrong mains equipment may damage your device. You should only use
the power supply unit provided! If you require foreign adapters/mains units, please
contact our bintec elmeg service.
Incorrect cabling of the ISDN and ETH interfaces may also damage your device. Con-
nect only the ETH interface of the device to the LAN interface of the computer/hub or a
WAN interface if available and the ISDN interface of the device only to the ISDN con-
nection.
Note
If you connect an unconfigured device to an ISDN connection in parallel to a PBX, the
PBX cannot take any calls until an ISDN number is configured on the device. If no
entry is specified, every incoming ISDN call is accepted by the ISDN Login service.
bintec RS123aw and bintec RS353aw are equipped with two external WLAN antennas.
1 Installation bintec elmeg GmbH
10 bintec RS Series