SECTION 31 - IMPLEMENT POWER TAKE-OFF (PTO) - CHAPTER 4
31-4
7. Tip the step-up gearbox so that the breather is
positioned upwards and lift it back into the
tongue; for 1000 RPM operation, it will be
necessary to install top of gearbox first, and then
swing bottom of gearbox into frame to avoid
damaging breather.
IMPORTANT: The step-up gearbox is heavy and
awkward; use caution not to drop the gearbox as
personal injury or damage to the gearbox may result.
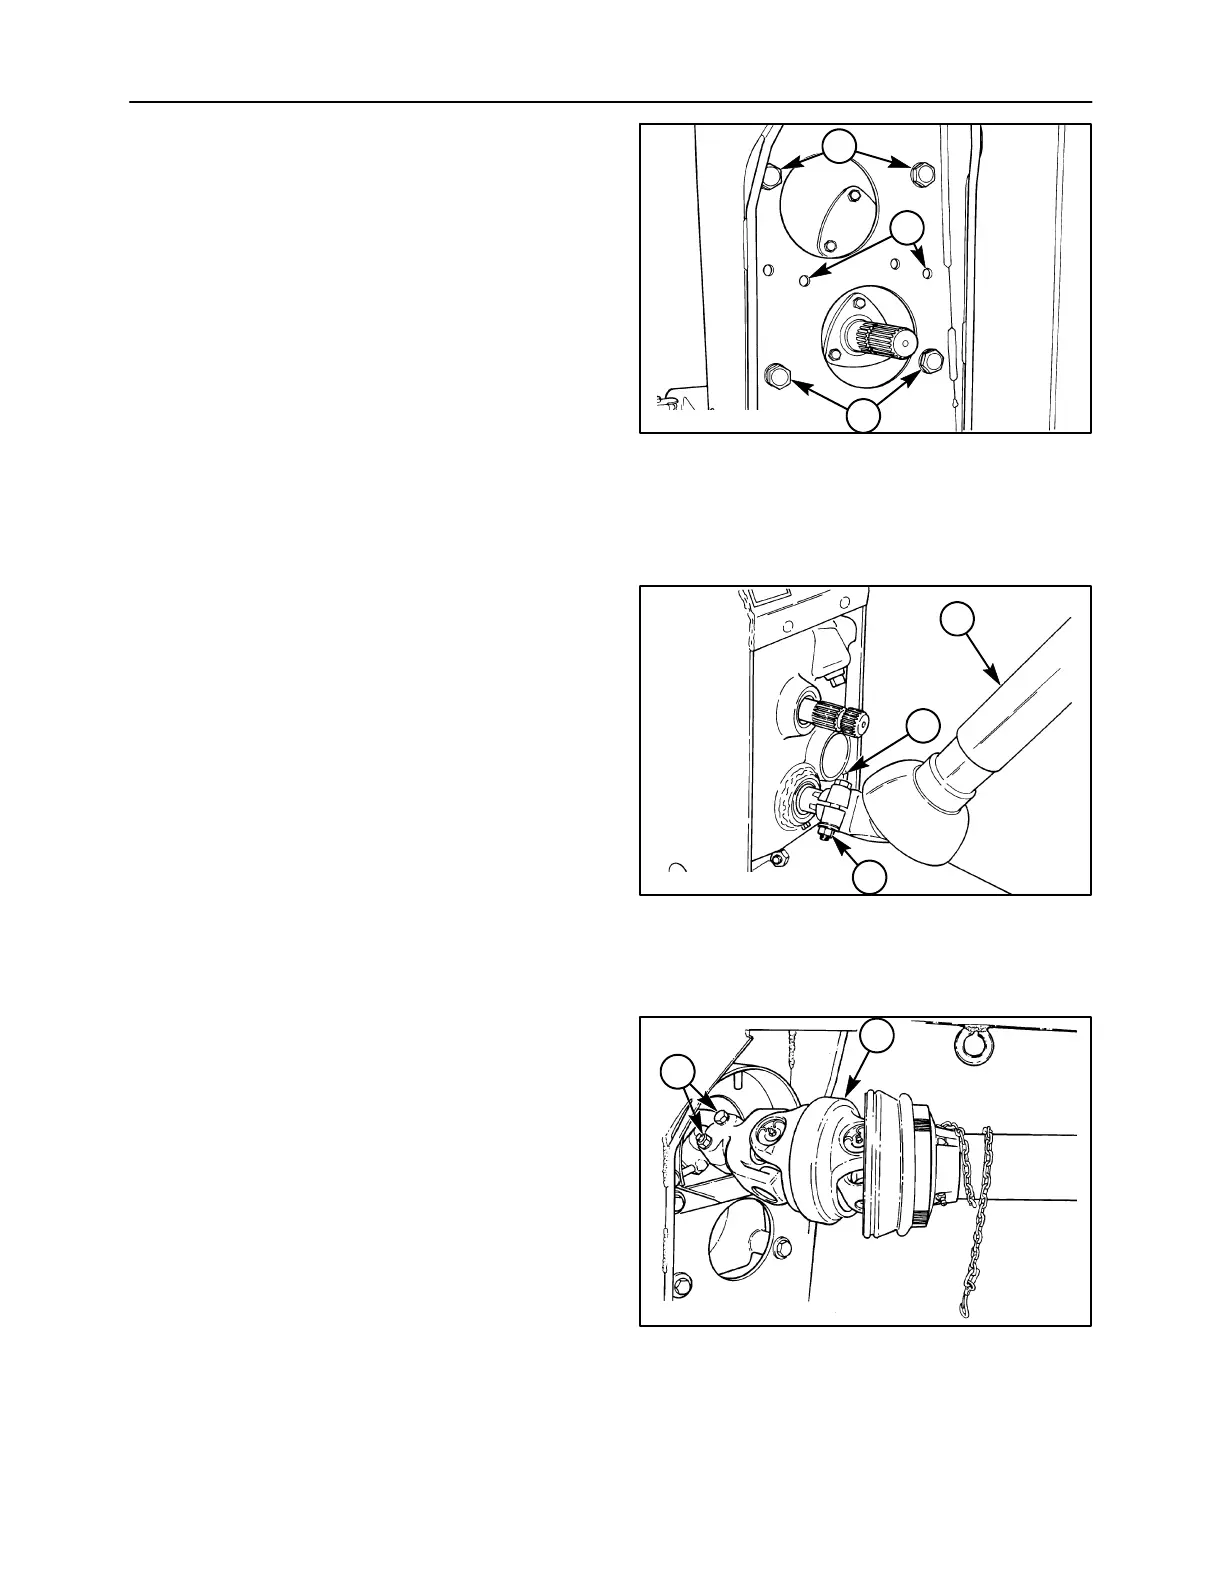
8. Install the 4 retaining bolts at 1, and torque to 224
N⋅m (165 ft-lb).
9. Reinstall the rear PTO shield mount at 2, using
the previously removed hardware. Select the
appropriate mounting holes on the tongue to
position the shield mount around the output shaft
location.
A3657-17
1
1
2
7
10. Remove any shaft protectant from the gearbox
splines, and apply a thin coat of grease to the
splines. Install the appropriate primary PTO
shaft, 1, to bottom shaft of gearbox. Install cap
screw, 2, and locknut; torque to 87 N⋅m (64 ft-lb).
IMPORTANT: The PTO shafts are very heavy and
awkward; use caution not to drop the shaft
assemblies as personal injury or damage to the CV
joints may result.
NOTE: Do not overtorque; locknuts are Class C, and
are limited to 87 N
⋅
m (64 ft-lb).
11. Check for proper gearbox oil level at 3, and top
off with API GL5 80W90 gear oil if necessary.
Reinstall the front PTO shield using 4 bolts.
A3657-22
1
2
3
8
12. Slide the rear PTO shield over the secondary
PTO shaft. Install the secondary PTO shaft, 1, by
sliding the yoke end onto the output shaft of the
step-up gearbox. Install two cap screws, 2, and
locknuts; torque to 87 N⋅m (64 ft-lb).
NOTE: Do not overtorque; locknuts are Class C, and
are limited to 87 N
⋅
m (64 ft-lb).
IMPORTANT: The secondary PTO shaft is very
heavy and awkward; use caution not to drop the shaft
assembly as personal injury or damage to the CV
joint may result.
13. Reinstall the rear shield onto the retaining pins.
1411/3-16
1
2
9