SECTION 58 - ATTACHMENTS / HEADERS - CHAPTER 3
58-17
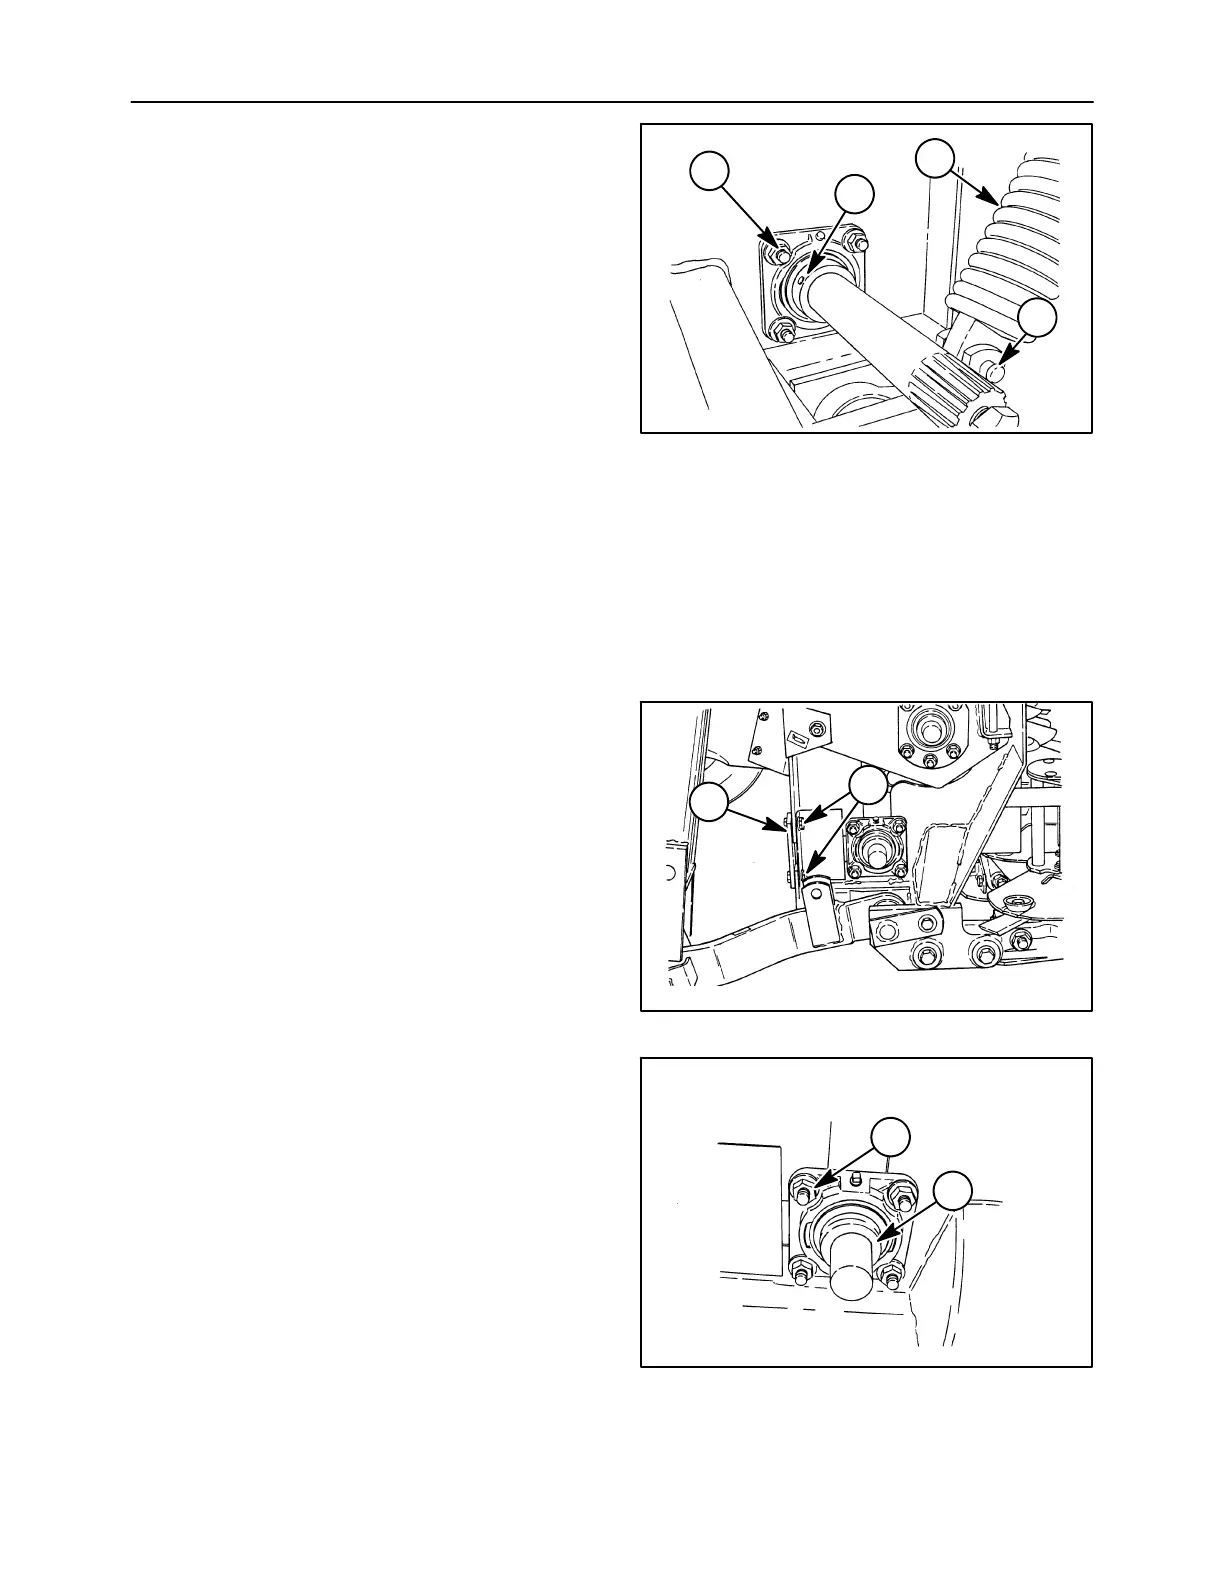
9. Clean the shaft thoroughly using emery cloth.
Loosen the setscrew, 1, and remove the lock
collar by driving it in the opposite direction of
rotation using a hammer and punch. Use a file to
remove any marks on the shaft from the lock
collar setscrew.
Support the left end of the conditioner roll using
a suitable lift, floor jack or blocking. Remove the
four flange nuts, 2, and slide the bearing and
housing off the lower conditioner roll shaft.
NOTE: Shaft preparation is very important when
removing the locking collar and bearing. Clean it
thoroughly with emery cloth and lubricate it to ease
bearing removal.
10. Loosen the adjusting bolt to relieve all tension on
the right side flotation spring. Remove the cotter
pin and slide the clevis pin, 3, out of the brackets
on the lift arm. Allow the flotation spring, 4, to lay
back against the right side tire.
NOTE: Removing the flotation spring will provide
improved access to the right side of the lower
conditioner roll to ease removal.
19992642
1
2
3
4
42
11. Remove the plates, 1, on the removal slot at the
right side of header by removing the two cap
screws, 2.
A5049-4
1
2
43
12. Loosen the setscrew and remove the lock collar,
1, by driving it in the opposite direction of rotation
using a hammer and punch.
13. Clean any rust, dirt or corrosion off the shaft
using emery cloth, and file down any marks from
the locking collar setscrew. Support the lower
conditioner roll using a suitable lift, floor jack, or
appropriate blocking. Remove the four flange
nuts, 2, and slide the bearing and housing off the
shaft. Note that the top rear bolt on the right side
of the header is loose (not welded to header) and
should also be removed.
NOTE: Removing the top rear bolt on the right side
of the header eases removal of the upper roll pivot
arm.
19992643
1
2
44