13.4 Inserting Actions into Macro Cues
• Go to Menu and click on Doremi Apps., then select Macro Editor.
• Click the “Insert a new Action” button from the Macro Editor window (Figure 166).
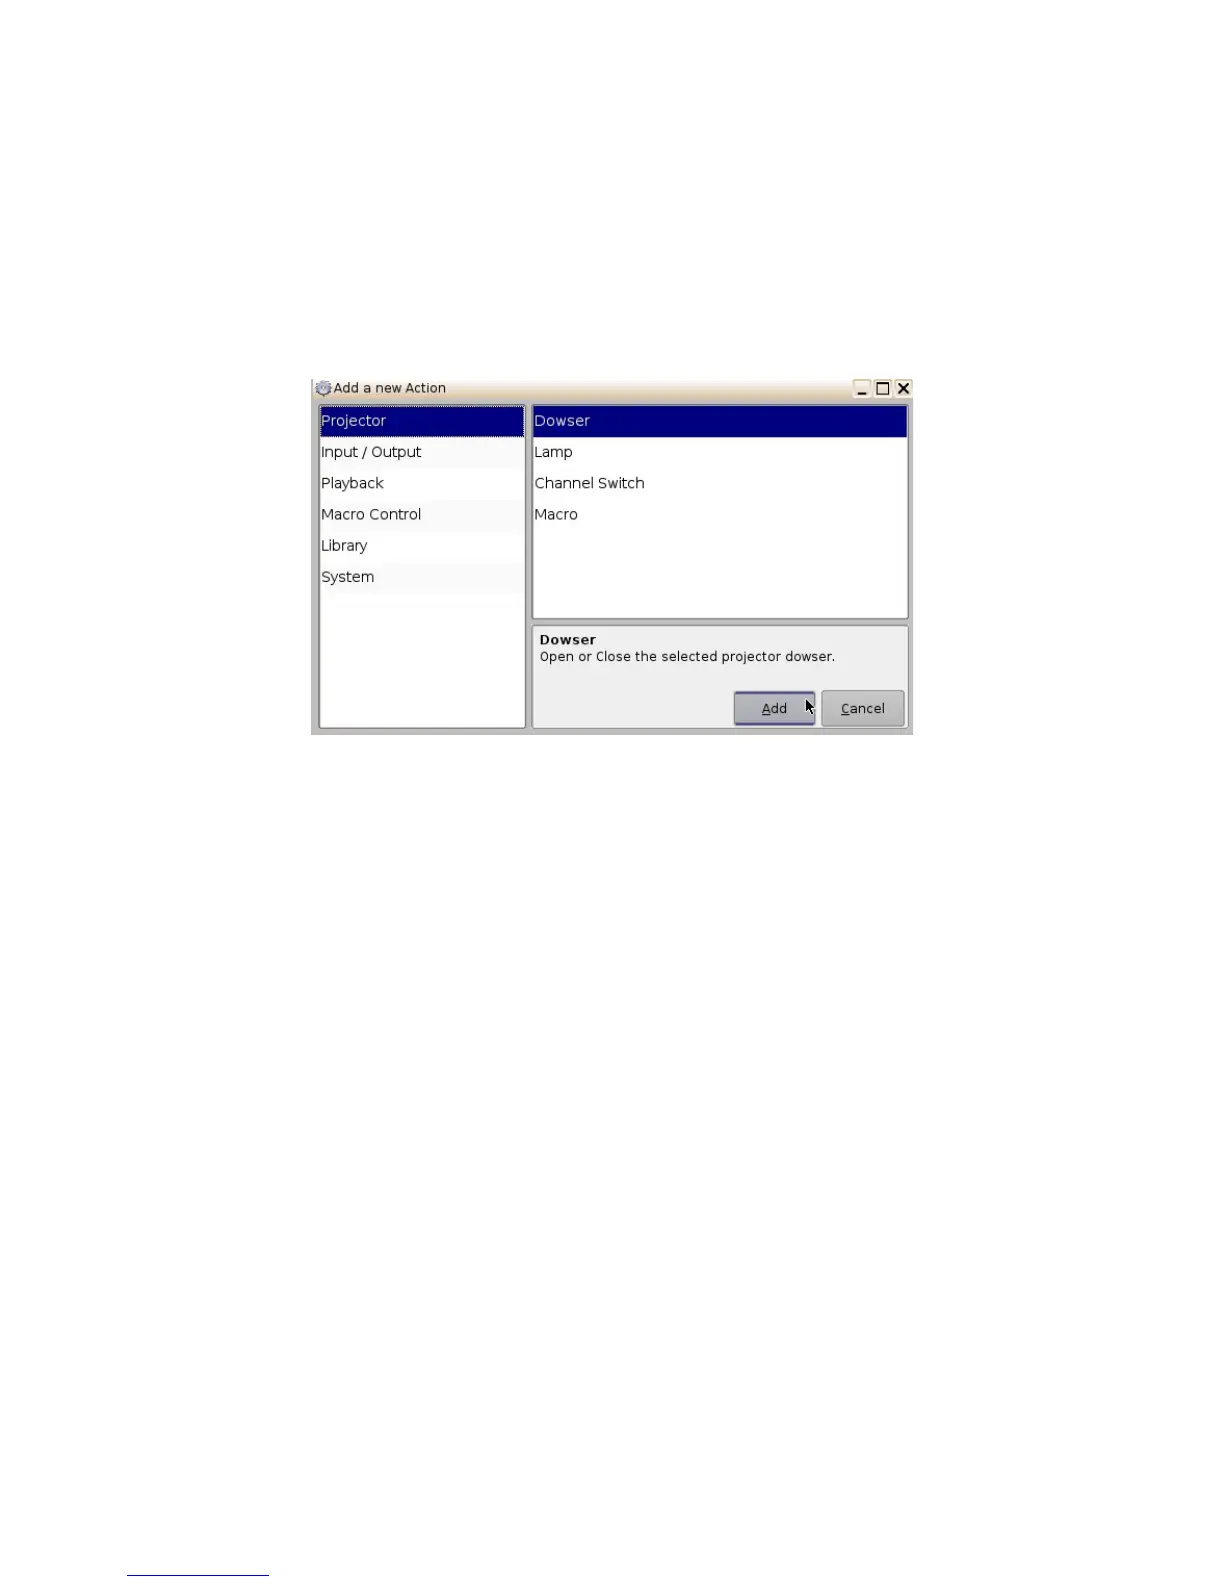
• The “Add a new Action” window will appear ( Figure 168). The “Add a new Action" window
provides a list of available actions to be used within a Macro Automation Cue.
• To add an action to the Macro Automation Cue, click on its corresponding action button in
the left side of the “Add a new Action” window and click the Add button ( Figure 168).
Figure 168: Add a New Action Window
• The “Add a new Action” window provides a list of available actions, on the left side, to be
used within a Macro Automation Cue. The actions available include the following:
• Projector:
• Projector Dowser: open or close the selected projector dowser.
• Lamp: Power ON or Off the selected projector lamp.
• Projector Channel Switch: Switch the selected projector channel.
• Macro: Execute the macro defined in the selected projector.
• Input / Output:
• General Purpose Output: Configure a GPO line.
• Send Message: Send a message to the connected device.
• Playback:
• Audio Volume: Control the audio volume output.
• Playback Actions: Change the playback state.
• Video Output Actions: Change the default video output format.
• Sensio3D: Enable or disable the Sensio3D output format.
• RealD SBS: Enable or disable the RealD SBS output format.
______________________________________________________________________________________
D2K.OM.001822.DRM Page 134 of 177 Version 1.5
Doremi Labs