6.13 Networking Configuration
To configure the network, please refer to Section 4.
6.14 Time Setting
To adjust the time for the unit, follow the procedure below.
• To access the Time Setting GUI, double-click the Time Setting icon in the Control Panel
window.
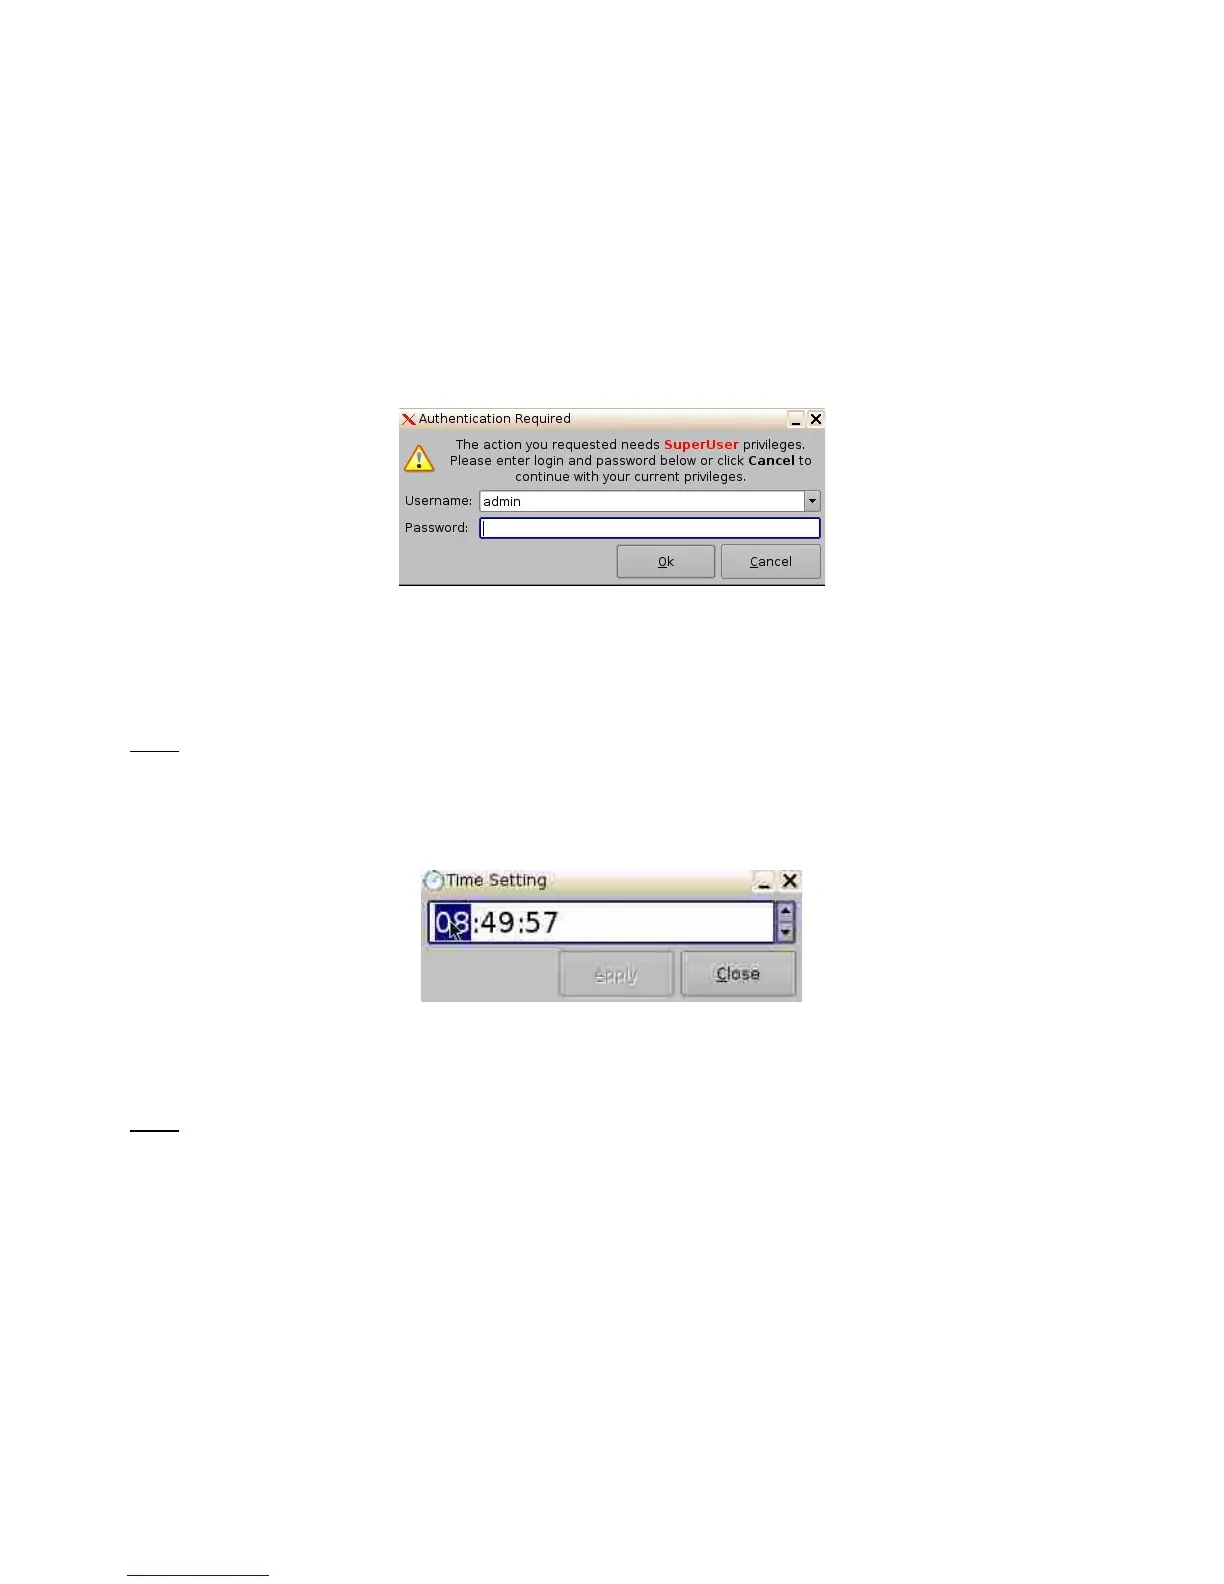
• The user will be asked for a password. Enter the appropriate password to continue (Figure
128).
Figure 128: Password Confirmation Window
• The following pop-up window will appear. Adjust the time accordingly and then press the
Apply button. The time will now be updated.
Note: Due to DCI requirements, users can only set the time to no more than 30 minutes per
calendar year on a Dolphin DCI FIPS 1.0 board. For Dolphin DCI FIPS 1.2 boards, you can only
adjust the RTC (Real Time Clock) time within DCI allowed-time of 6 minutes per calendar year. If
you try to apply a value outside the remaining time limit, it will not be applied. Network Time
Protocol (NTP) should be used to keep the RTC time correct.
Figure 129: Time Setting Pop-Up Window
6.15 TouchScreen Calibration
Note: Verify that the stylus on the server front panel LCD screen functions as a mouse. Check to
see if the server LCD screen VGA connector is linked to the motherboard VGA connector.
• Go to Menu → System → Touchscreen Calibration.
• Using the stylus located on the left side of the server LCD screen, press on the four blinking
dots, as shown below (there is one dot in each screen corner). See Figure 130 below.
• Make sure to hold the stylus over the blinking dot for more than a second.
______________________________________________________________________________________
D2K.OM.001822.DRM Page 104 of 177 Version 1.5
Doremi Labs