Stacker
258 Service Instructions 755 A/756 A - 00.0 - 02/2019
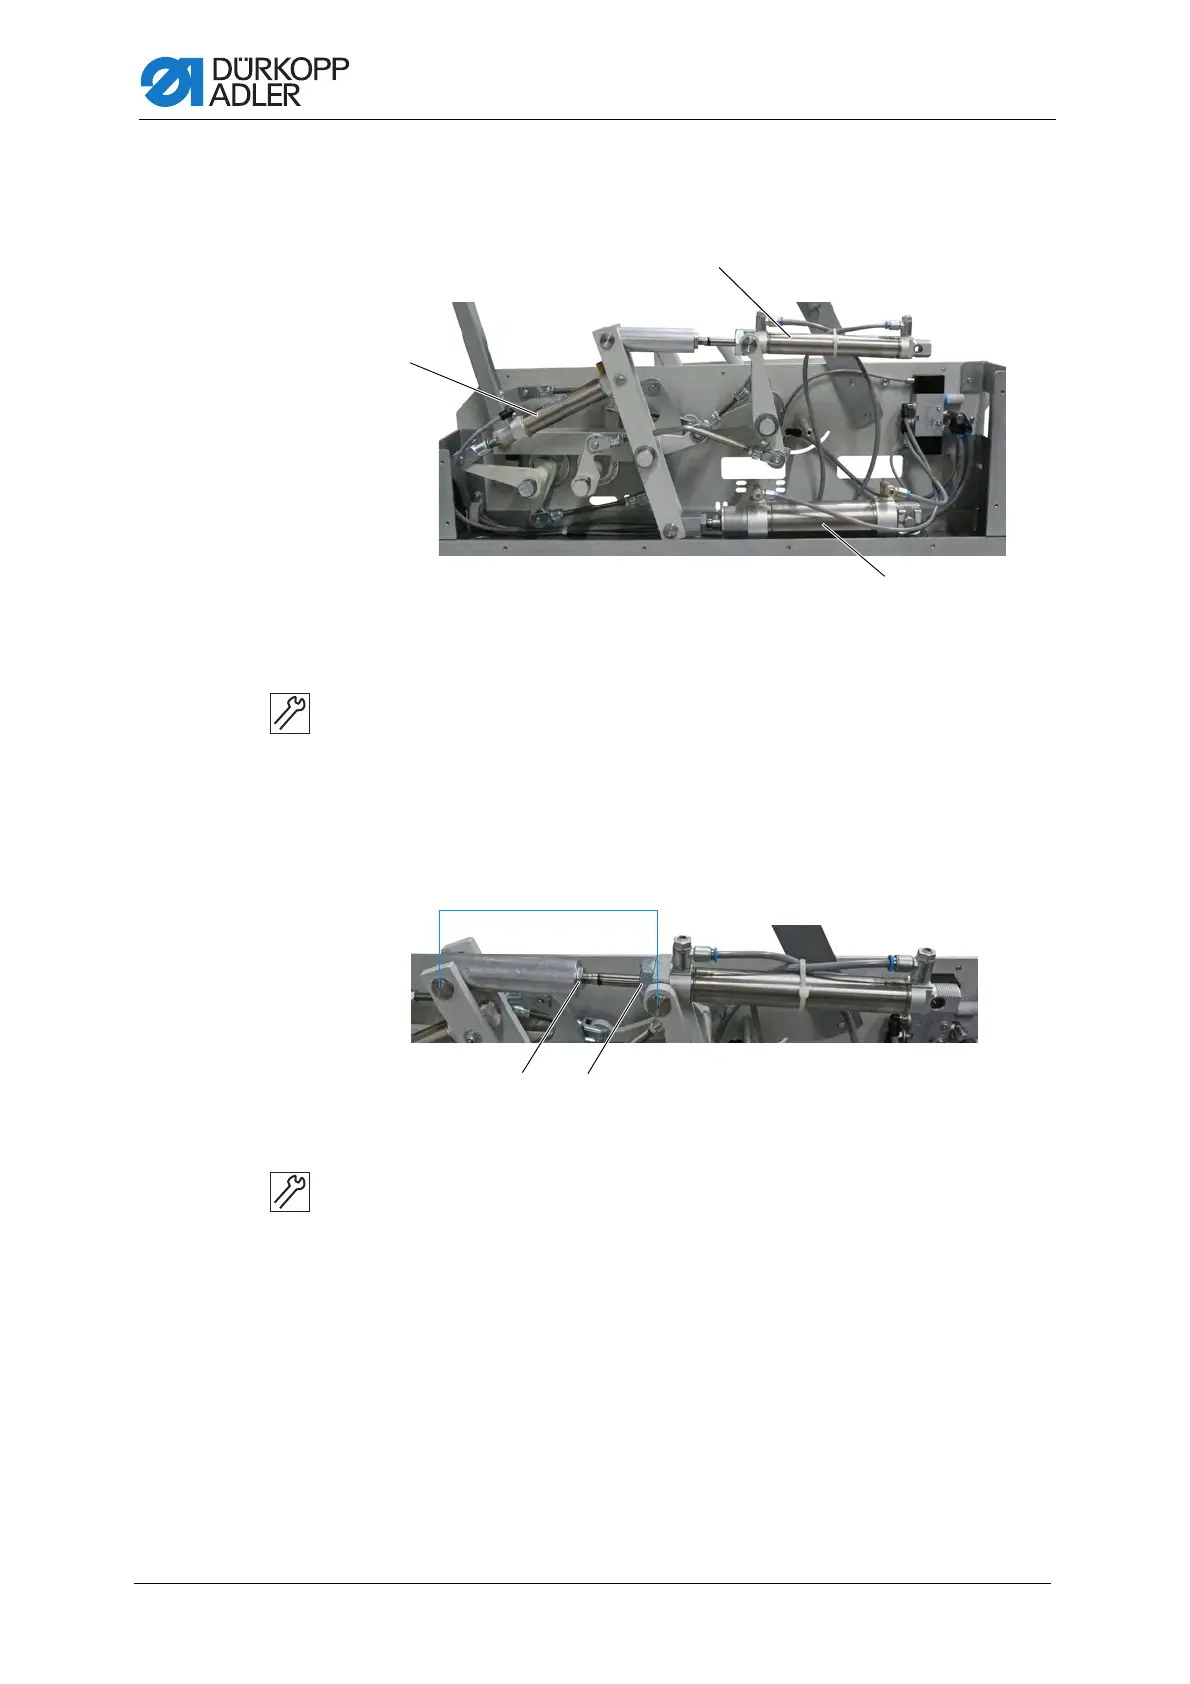
Replacing the pneumatic cylinders
Fig. 253: Replacing the pneumatic cylinders
To replace the pneumatic cylinders:
1. Remove the covers ( p. 257).
2. Uncouple the pneumatic lines.
Replacing pneumatic cylinder 1
Fig. 254: Replacing pneumatic cylinder 1
To replace pneumatic cylinder 1:
1. Loosen nuts (1) and (2).
2. Disassemble the old pneumatic cylinder.
3. Assemble the new pneumatic cylinder.
4. Connect the pneumatic lines.
5. Place and tighten the side panel.
6. Switch on the compressed air supply.
7. Set the pneumatic cylinder to a dimension of 175 mm.
(1) - Pneumatic cylinder 1
(2) - Pneumatic cylinder 2
(3) - Pneumatic cylinder 3
(1) - Nut (2) - Nut
 Loading...


