Needle bar
60 Service Instructions 755 A/756 A - 00.0 - 02/2019
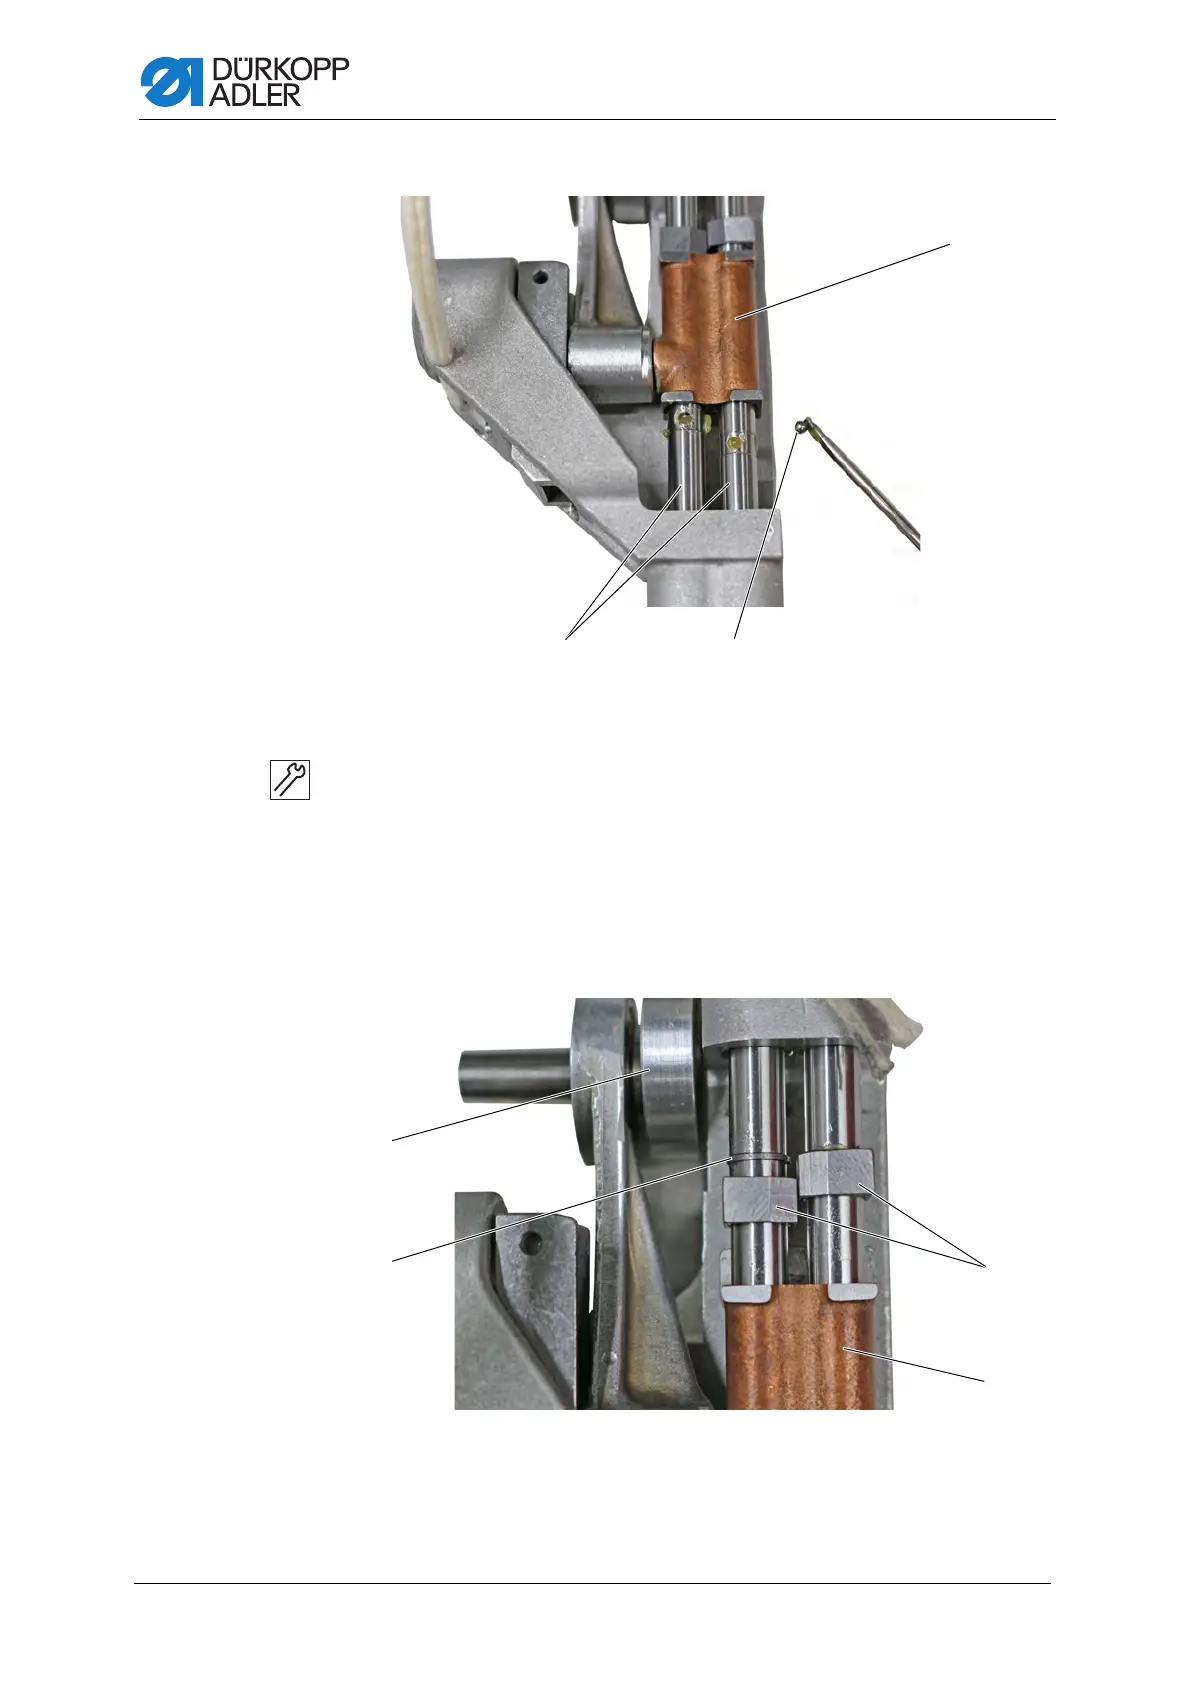
Fig. 57: Assembling the needle bar linkage (4)
4. Lubricate the ball slots in the needle bars (2) with grease.
5. Place the lower balls (8) into the ball slots using a screwdriver.
6. Slide both needle bars down by approx. 15 mm.
7. Place the upper balls (8) into the ball slots using a screwdriver.
8. Fix the needle bars (2) in place on a solid surface.
9. Slide the crosshead (7) downwards over the balls (8).
Fig. 58: Assembling the needle bar linkage (5)
(2) - Needle bars
(7) - Crosshead
(8) - Ball
(6) - Pull rod
(7) - Crosshead
(9) - Retaining rings
(11) - Clamping rings

 Loading...


